KO
|
EN
gitlite — search
Search
#python
#java
#python3
#arduino
#golang
#machine-learning
#rust
#html
#flask
#javascript
#seismology
#nodejs
session-store-nextjs
★ 15
Open GitHub ↗
No description available.
Download README (.md)
Explore Similar Repositories
SDUI-Demo-KMP
:
No description available.
OSEP
:
No description available.
AgenticAGI
:
Advanced Strawberry Logic for All LLMs
wild-snake-boa-ii
:
A snake game for MS-DOS. 🐍
SynthLC
:
No description available.
// repository documentation
Was this content helpful?
★ 0
(0 ratings)
Select Rating:
★
★
★
★
★
Submit Feedback
Recent Feedback
×
Download README
Do you want to download the
README.md
file for
session-store-nextjs
?
Download (.md)
# 🚀 Next.js Redis Session Store Example    This [Next.js](https://nextjs.org/) project demonstrates how to use **Redis as a session store** for authentication. The application supports multiple authentication providers, offering a scalable and performant solution for your web applications. ## 📋 Table of Contents - [🚀 Deploy with Redis Cloud on Vercel](#-deploy-with-redis-cloud-on-vercel) - [✨ Features](#-features) - [🌱 Getting Started](#-getting-started) - [🛠️ Configuration](#️-configuration) - [💾 Session Management with Redis](#-session-management-with-redis) - [🗂️ Project Structure](#️-project-structure) - [📜 Available Scripts](#-available-scripts) - [📚 Learn More](#-learn-more) - [🤝 Contributing](#-contributing) - [📄 License](#-license) ## 🚀 Deploy with Redis Cloud on Vercel Follow these steps to deploy your application with Redis Cloud on Vercel: 1. Click the "Deploy" button below to start the deployment process: <a href="https://vercel.com/new/clone?repository-url=https%3A%2F%2Fgithub.com%2Fredis-developer%2Fsession-store-nextjs&project-name=redis-session-store-nextjs&stores=%5B%7B%22type%22%3A%22integration%22%2C%22integrationSlug%22%3A%22redis%22%2C%22productSlug%22%3A%22redis%22%7D%5D"> <img src="https://vercel.com/button" alt="Deploy with Vercel" /> </a> 2. In the Vercel UI, create a new repository for your project. 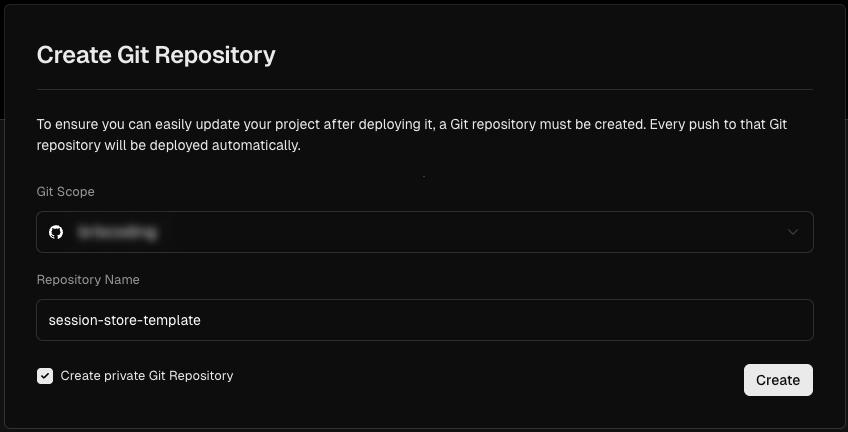 3. Add Redis as a store in the Vercel UI. This will automatically set your `REDIS_URL` environment variable. 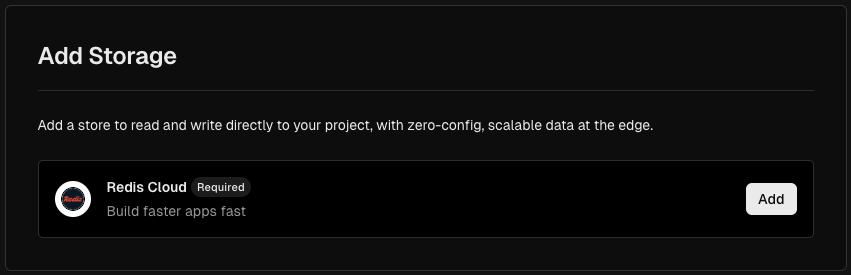 4. Wait for the deployment to complete. 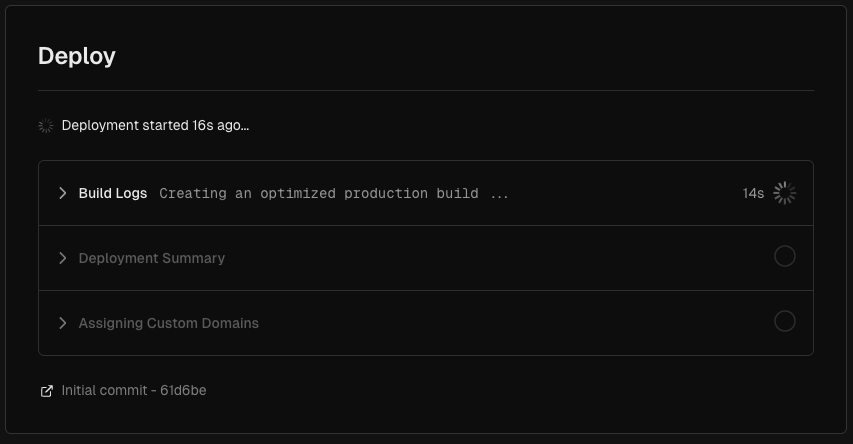 5. Once deployed, use the URL of your deployed app to set up the authentication providers. See the [Configuration](#️-configuration) section below for detailed instructions for setting these up. By default, the template is configured to use GitHub and Discord. Only one provider is required. ## ✨ Features - 🗄️ **Redis Session Store**: Utilizes Redis for storing session data - 🔐 **NextAuth.js Integration**: Implements authentication using NextAuth.js with a custom Redis adapter - 🌐 **Multiple Authentication Providers**: Supports GitHub and Discord authentication - ⚙️ **Dynamic Configuration**: Easily enable or disable authentication providers via environment variables ## 🌱 Getting Started 1. **Install dependencies:** ```bash npm install # or yarn install # or pnpm install ``` 2. **Run the development server:** ```bash npm run dev # or yarn dev # or pnpm dev ``` 3. Open [http://localhost:3000](http://localhost:3000) in your browser to see the application. ## 🛠️ Configuration ### Setting Up Redis Ensure you have a Redis server running and configure the connection in your `.env` file: ```env REDIS_URL=redis://localhost:6379 ``` Note: If you deployed using Vercel with Redis Cloud, this will be automatically set for you. ### Enabling/Disabling Authentication Providers Configure authentication providers by setting or omitting their respective environment variables in your `.env` file: ```env NEXTAUTH_SECRET=your_nextauth_secret # GitHub Authentication GITHUB_CLIENT_ID=your_github_client_id GITHUB_CLIENT_SECRET=your_github_client_secret # Discord Authentication DISCORD_CLIENT_ID=your_discord_client_id DISCORD_CLIENT_SECRET=your_discord_client_secret ``` - To enable a provider: Set both the `CLIENT_ID` and `CLIENT_SECRET` - To disable a provider: Remove or comment out the `CLIENT_ID` and `CLIENT_SECRET` ### Provider-Specific Configuration #### GitHub 1. Go to [GitHub Developer Settings](https://github.com/settings/developers) 2. Click on "New OAuth App" 3. Fill in the application details: - Application name: Your app name - Homepage URL: https://your-vercel-app-url.vercel.app - Authorization callback URL: https://your-vercel-app-url.vercel.app/api/auth/callback/github (or your local URL if you're running it locally) 4. Click "Register application" 5. Copy the Client ID and generate a new Client Secret 6. Add these to your Vercel project's environment variables as `GITHUB_CLIENT_ID` and `GITHUB_CLIENT_SECRET` Example: ``` GITHUB_CLIENT_ID=1234567890abcdef1234 GITHUB_CLIENT_SECRET=1234567890abcdef1234567890abcdef12345678 ``` #### Discord 1. Go to the [Discord Developer Portal](https://discord.com/developers/applications) 2. Click on "New Application" 3. Give your application a name and create it 4. Go to the "OAuth2" tab in the left sidebar 5. Add a redirect URL: https://your-vercel-app-url.vercel.app/api/auth/callback/discord (or your local URL if you're running it locally) 6. Copy the Client ID and Client Secret 7. Add these to your Vercel project's environment variables as `DISCORD_CLIENT_ID` and `DISCORD_CLIENT_SECRET` Example: ``` DISCORD_CLIENT_ID=123456789012345678 DISCORD_CLIENT_SECRET=abcdefghijklmnopqrstuvwxyz123456 ``` ### Adding Additional Providers To add more authentication providers: 1. Install the provider package (if required) 2. Update the NextAuth configuration in `app/api/auth/[...nextauth]/route.js` 3. Add the necessary environment variables Example for adding Google provider: ```javascript import GoogleProvider from "next-auth/providers/google"; // In the providers array: GoogleProvider({ clientId: process.env.GOOGLE_CLIENT_ID, clientSecret: process.env.GOOGLE_CLIENT_SECRET, }), ``` For more information on adding and configuring providers, refer to the [NextAuth.js documentation on providers](https://next-auth.js.org/providers/). ### NextAuth.js Secret Generate a secure `NEXTAUTH_SECRET`: ```bash openssl rand -base64 32 ``` Add this to your Vercel project's environment variables as `NEXTAUTH_SECRET`. ## 💾 Session Management with Redis This application leverages Redis for efficient session data storage, offering: - ⚡ **High Performance**: Fast read/write operations with in-memory data store - 📈 **Scalability**: Share session data across multiple application instances - 💽 **Optional Persistence**: Configure Redis to persist data to disk for recovery ## 🗂️ Project Structure ``` / ├── app/ # Next.js pages and API routes ├── components/ # Reusable React components ├── lib/ # Utility functions and custom adapters ├── hooks/ # Custom React hooks └── styles/ # Global and brand-specific styles ``` ## 📜 Available Scripts - `npm run dev`: Run the app in development mode - `npm run build`: Build the app for production - `npm run start`: Start the production build - `npm run lint`: Run linting on the codebase ## 📚 Learn More Explore these resources to deepen your understanding: - [Next.js Documentation](https://nextjs.org/docs) - [NextAuth.js Documentation](https://next-auth.js.org/getting-started/introduction) - [Redis Documentation](https://redis.io/docs/) - [Redis Clients for Node.js](https://redis.io/docs/clients/nodejs/) - [Environment Variables in Next.js](https://nextjs.org/docs/basic-features/environment-variables) ## 🤝 Contributing We welcome contributions! If you have ideas, suggestions, or encounter issues, please open an issue or submit a pull request. ## 📄 License This project is open source and available under the [MIT License](LICENSE).
