KO
|
EN
gitlite — search
Search
#php
#python
#swift
#machine-learning
#react
#javascript
#csharp
#golang
#kubernetes
#webpack
#nodejs
#android
Viosuo
★ 78
Open GitHub ↗
3D-printable hand-strapped keyboard
Download README (.md)
Explore Similar Repositories
goji
:
Commitizen-like Emoji Commit Tool written in Go and AI commit message generator (think cz-emoji and other commitizen adapters but in go) 🚀
react-canvas-editor
:
React version of canvas editor
YyFlight.ToDoList
:
✍【.NET8 MongoDB 待办清单系统】.NET8 MongoDB从入门到实战基础教程,该项目后端使用的是.NET8、前端页面使用Blazor、使用MongoDB存储数据,更多相关内容大家可以看目录中的MongoDB从入门到实战的相关教程。该系列教程可作为.NET Core入门项目进行学习,感兴趣的小伙伴可以关注博主和我一起学习共同进步。
langchainjs-quickstart-demo
:
Build a generative AI application using LangChain.js, from local to Azure
resilience4j-spring-boot3-demo
:
A Spring Boot 3 demo which shows how to use the Resilience4j Spring Boot 3 Starter
// repository documentation
Was this content helpful?
★ 0
(0 ratings)
Select Rating:
★
★
★
★
★
Submit Feedback
Recent Feedback
×
Download README
Do you want to download the
README.md
file for
Viosuo
?
Download (.md)
**Note: This is mostly a dump of the project files with very scant instructions. The keyboard has been adjusted to my hand and probably wouldn't serve well anyone else. So at this point it's basically a proof of concept. However, if someone wants to play with this idea I will be happy to help if I can.** 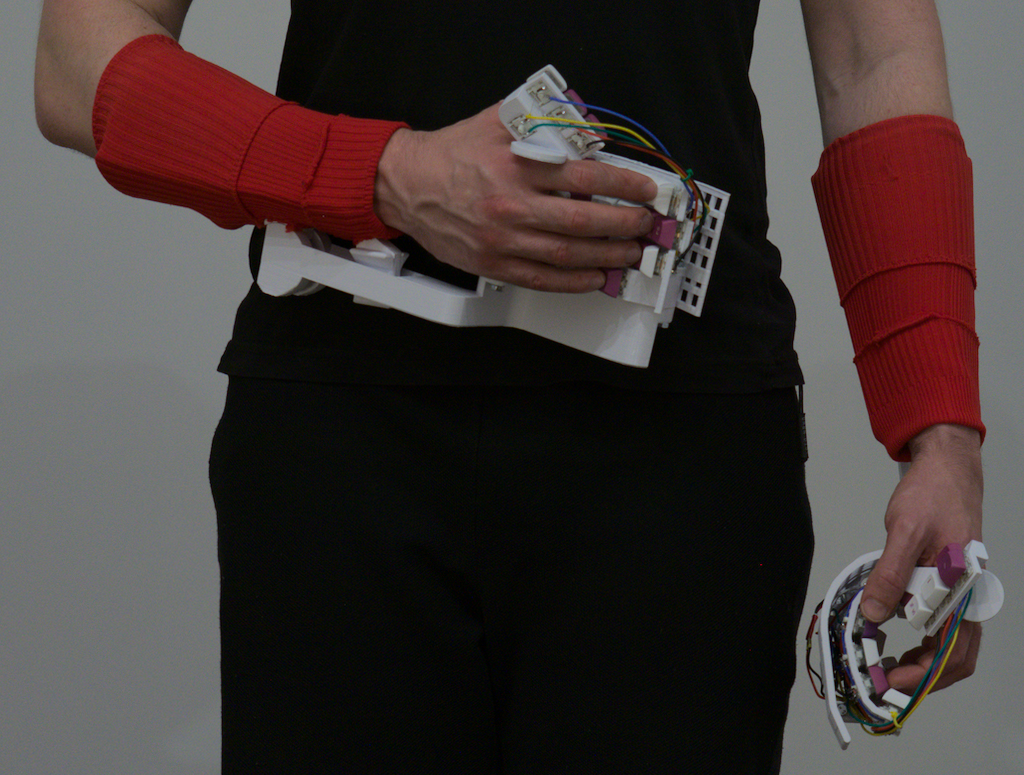 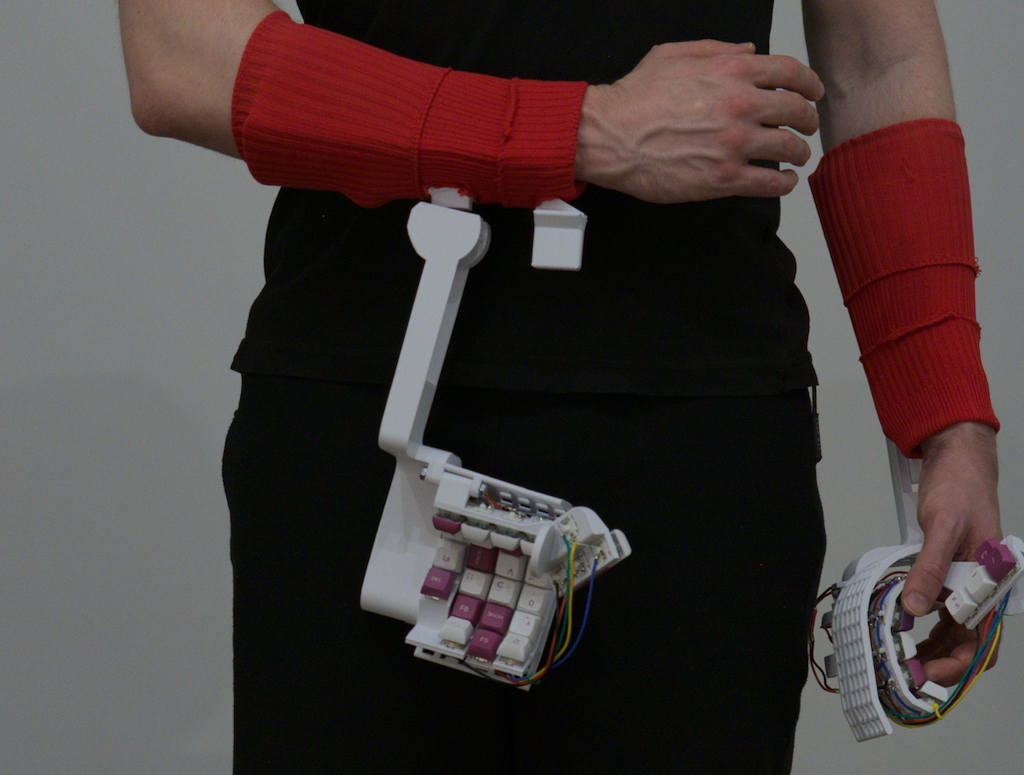 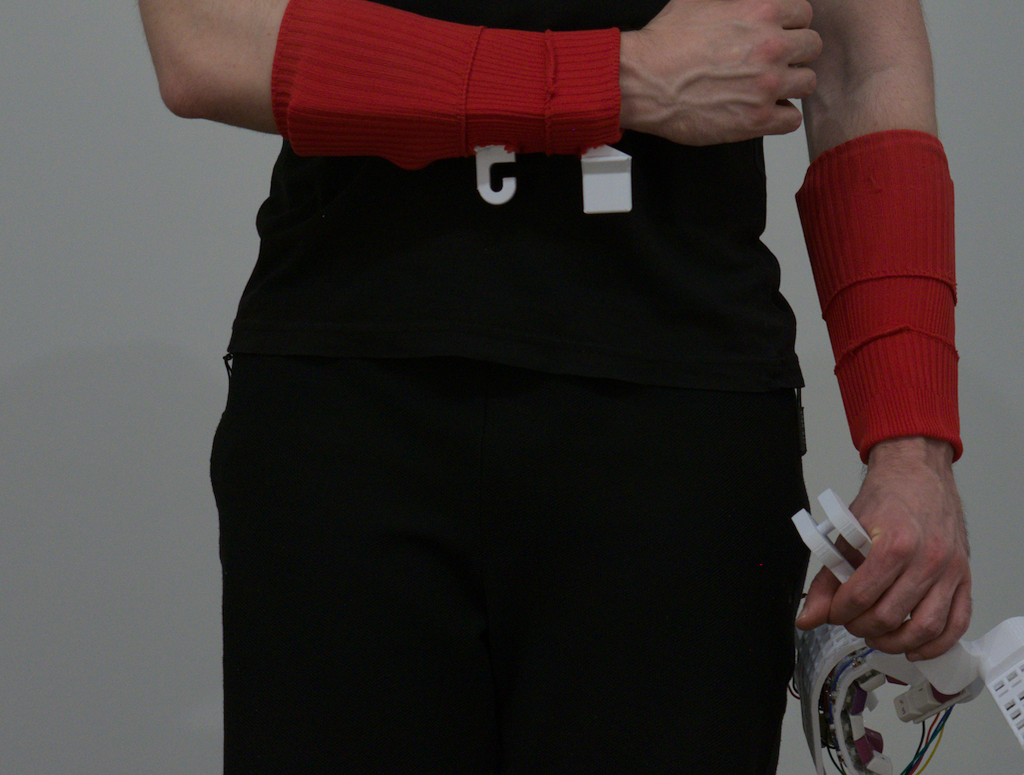 Demo ==== Video demo of typing: [https://youtu.be/d8-P9P5Dz6U](https://youtu.be/d8-P9P5Dz6U) What's this? ============ 3D-printable parts of a pretty weird but fully functional keyboard. My design goals: * It has to be fully usable while walking, since I like to pace back-and-forth while thinking * Even though it's strapped to the arms, it should not hinder basic manual tasks that a programmer might need to perform during his work, most importantly: preparing and drinking coffee. * It should be impossible or extremely rare to 'get lost' on the keyboard, i.e., to become uncertain where specific keys are located in relation to the user's fingers * It has to offer all the keys, including modifiers, for normal writing, programming and using software such as vim, tmux, etc. * The typing speed should not suffer _too much_. It might be impossible to reach the same speed as on a standard QWERTY keyboards though - some sacrifice is acceptable * (Non-critical) It should look nerdy Name and pronunciation ====================== Viosuo is pronounced like the [Polish word for oar](https://translate.google.com/?sl=en&tl=pl&text=oar&op=translate). I chose this name because an early prototype looked a lot like an oar and was as uncomfortable as it sounds. What's in this repo =================== * The `stl/` subdirectory contains STL files of the most recent design. All of them can be easily printed on Ender 3. * The `viosuo.FCStd` is a FreeCAD file with the entire design. It's done really, really badly mostly due to my inexperience, but also because I was working around the [Topological Naming problem](https://wiki.freecadweb.org/Topological_naming_problem). * `macros/hole_puncher.py` is a simple FreeCAD macro that for a selectedy Body finds all surfaces that look like they might be inteded for a key and cuts out a 14x14mm square through the middle, intended for an MX switch * `macros/fc_plumbing.py` is my quickly-abandoned attempt at writing a framework that would make python scripting in FreeCAD much easier. I still think somethink like this would be an amazing tool and should be reasonably easy to create but I'm too lazy to do it myself. I'm including this here since `hole_puncher` depends on it. * `zmk/` is my fork of the [ZMK framework](https://github.com/zmkfirmware/zmk) with a keymap and all the necessary boilerplate for Viosuo added. How to build one ================ Printing suggestions -------------------- I used Ultimaker Cura for slicer and printed on Ender 3. Support structure was Tree. Every part was printed with a Brim for adhesion. * The Sleeve was printed vertically * The Connector was printed horizontally, with almost all of its body resting on the support structure * The Palm was printed flat, without any additional rotation. You might have to fiddle with the support structure's settings and carefully preview the generated gcode to make sure that every hole has enough support. * The Cover is optional. I printed it upside-down * The Travel\_bottom and Travel\_top should not be needed at all - I designed them quickly when I had to travel and throw my keyboard into a suitcase. Additional materials -------------------- * M5x40 bolts and M5 nuts (4x) * Some kind of elastic sleeve to strap the keyboard to your forearm - I used football calf compression socks for boys: https://www.emag.ro/set-1-1-jampieri-rucanor-pentru-baieti-rosu-796830/pd/DFV01TMBM/ * nice!nano (2x): https://nicekeyboards.com/nice-nano/ * Mill Max Low Profile Sockets (2 pairs) - optional if you want to connect your nice!nanos somehow else * batteries (2x) - See the nice!nano page for requirements; I used some no-name: https://www.emag.ro/acumulator-li-po-3-7v-400mah-2-fire-1337/pd/DW87YGBBM/ * 1N4148 diodes (68x) * XDA keycaps (68x) * MX-compatible switches (68x) - I used gateron greens * wires * heat-shrink tubes Wiring ------ Here are some pictures of the left-hand side's wiring. Please note that I have soldered sockets to the nice!nano upside-down. There is a very simple reason for that: I made a mistake. 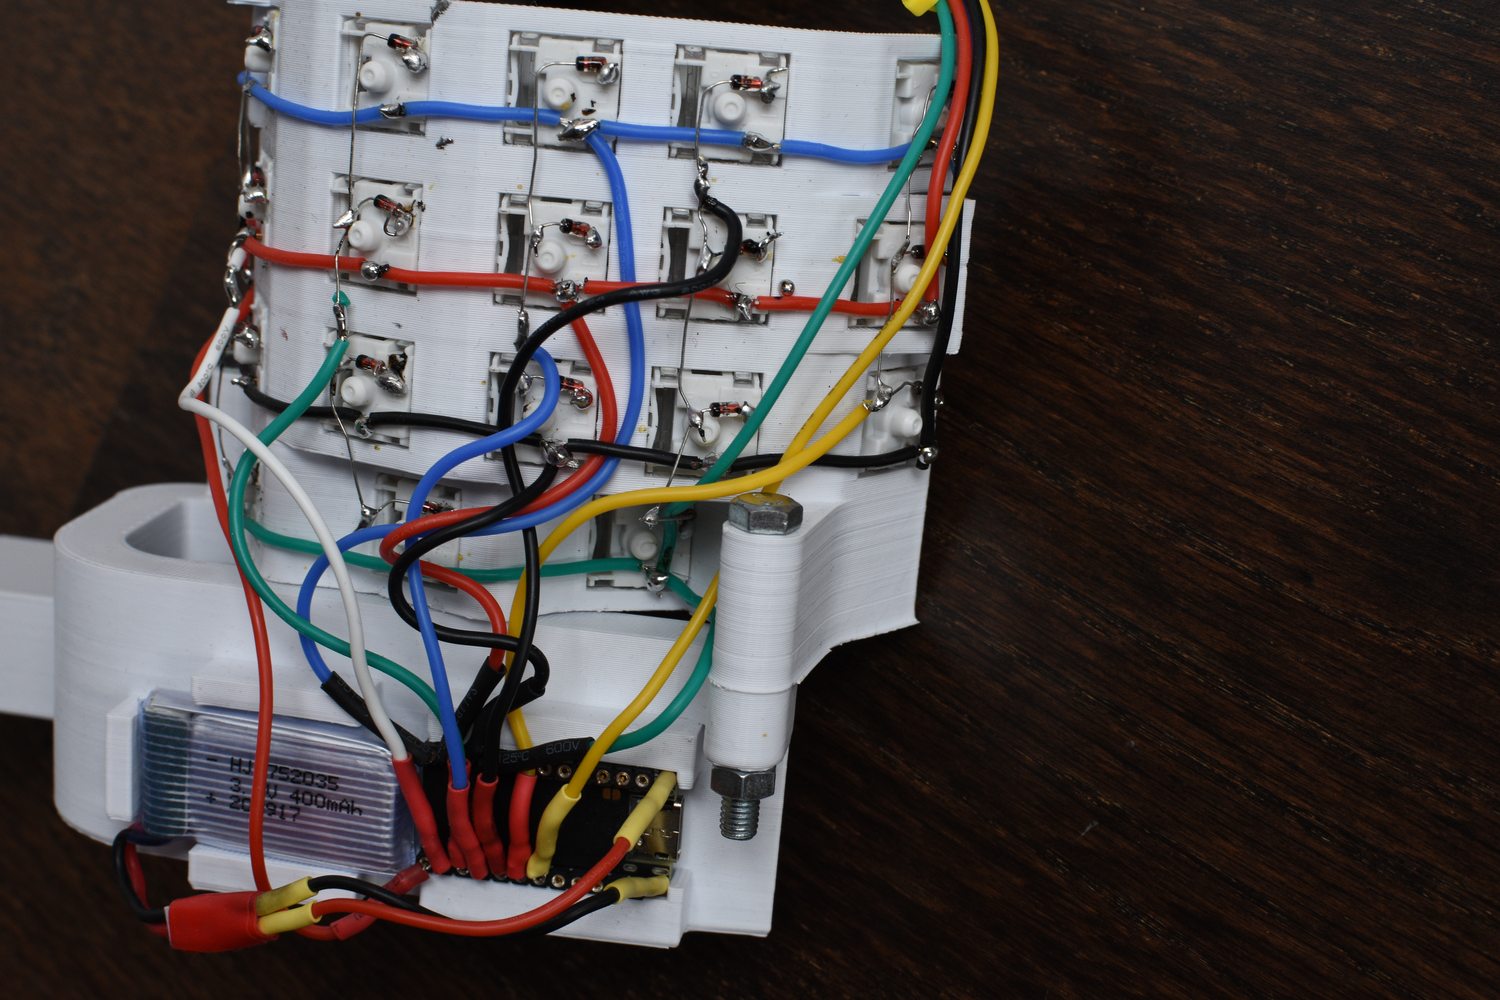 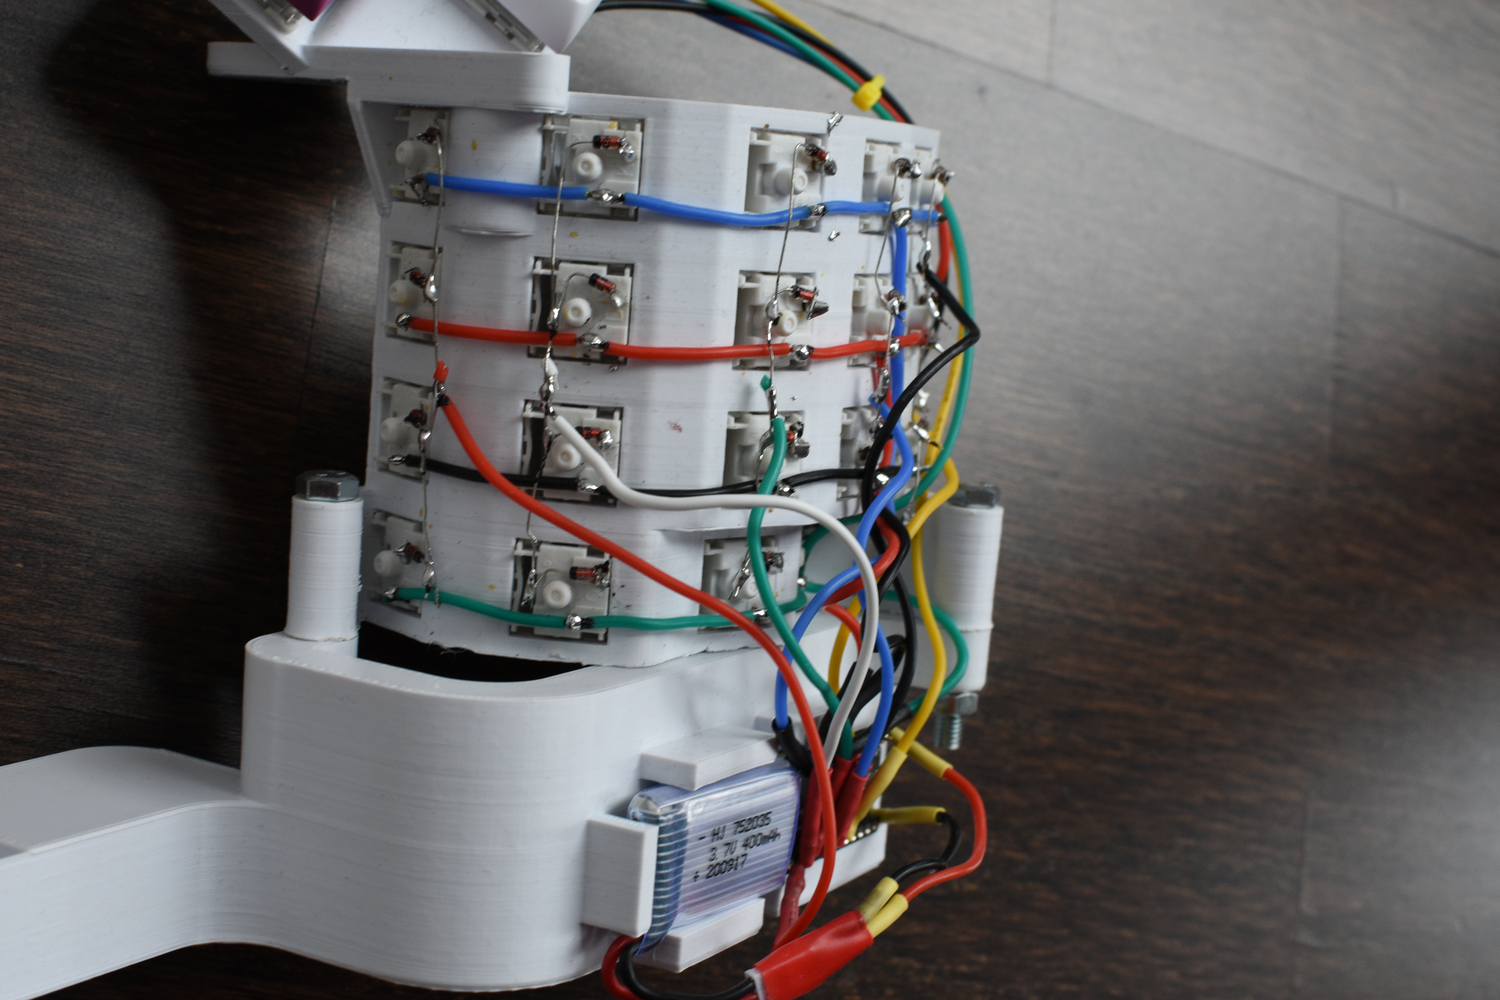 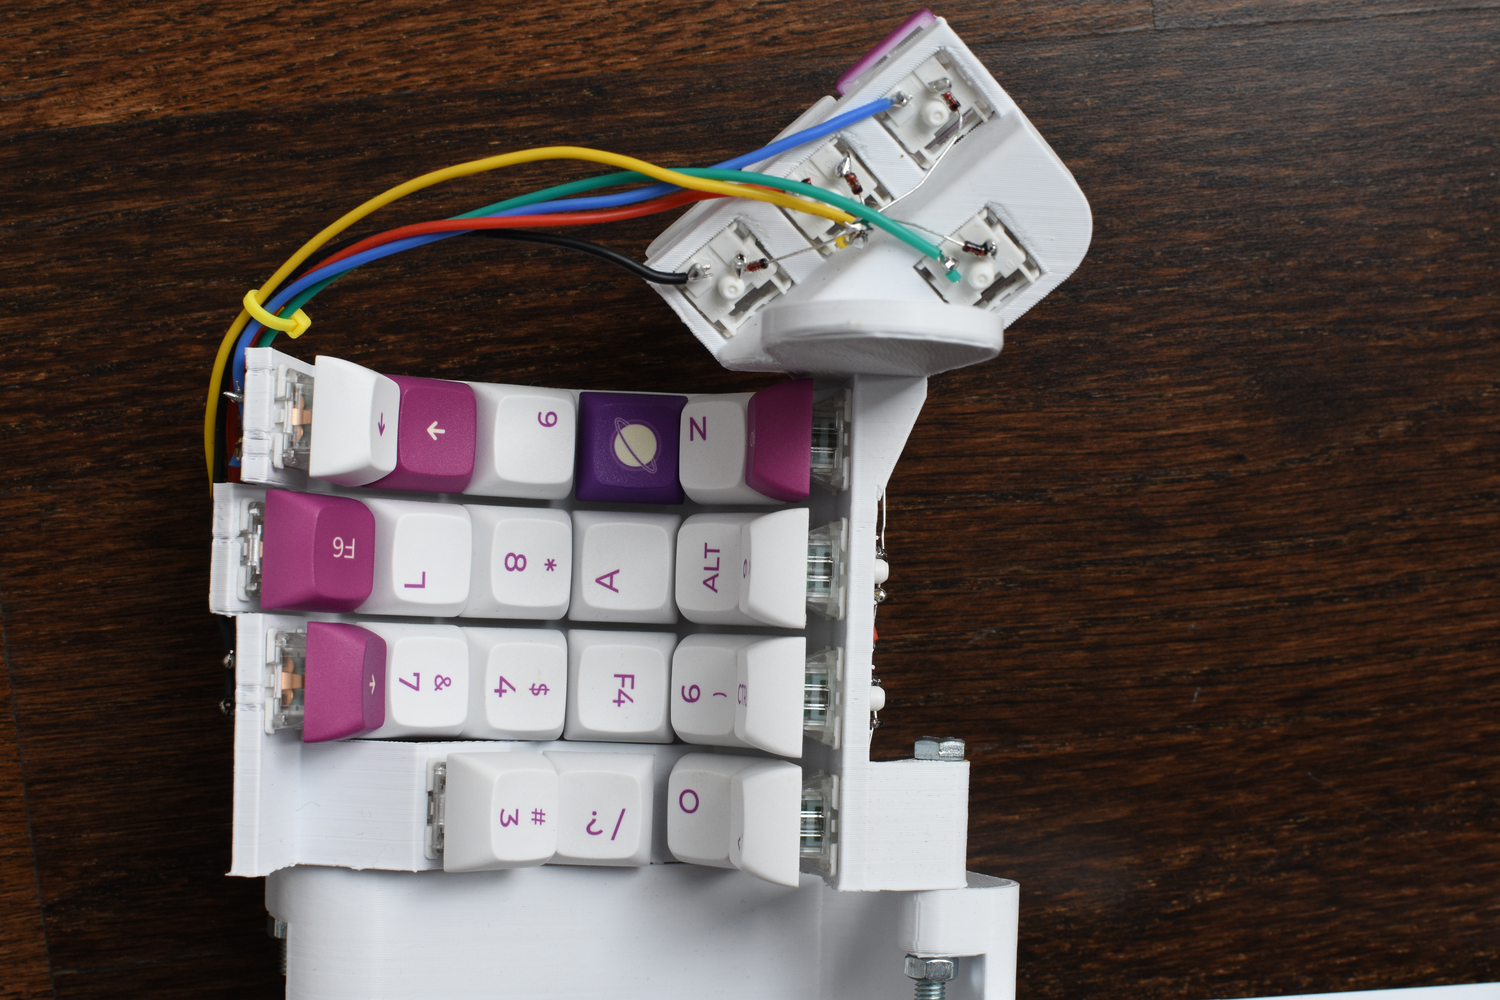 In the pictures above each wire responsible for a column (i.e., set of keys operated by a single finger) ends with a black heat-shrink tube. Every row-wire ends with a red heat-shrink tube. The thumb cluster is treated as another row but this one ends with a yellow heat-shrink tube. In order to plug the wires into the Mill Max sockets soldered to nice!nanos I did the following: 1. Put the heat-shrink tube on each of the wires 1. Gather the diode legs cut off while soldering the keyboard 2. Solder one to the chip-facing end of each of the wires 3. Bend the end of each of those legs at the right angle. The length of the bent piece should be such that it fits into the socket but doesn't stick out much. 4. Slide the heat-shrink tube all the way towards the bent part and apply heat. That way the wires should not short when they are plugged in next to each other. Sleeve ------ I simply put the 3D-printed "Sleeve" part into my textile sleeves, cut out the holes for the protruding elements and then stapled (with an office stapler) the surrounding area of the textile sleeve so that the holes do not rip. Building firmware ----------------- I used ZMK firmware. My patches live in this repo as the 'zmk' submodule. In order to clone this repo together with the firmware run either git clone --recursive https://github.com/Baranowski/Viosuo or git clone https://github.com/Baranowski/Viosuo cd Viosuo git submodule update --init --recursive Then you can follow the standard zmk building instructions: https://zmk.dev/docs/development/build-flash The name of the shield is viosuo and so the specific commands to build this firmware are: west build -d build/left -b nice_nano -- -DSHIELD=viosuo_left west build -d build/right -b nice_nano -- -DSHIELD=viosuo_right TODO improvements ================= Separate columns ---------------- It would be much better if each column (i.e., a set of keys operated by a single finger) could be printed separately and then they could be joined together by a couple long bolts. The longer bolts would replace the currently used M5x40 (I used M5x40 simply because that's what I had at hand). That way you could iterate much faster while experimenting with variations in the keys layout. I haven't yet figured out how the thumb cluster could be attached in a similar way. Software for desigining columns ------------------------------- One thing I love about Dactyl-Manuform is how customizable the design is, thanks to the scripts that generate STL files for any reasonable parameters chosen by the builder. It should be possible to write similar software for Viosuo's columns. This again would make it much faster to iterate on the layout and would allow more people to adjust the keyboard to their hands. Angles between keys and protruding keys --------------------------------------- The angle between the 3rd and 4th row (counting from the palm) is too flat - I often confuse the two rows. A sharper angle would be more practical. Perhaps they keys of the 3rd row should protrude, similarly to how the top keys on the pinky column protrude. Unfortunately, I came up with the idea of protruding keys quite late in the game when I didn't want to fiddle with the arrangement of the 3 main columns. The above idea of separately-printable columns would have helped with that. Cover attachment ---------------- The cover seems to be necessary - without it the electronic components catch very easily on clothing. However, the method of attaching the cover should be smarter - currently it's really a hassle because the bolts joining all the elements together are quite deep underneath the cover. Comfort in different positions ---------------------------- Currently I find the keyboard very comfortable when standing or walking but I choose to take it off whenever I want to sit down. A better design would allow to comfortably rest the keyboard in your laps and on or underneath a desk. I believe this should be pretty easy to do with modifications to the "Connector" part. Perhaps the hook on the "Sleeve" part would also have to be reversed. License ======= Um... I don't know. I will pick one if there is any interest. It will be something open and permissive.
