KO
|
EN
gitlite — search
Search
#python
#java
#python3
#arduino
#golang
#machine-learning
#rust
#html
#flask
#javascript
#seismology
#nodejs
Forum
★ 21
Open GitHub ↗
Freedom community for Iran
Download README (.md)
Explore Similar Repositories
fleet
:
Docker production management CLI + MCP server for Claude Code
GodotBlenderShare
:
This repo I share some Godot and Blender stuffs
godshell
:
A Tool to give your LLM access to your Kernel.
DeJson
:
An Unreal Engine plugin to help with JSONs in blueprints
Causal-AI-Agent
:
No description available.
// repository documentation
Was this content helpful?
★ 0
(0 ratings)
Select Rating:
★
★
★
★
★
Submit Feedback
Recent Feedback
×
Download README
Do you want to download the
README.md
file for
Forum
?
Download (.md)
# IranGuard Forum <img src="./public/iran.png" alt="Iran" width="24" height="24" style="vertical-align:middle;margin-right:8px;" /> [](https://raw.githubusercontent.com/frank-vpl/Forum/master/LICENSE) [](https://laravel.com) [](https://livewire.laravel.com) [](https://vite.dev) [](https://tailwindcss.com) [](https://www.php.net) Freedom community forum for Iran — built on Laravel + Livewire + Vite and Tailwind, with a focus on simplicity and privacy. 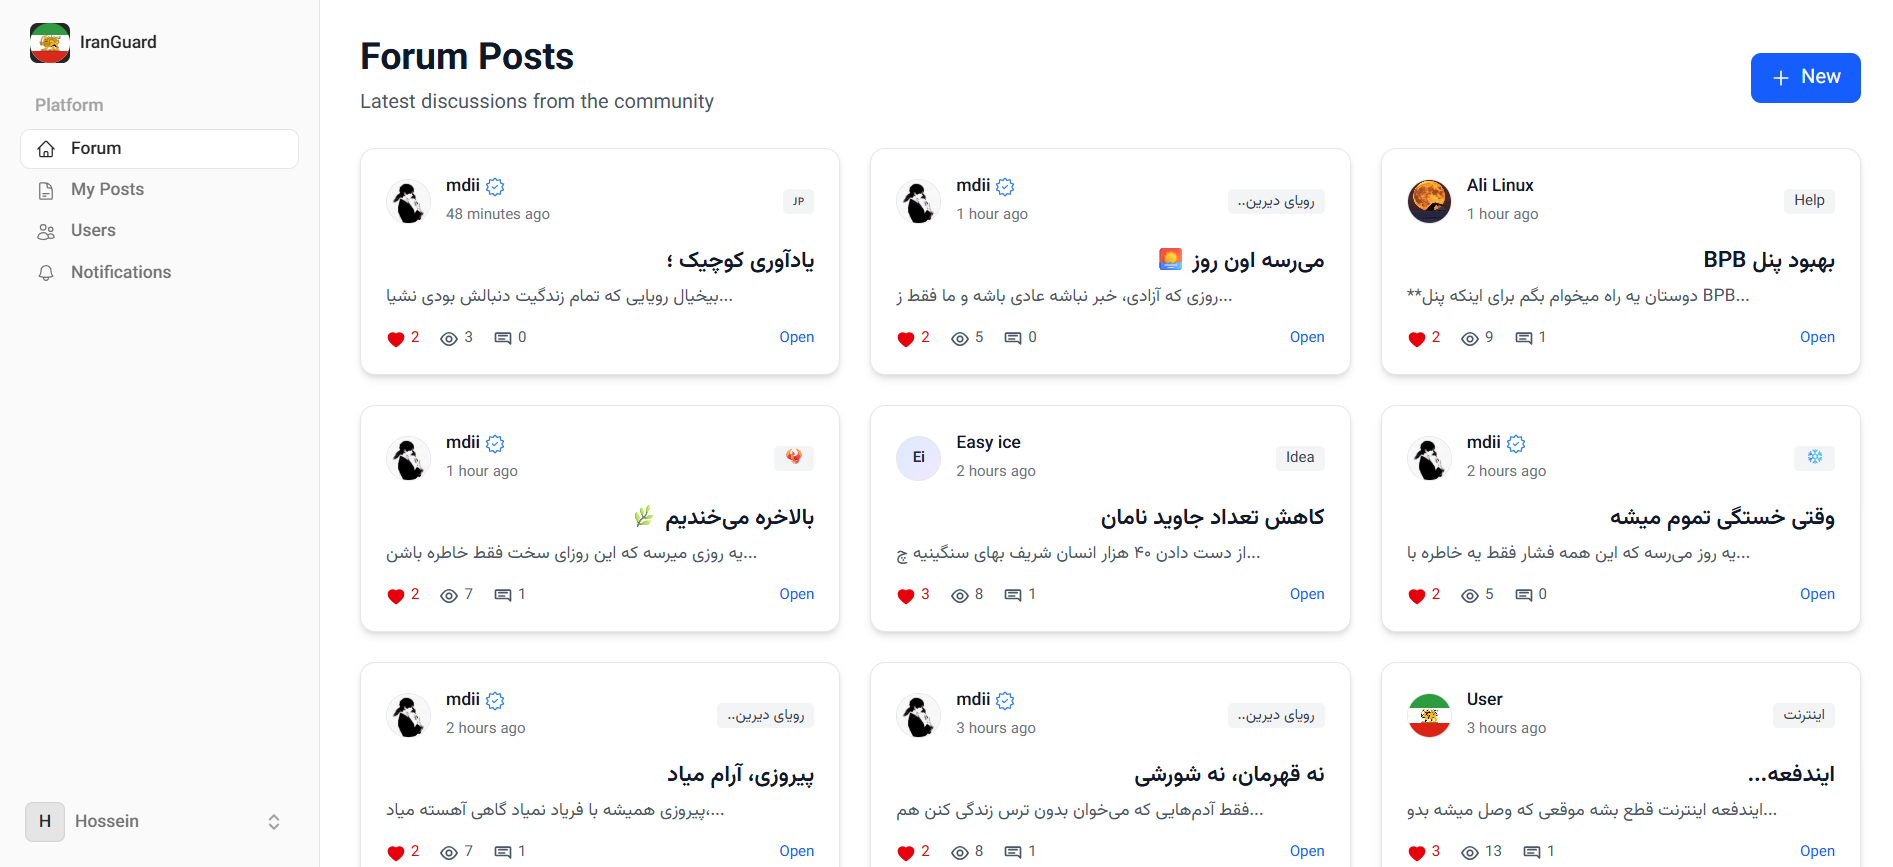 ## Features - User registration, login, email verification, 2FA - Create posts, comments, likes, views tracking - Notifications and user profiles with image upload - Modern frontend built with Vite and Tailwind CSS ## License - GPL-3.0 — see the full text in [LICENSE](./LICENSE). ## Prerequisites - PHP 8.2+ and Composer - Node.js 18+ and npm - Database: SQLite by default; MySQL recommended for production ## Install - Clone repository: ```bash git clone https://github.com/frank-vpl/Forum.git ``` - Go to project directory: ```bash cd Forum ``` - Install PHP packages: ```bash composer install ``` If install has issues, you can use: ```bash composer update ``` - Install JavaScript packages: ```bash npm install ``` - Create environment file: ```bash cp .env.example .env ``` On Windows (PowerShell): ```bash copy .env.example .env ``` - Generate application key (sets APP_KEY in .env): ```bash php artisan key:generate ``` ### Configure .env Set each variable with short tips. See DB and Email “code cards” followed by helpful lists. - App name (quotes allowed if spaces): ```bash APP_NAME="IranGuard Forum" ``` Helpful: APP_NAME supports quotes when the name has spaces. - Environment: ```bash APP_ENV=local ``` - Debug (set to false in production): ```bash APP_DEBUG=true ``` - App URL (port/domain/subdomain supported): ```bash APP_URL=http://localhost ``` #### Database Settings (MySQL example) ```dotenv DB_CONNECTION=mysql DB_HOST=127.0.0.1 DB_PORT=3306 DB_DATABASE=iranguard_forum DB_USERNAME=root DB_PASSWORD= ``` - DB_CONNECTION: mysql recommended for production; sqlite works out-of-the-box. - DB_HOST: your database server host; use service name if using Docker. - DB_PORT: default MySQL port is 3306; adjust if your provider differs. - DB_DATABASE: database name; create it before running migrations. - DB_USERNAME: MySQL user with permissions on the database. - DB_PASSWORD: user password; for local root it may be empty. #### Email Settings (SMTP example) ```dotenv MAIL_MAILER=smtp MAIL_SCHEME=null MAIL_HOST=smtp.example.com MAIL_PORT=465 MAIL_USERNAME=your_email@example.com MAIL_PASSWORD=your_email_password MAIL_FROM_ADDRESS=your_email@example.com MAIL_FROM_NAME="${APP_NAME}" MAIL_ENCRYPTION=ssl ``` - MAIL_MAILER: driver (smtp recommended for providers). - MAIL_SCHEME: leave null unless your provider requires a scheme. - MAIL_HOST: SMTP server host from your email provider. - MAIL_PORT: 465 for SSL, 587 for TLS (common defaults). - MAIL_USERNAME: mailbox username or full email address. - MAIL_PASSWORD: mailbox password or app-specific password. - MAIL_FROM_ADDRESS: sender address shown in emails. - MAIL_FROM_NAME: display name; typically your app name. - MAIL_ENCRYPTION: ssl or tls per provider requirements. #### Google OAuth (optional) ```dotenv # Google OAuth GOOGLE_CLIENT_ID= GOOGLE_CLIENT_SECRET= GOOGLE_REDIRECT="${APP_URL}/callback/google" ``` Callback URL: ${APP_URL}/callback/google Login redirect route: /auth/google Steps to obtain these from Google Cloud Console: - Create a project: 1. Open https://console.cloud.google.com/ and sign in. 2. Click the project selector (top left) → New Project → give it a name → Create → switch to it. - Configure OAuth consent screen: 1. Navigation menu → APIs & Services → OAuth consent screen. 2. Choose “External” for public use or “Internal” for organization-only. 3. App name, support email, developer contact email → Save and Continue. 4. Scopes: add openid, email, profile (Google automatically provides these for basic sign-in). 5. Test users (if app not published): add the Gmail accounts that can sign in while you test. 6. Save (you can keep the app in testing mode for development). - Create OAuth client: 1. Navigation menu → APIs & Services → Credentials → Create Credentials → OAuth client ID. 2. Application type: Web application. 3. Name: e.g., IranGuard Web. 4. Authorized JavaScript origins: add your base URL (example: http://127.0.0.1:8000 or http://localhost:8000). 5. Authorized redirect URIs: add ${APP_URL}/callback/google (example: http://127.0.0.1:8000/callback/google). 6. Click Create. Copy the Client ID and Client Secret into your .env as GOOGLE_CLIENT_ID and GOOGLE_CLIENT_SECRET. - Update your .env: - Set APP_URL to your base URL (e.g., http://127.0.0.1:8000). - Set GOOGLE_REDIRECT to ${APP_URL}/callback/google (default in .env.example is set this way). - Run: php artisan config:clear - Try it: - Start the app: php artisan serve - Visit /auth/google or click “Continue with Google” on the Login/Register page. Notes: - In “Testing” mode, only test users can log in; to allow anyone, publish the consent screen. - For production domains, ensure your APP_URL uses HTTPS and add the exact origin and redirect URI in Google. - If you change APP_URL or port, update the “Authorized JavaScript origins” and “Authorized redirect URIs” accordingly. ### Database - SQLite works out of the box. For MySQL, remove comments (`#`) from the DB variables above and fill in your credentials. - Then run migrations: ```bash php artisan migrate ``` ### Build and Run - Build frontend assets (Vite): ```bash npm run build ``` - Link storage (exposes public/storage for uploads): ```bash php artisan storage:link ``` - Run local development server (dev only): ```bash php artisan serve ``` ### Production - Do not use `php artisan serve` in production. Point your web server’s document root to the `public/` directory. - If your host requires `.htaccess` in project root to redirect to `public/`, add: ```apache <IfModule mod_rewrite.c> RewriteEngine On # Redirect all requests to public folder RewriteCond %{REQUEST_URI} !^/public/ RewriteRule ^(.*)$ public/$1 [L] </IfModule> ``` ## Shared Hosting (no shell/SSH) - Install and build locally: - Follow Install steps above - Run `npm run build` - Zip project files (exclude `node_modules`) - Upload to shared hosting and extract - Ensure web root points to `public/` (or use the `.htaccess` redirect shown above) - Open your website URL ## Built With - Laravel 12, Livewire 4 - Vite 7, Tailwind CSS 4 ## Development Scripts - Run everything together (server, queue, Vite): `composer run dev` - Lint PHP code: `composer run lint` - Run tests: `composer run test` ## Security Notes - Do not commit real credentials or secrets. Keep `.env` out of version control. - Review mail and storage settings before deploying to production. --- <div align="center"> <br /> <img src="./public/iran.png" alt="Iran" width="24" height="24" style="vertical-align:middle;margin-right:8px;" /> <strong>Made with ❤️ by Hossein Pira</strong> <br /> <a href="https://t.me/h3dev">Telegram</a> • <a href="mailto:h3dev.pira@gmail.com">Email</a> • <a href="https://instagram.com/h3dev.pira">Instagram</a> • <a href="https://x.com/albert_com32388">X (Twitter)</a> </div>
