KO
|
EN
gitlite — search
Search
#python
#java
#python3
#arduino
#golang
#machine-learning
#rust
#html
#flask
#javascript
#seismology
#nodejs
osu-on-linux
★ 27
Open GitHub ↗
osu! low latency guide
Download README (.md)
Explore Similar Repositories
Mysa_HA
:
High-performance Home Assistant integration for Mysa Thermostats with real-time MQTT control and instant UI feedback.
booster_assets
:
Booster robot descriptions and example motion data
understand_vggt
:
logit lens for VGGT
ziniao_webdriver_demo
:
包含基于紫鸟浏览器的电商平台WebDriver自动化示例
nestjs-hexigonal
:
No description available.
// repository documentation
Was this content helpful?
★ 0
(0 ratings)
Select Rating:
★
★
★
★
★
Submit Feedback
Recent Feedback
×
Download README
Do you want to download the
README.md
file for
osu-on-linux
?
Download (.md)
# osu-on-linux osu! low latency guide 2025 version # Language: [EN](README.md) | [RU](README_RU.md) | [JA](README_JA.md) # As my previous guide was nuked by someone, I made a decision to move it to github So, this is an osu! low latency guide with stable working wine, drag-n-drop and other stuff.  First of all - [download Arch Linux iso file from the official website](https://archlinux.org/download/). Download [Ventoy](https://sourceforge.net/projects/ventoy/files/v1.1.07/ventoy-1.1.07-windows.zip/download) and unpack it to any directory, we will make an USB multitool device for many distros. Open **Ventoy2Disk**, choose your USB flash drive, click **Install**, accept wipe of USB flash two times and after install your flash drive will be split into **VENTOY** and **VENTOYEFI**, drop archlinux iso to the flash drive, named **VENTOY**. # Screenshots: 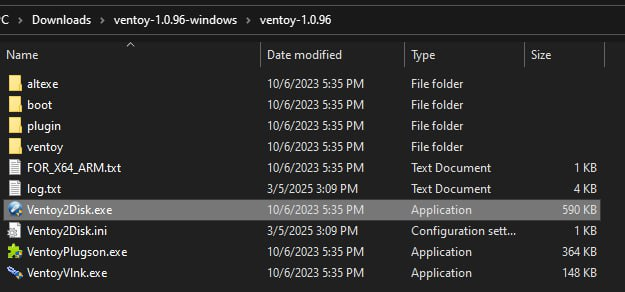 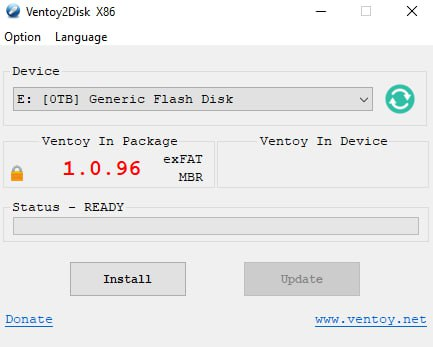 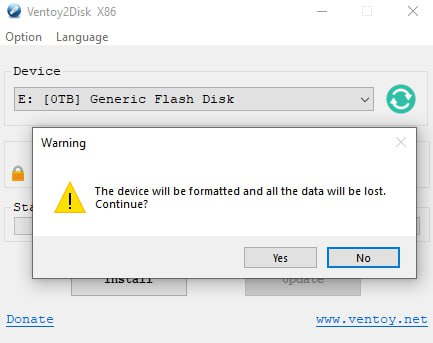 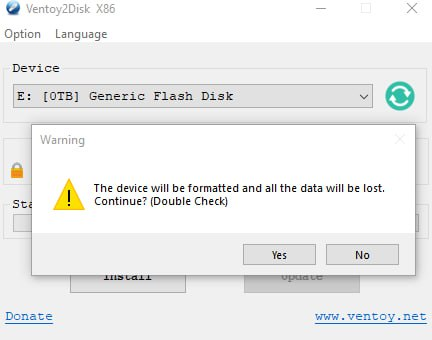 After thoose steps, reboot into **BIOS**, choose your flash drive in **Boot**, and you will load into Ventoy's GUI. 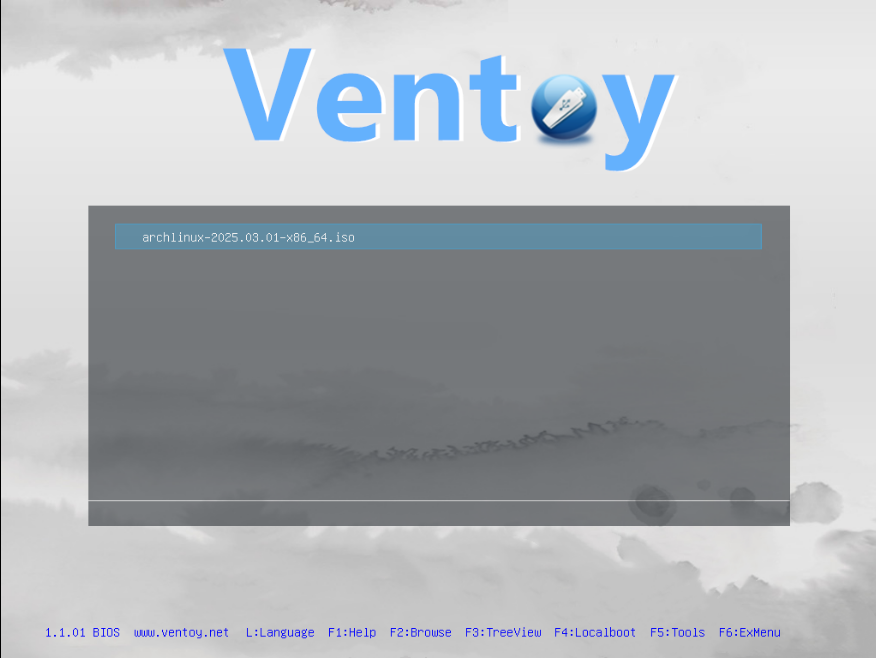 Important note: after choosing your archlinux iso in Ventoy, choose `Boot in grub2 mode` for successfull Arch Linux installation. 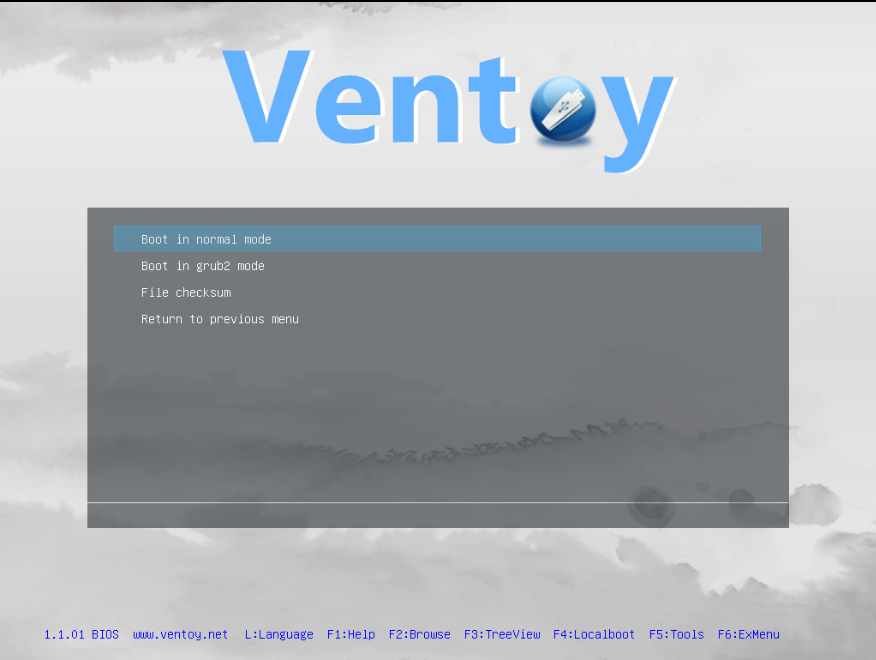 Let's install Arch on your PC: 1. After loading from Ventoy, you will see one of theese screens of archlinux boot: - if your BIOS in legacy mode: 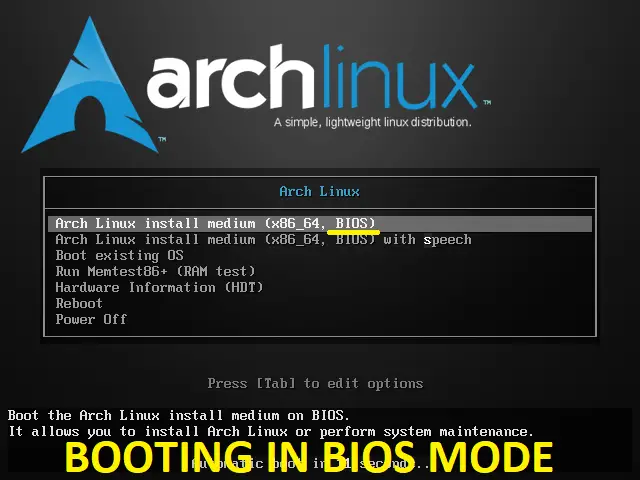 - if your BIOS in UEFI mode: 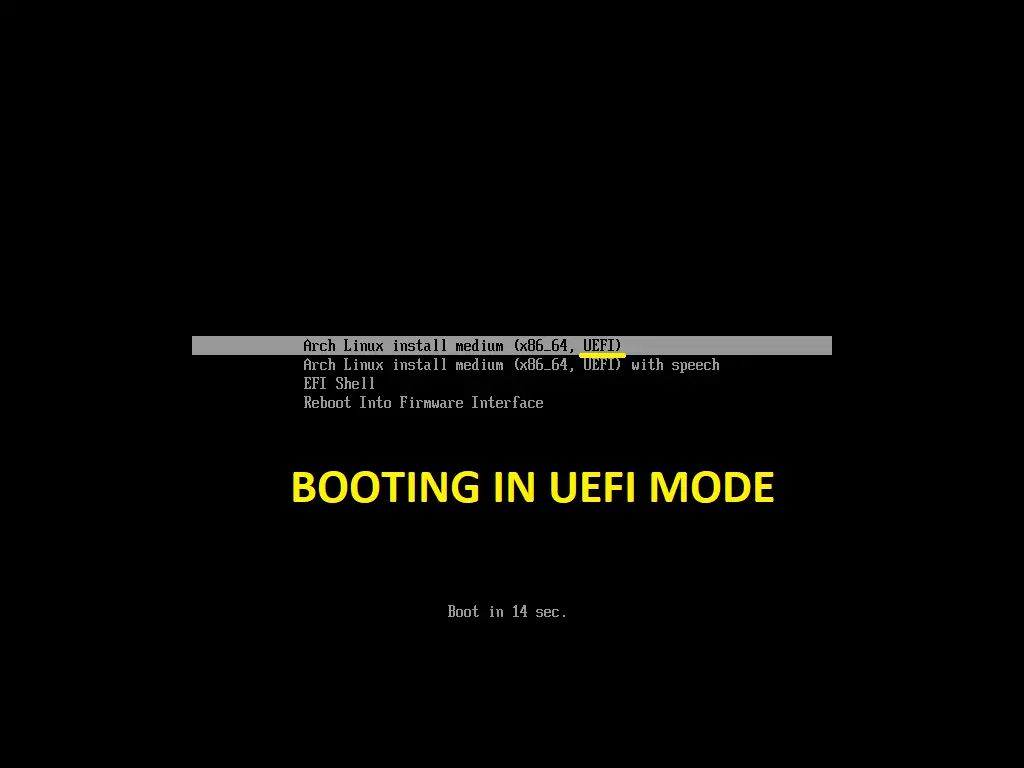 Choose `Arch Linux install medium` and wait, while setup media loads into terminal. 2. So, we loaded into terminal: 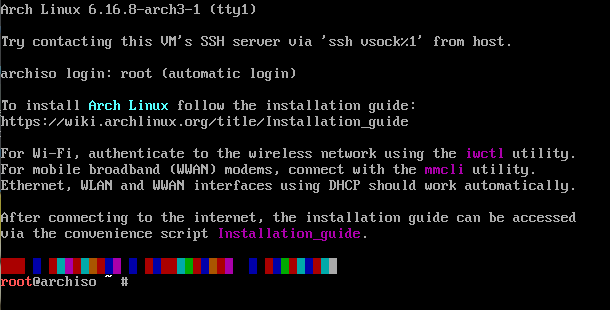 4. Type `archinstall` and press **Enter**, you will enter installation preudo GUI: 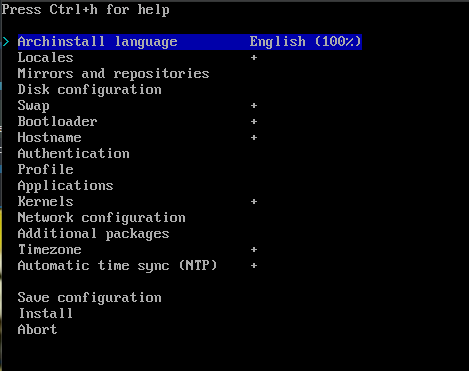 6. Choose `Mirrors and repositories`, press **Enter**, and you will enter this submenu: 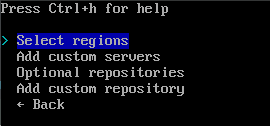 Press **Enter** again and you will enter into menu, where you can choose your region of Arch Linux mirror. For fast search, press `/` and type your country, in my case it's `/Belarus`: 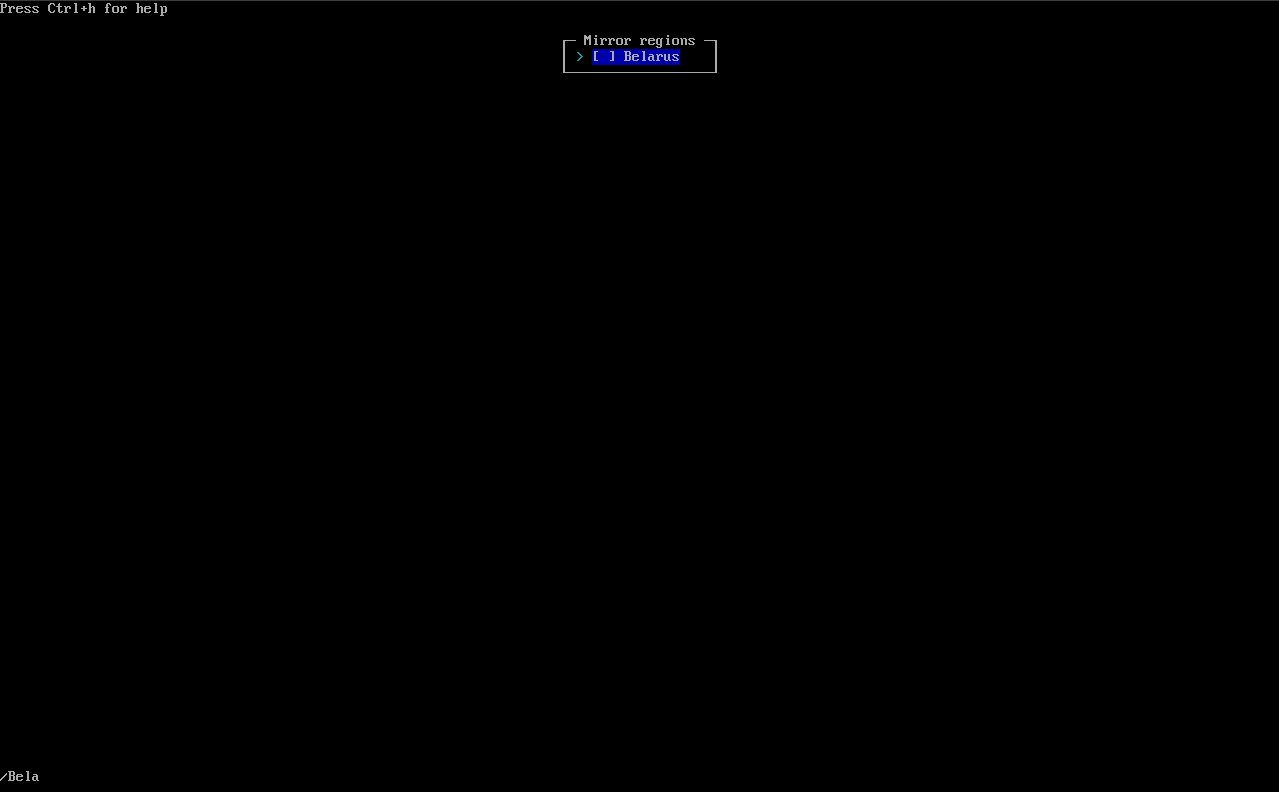 Press **Enter** and you will back to previous menu, choose `Optional repositories' and press **Enter**: 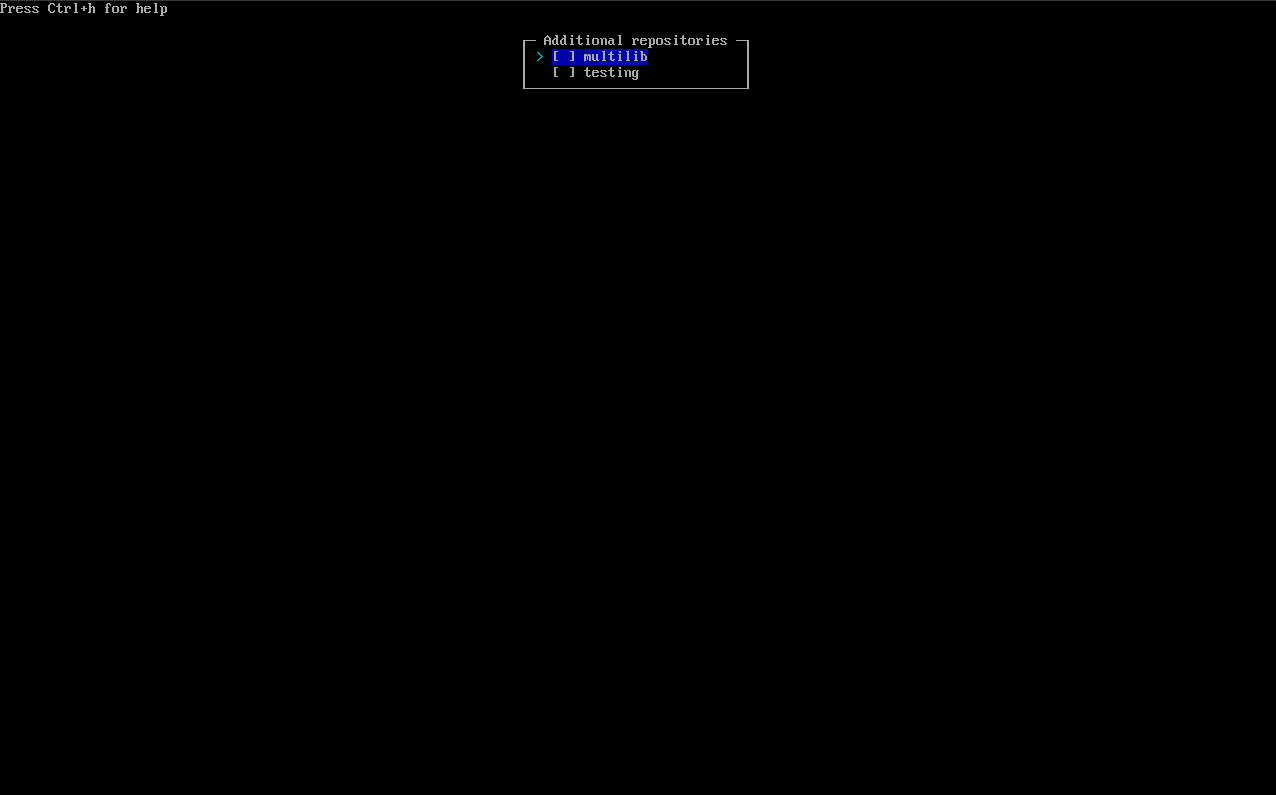 Choose `multilib`, press **Enter** and after thoose steps choose **Back** and press **Enter**, you will back to the main menu of installation: 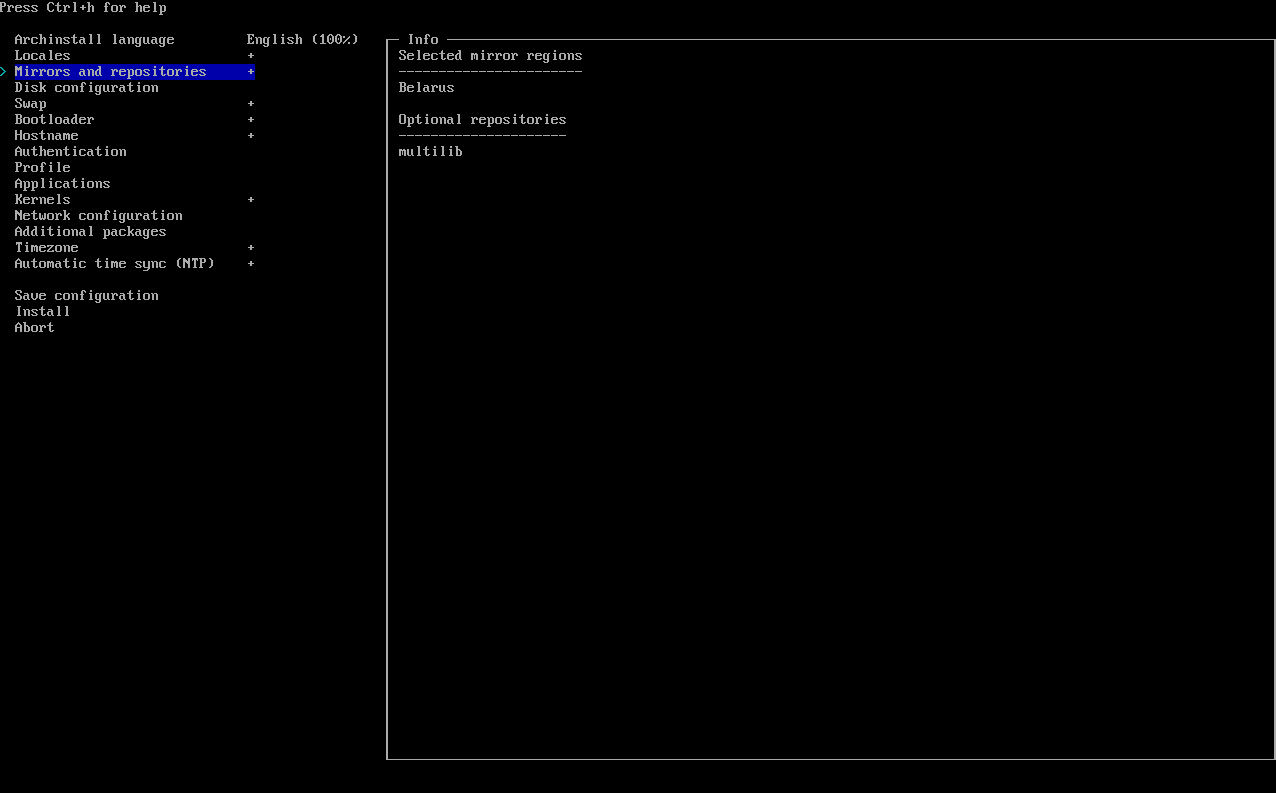 7. Choose `Disk configuration` and press **Enter**:  Press **Enter**: 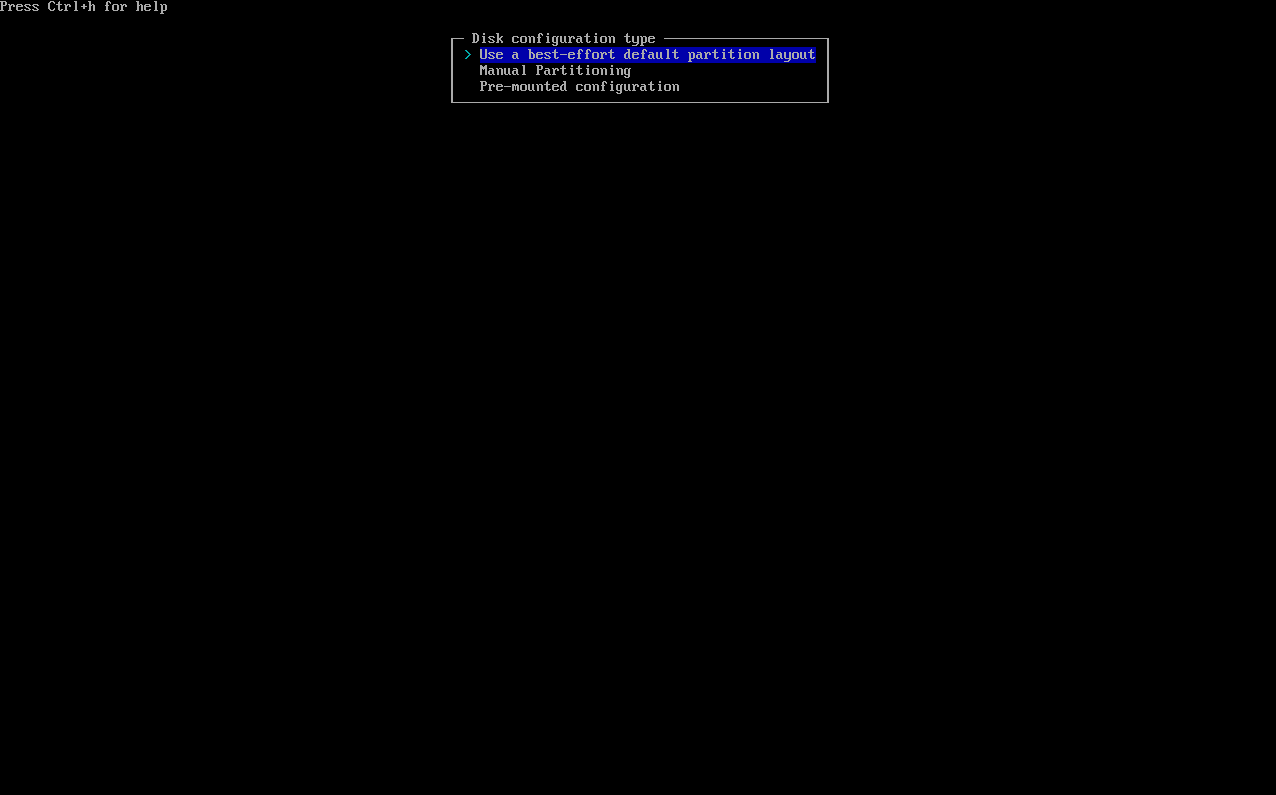 ### WARNING, MY GUIDE IS FOR SEPARATE DISK INSTALL, DONT USE INSTALL ON THE SAME DISK WHERE YOU HAVE YOUR WINDOWS INSTALLED Choose `Use a best-effort default partition layout` and choose your disk: 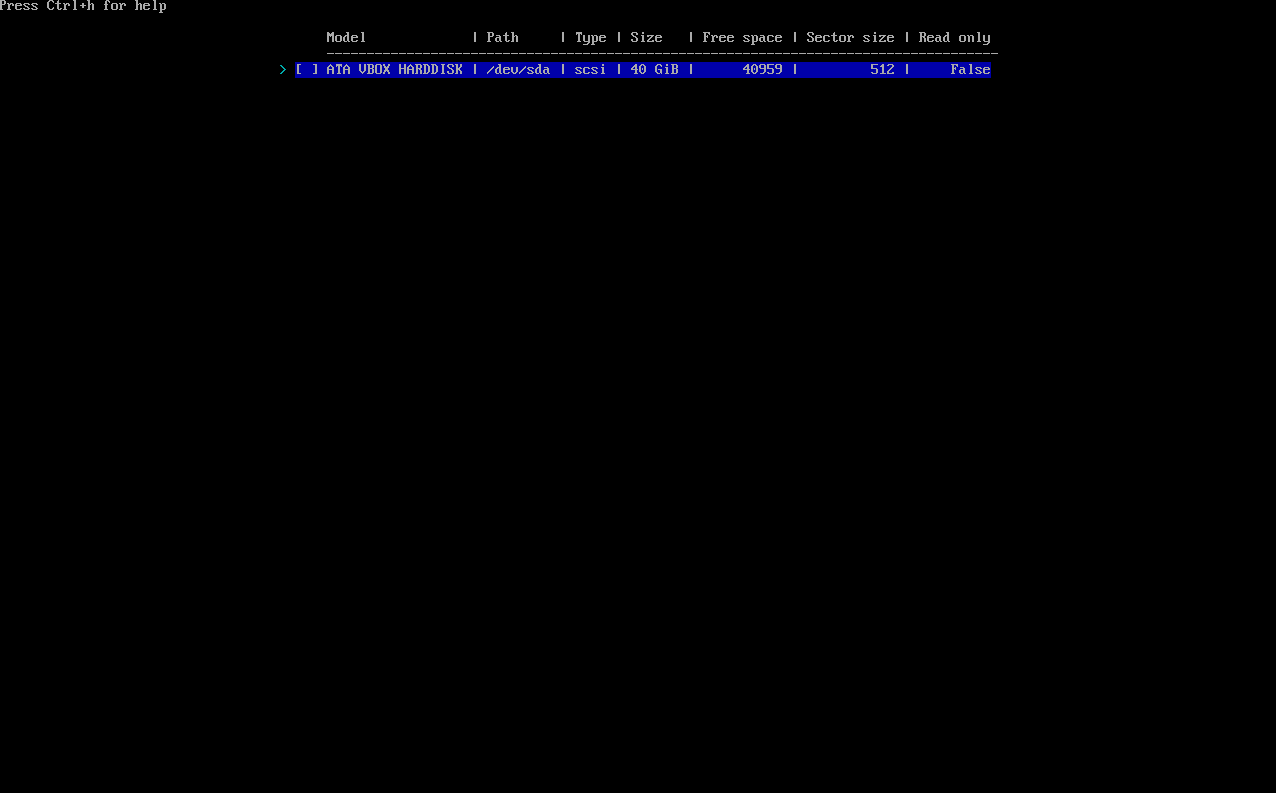 Choose `ext4`: 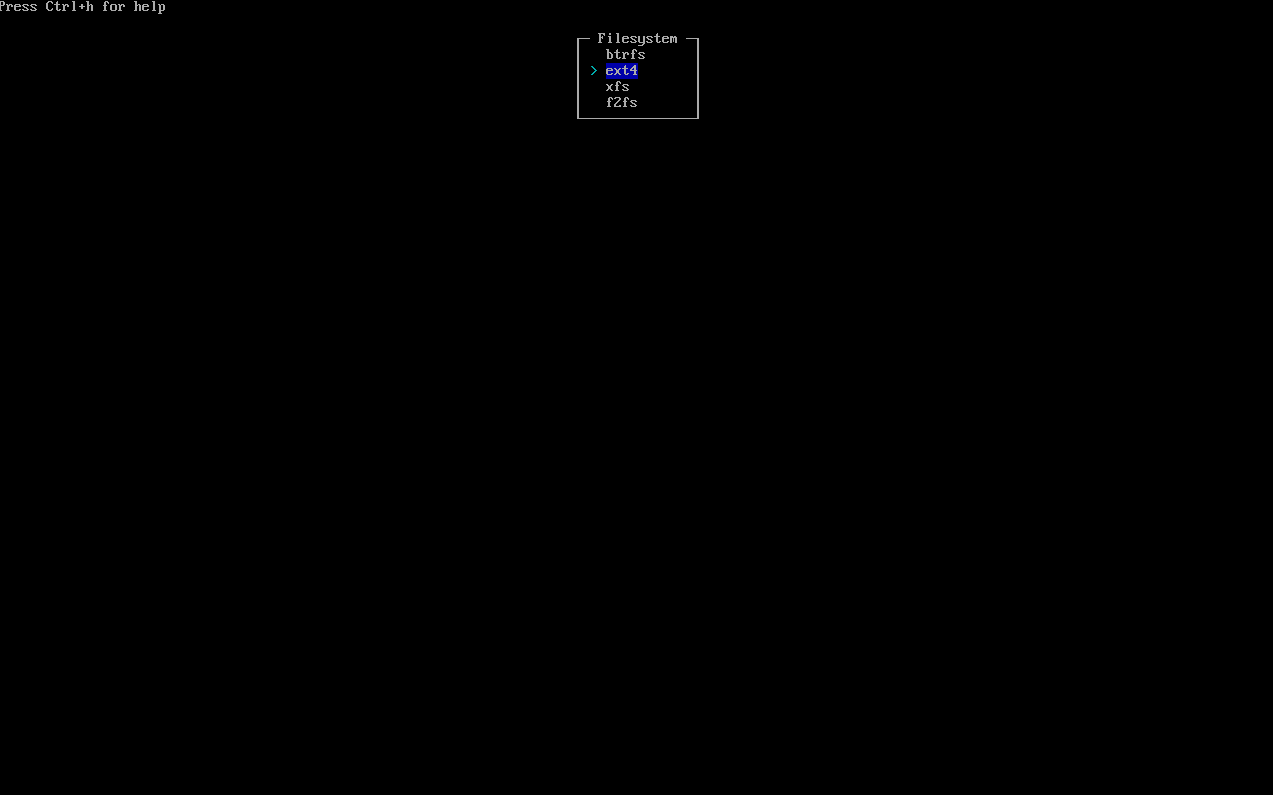 Disk was automatically partitioned: 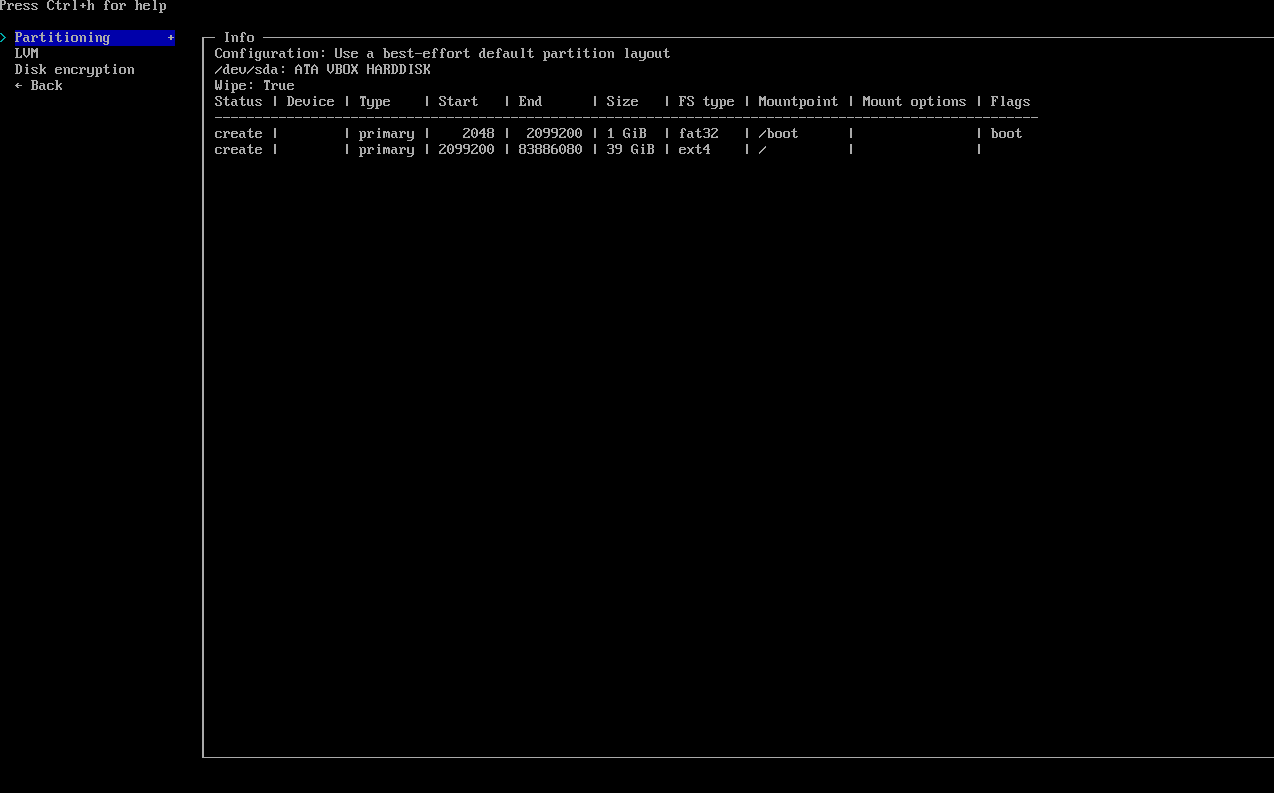 If your disk is from 64gb-256gb, you can skip next steps and go to paragraph 6. # If you want manually resize your partitons, do next steps: Choose `Partitioning` again, and go to the `Manual Partitioning`: 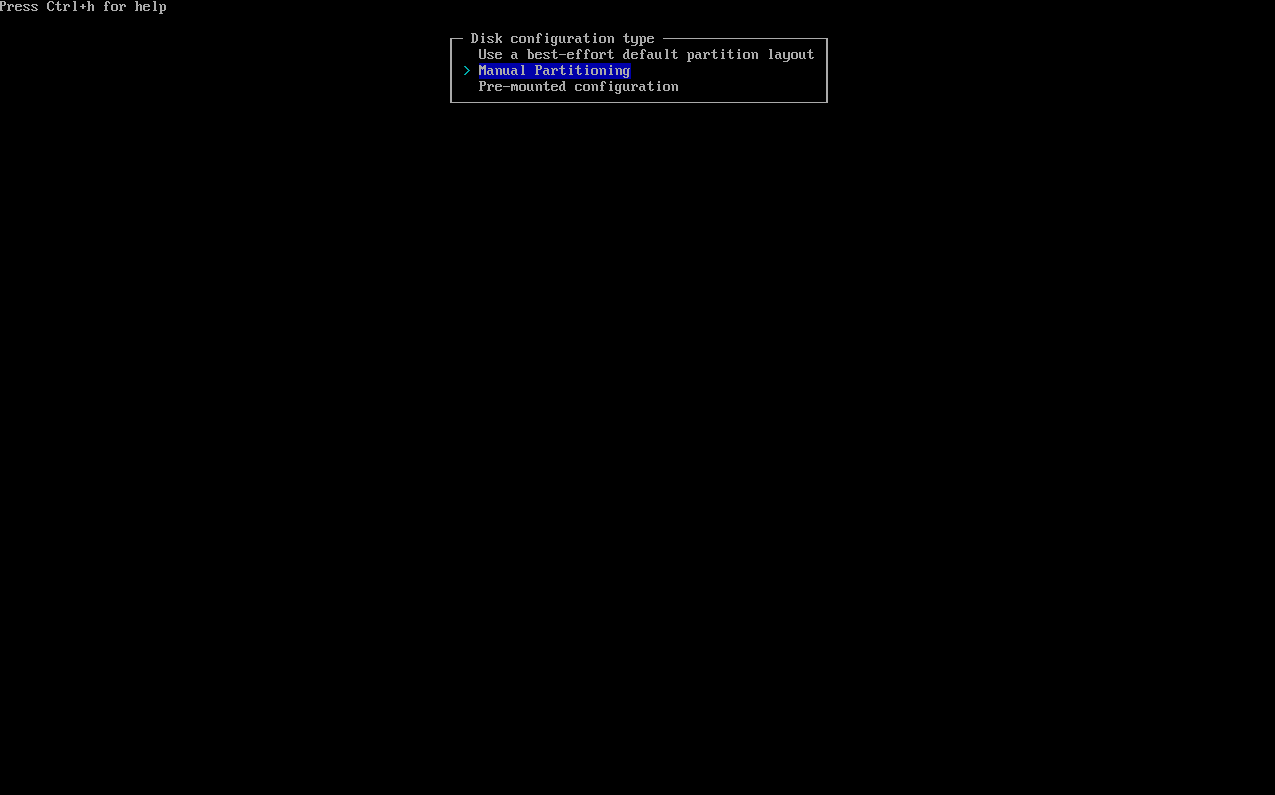 Choose your disk again: 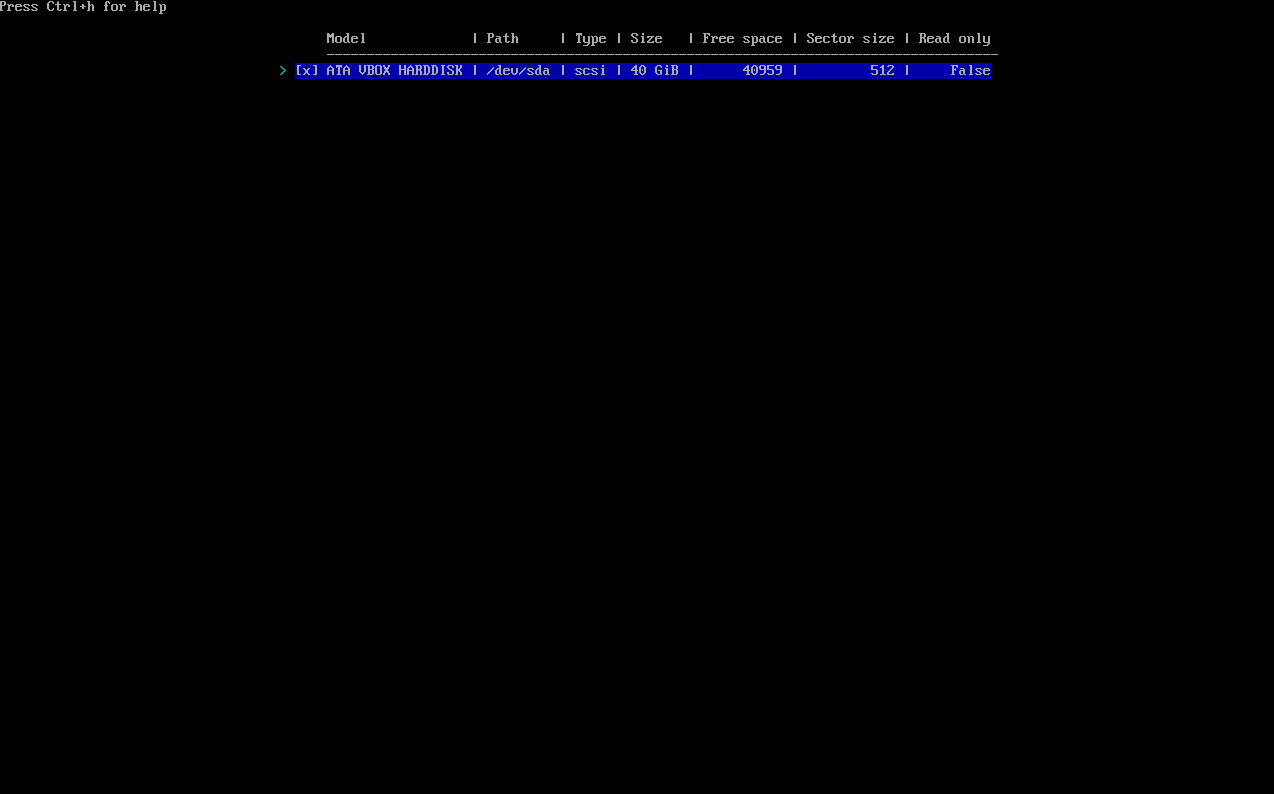 And you will see this menu: 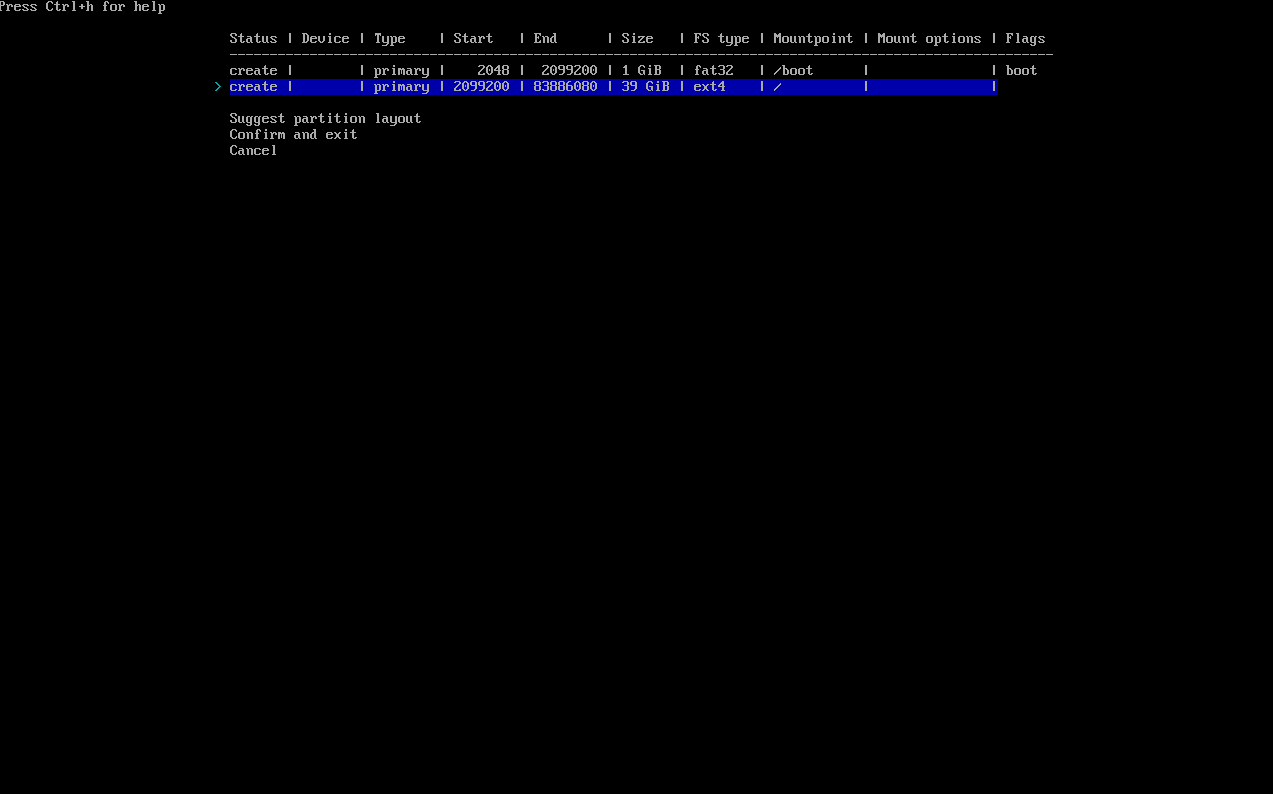 Choose second partition with label `/`, press Enter and you will enter this menu: 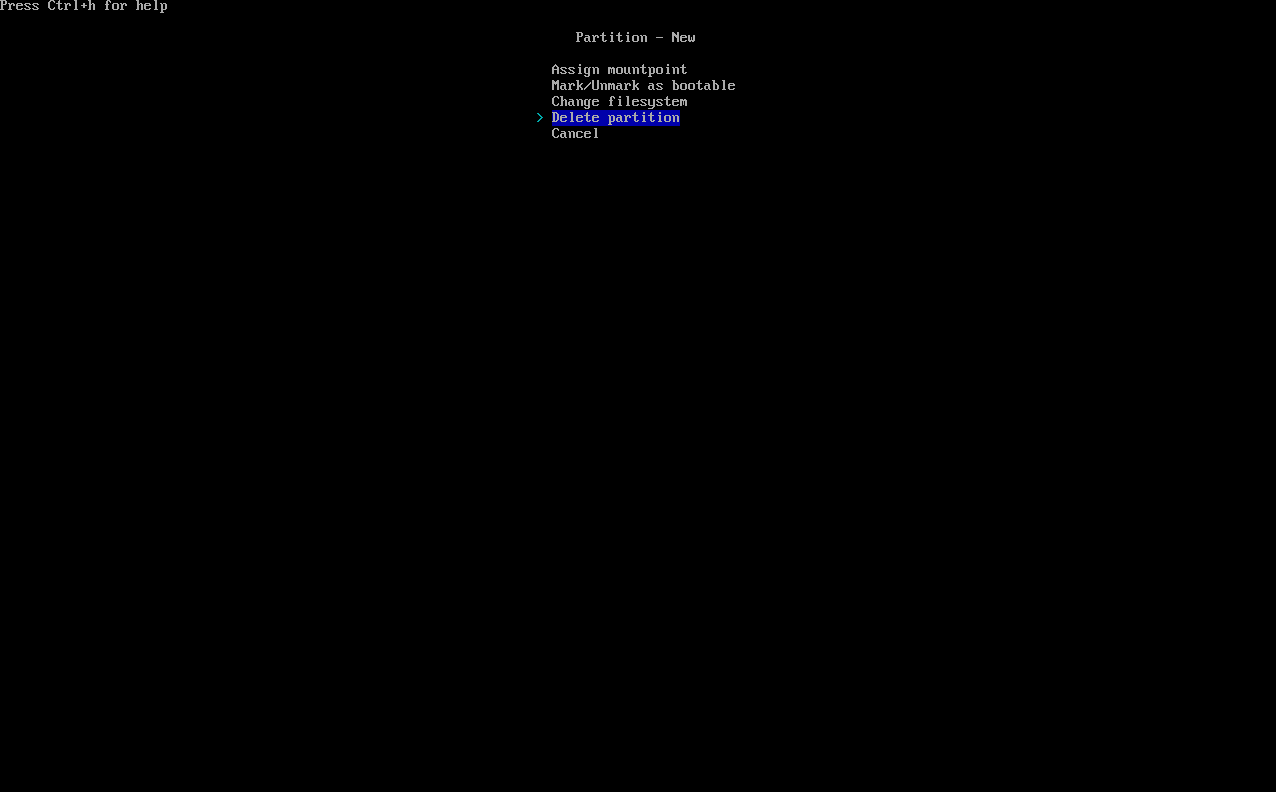 Choose `Delete partition` and press **Enter**, now you have a `free` partition: 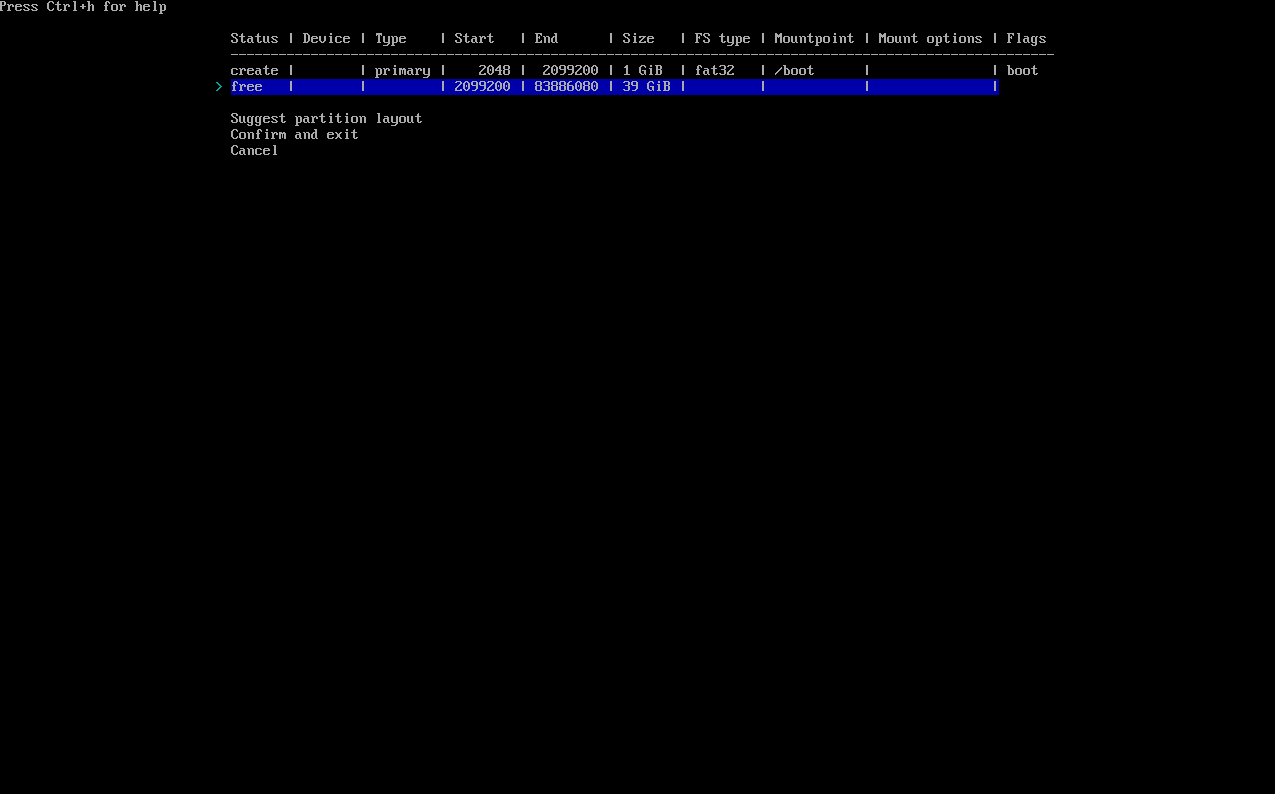 Choose your `free` partition, press **Enter**, and you will enter into menu, where you can choose size of your new partition: 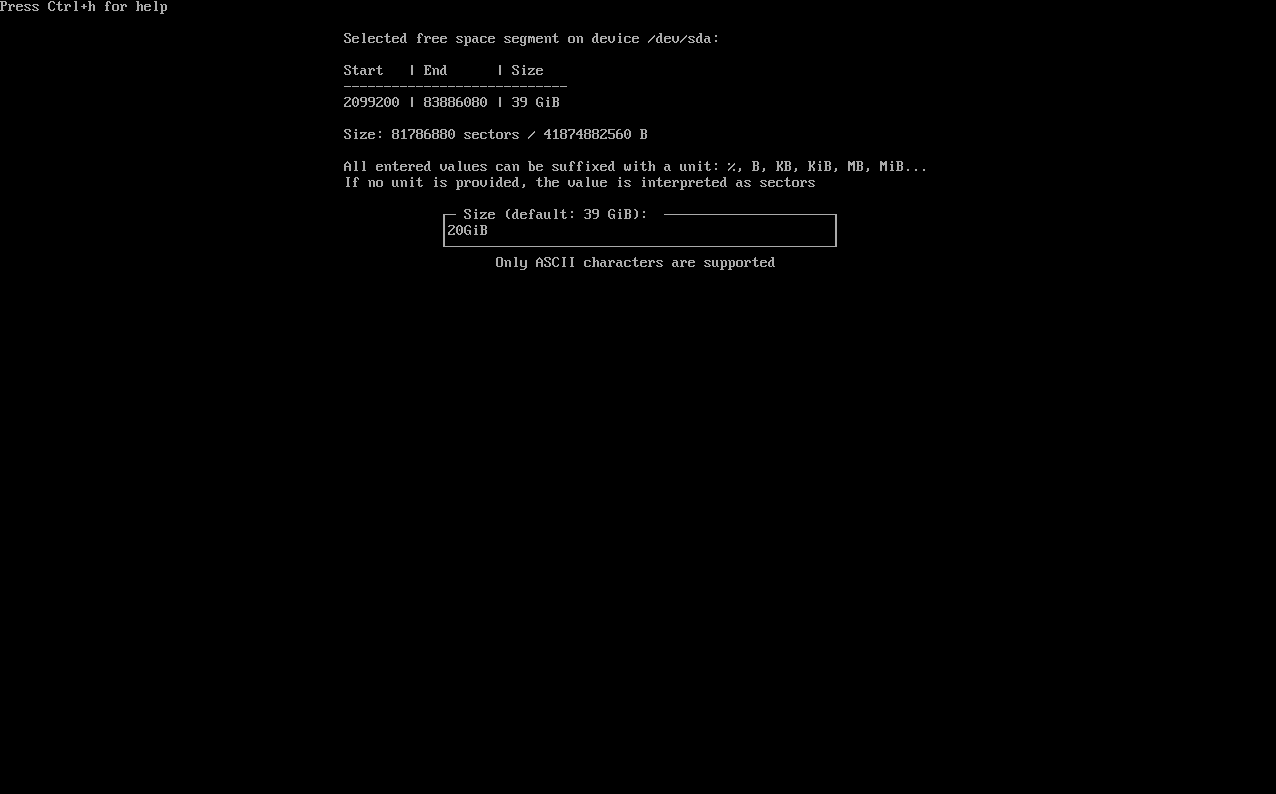 In my case, I will make root `/` partition with size 20GiB. After writing size, press Enter and choose `ext4` filesystem: 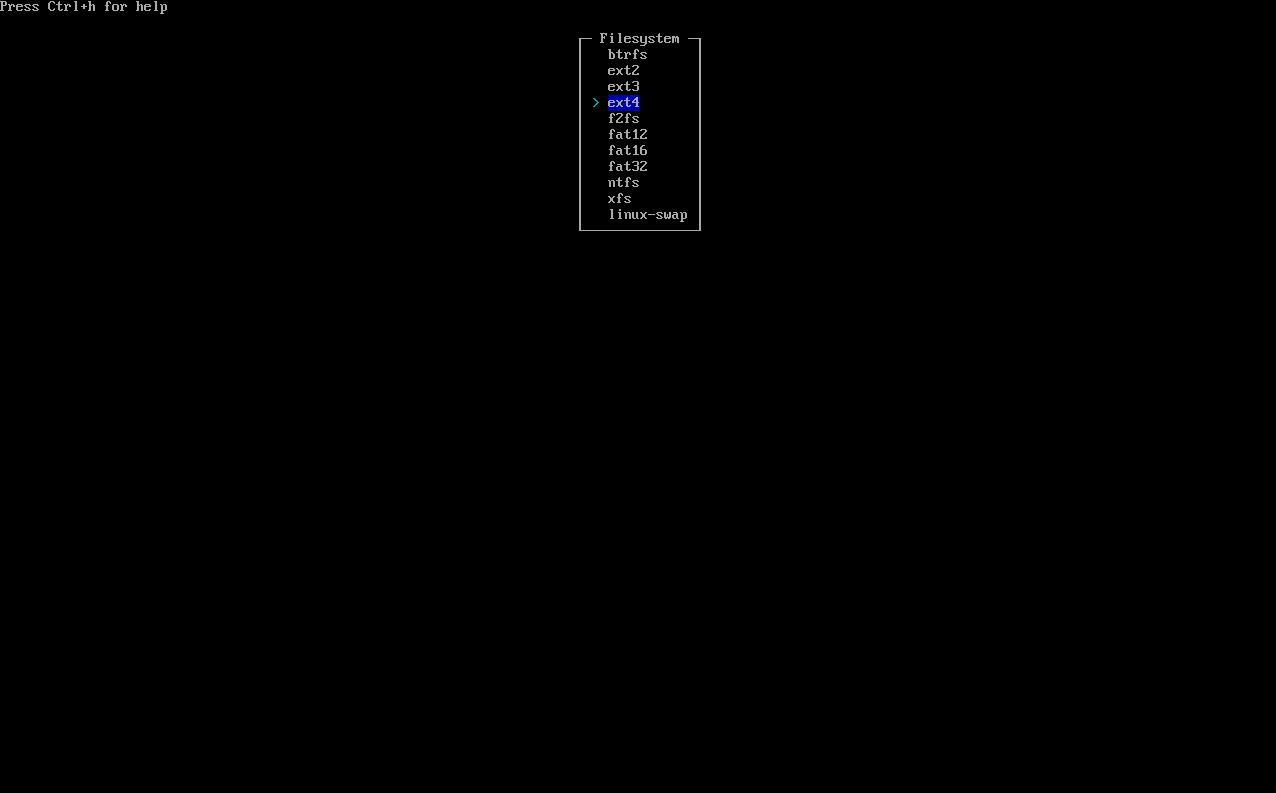 Press **Enter**, you will enter `Mountpoint` menu and write `/` for your first partition: 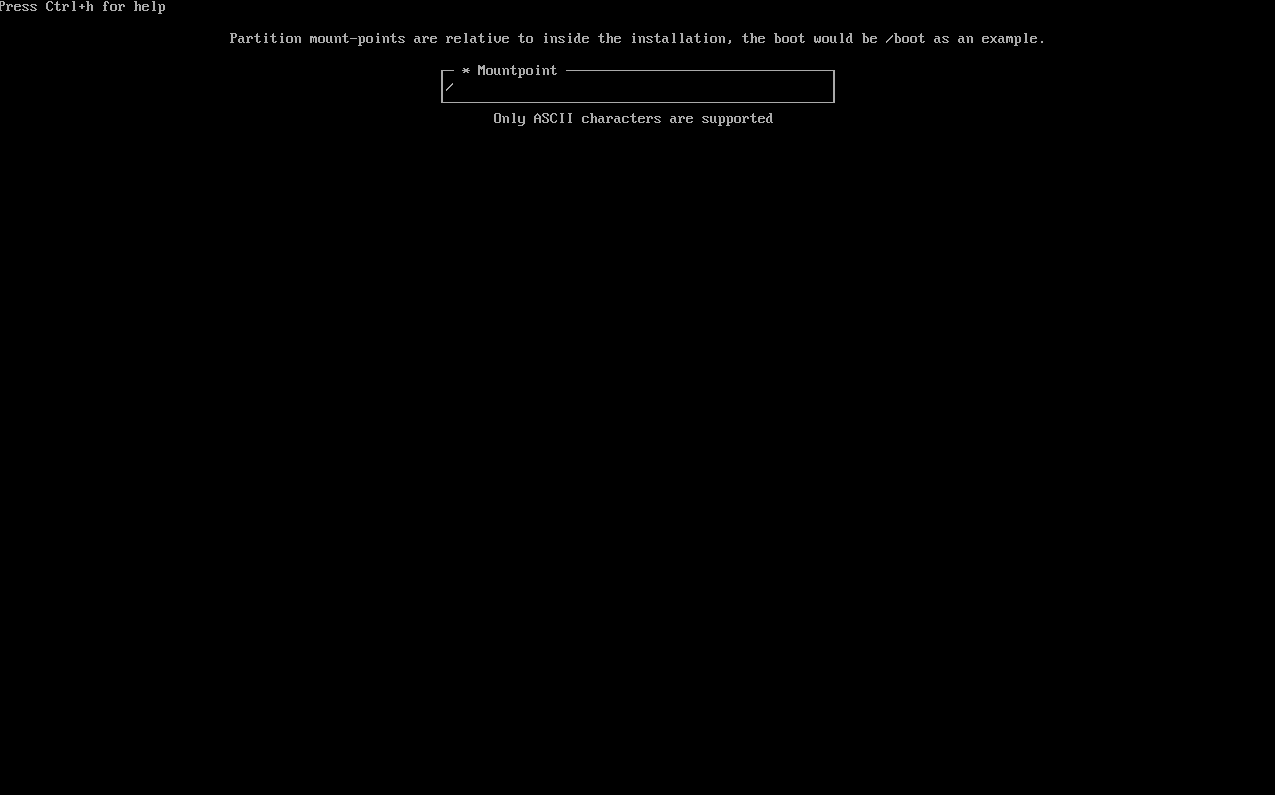 Press **Enter** and you will enter previous menu with your disk layout. Remember the `Size` of your free partition: 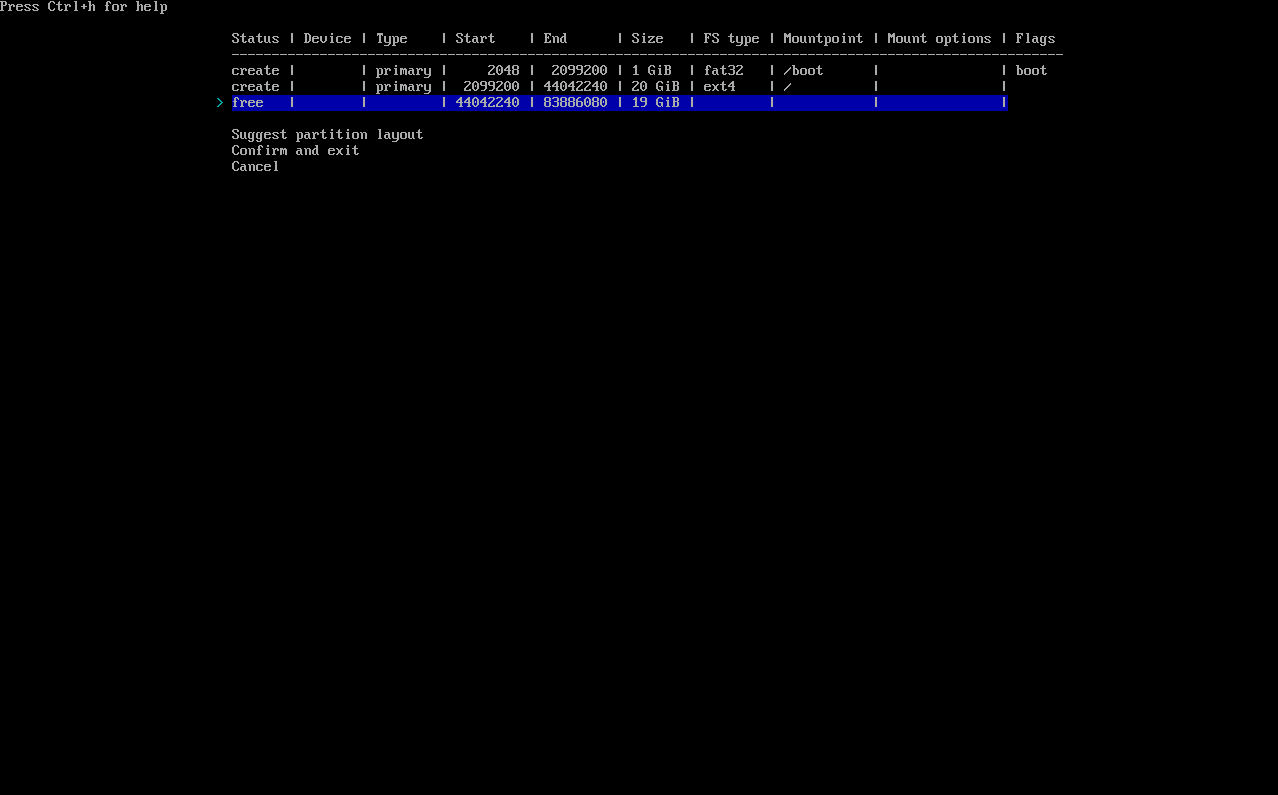 Choose your `free` partition and press **Enter**: 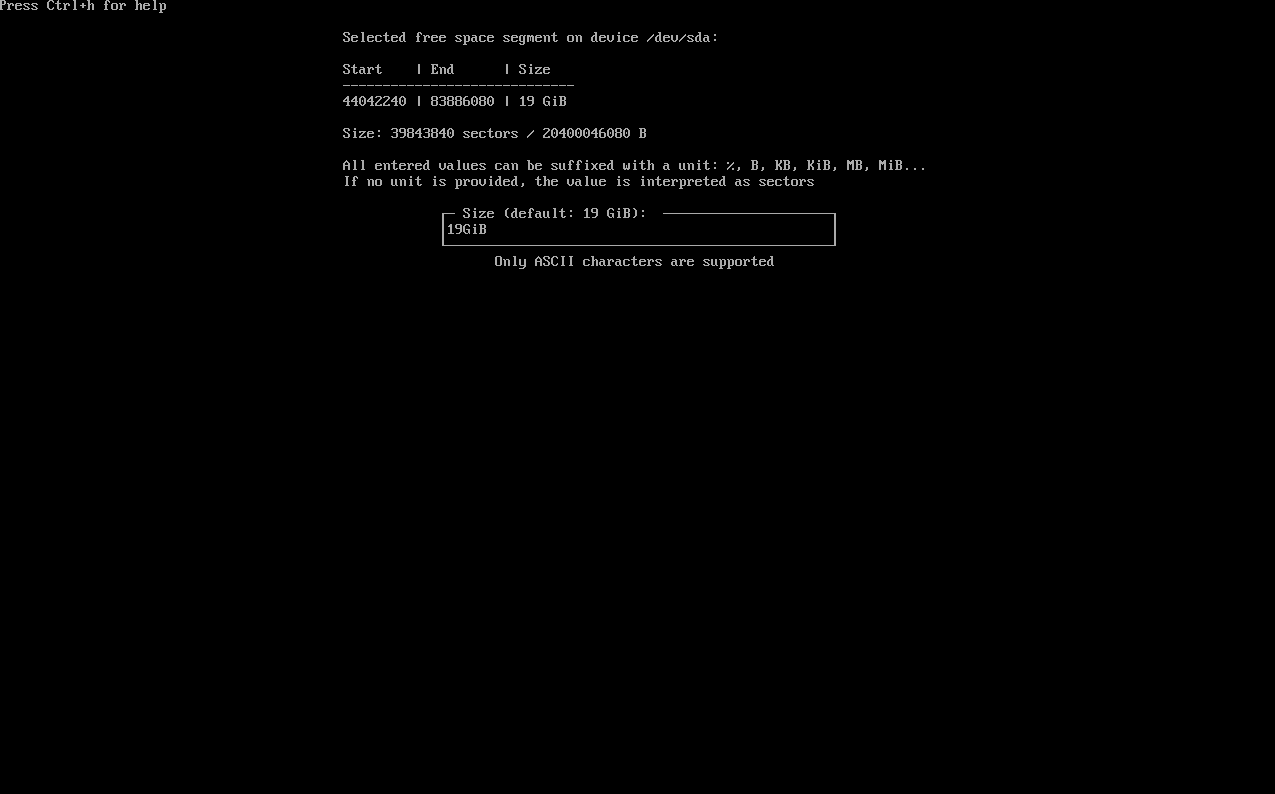 In this case, my free partition size is 19GiB, in your case - write your free partiton size from previous step:  Choose `ext4` filesystem: 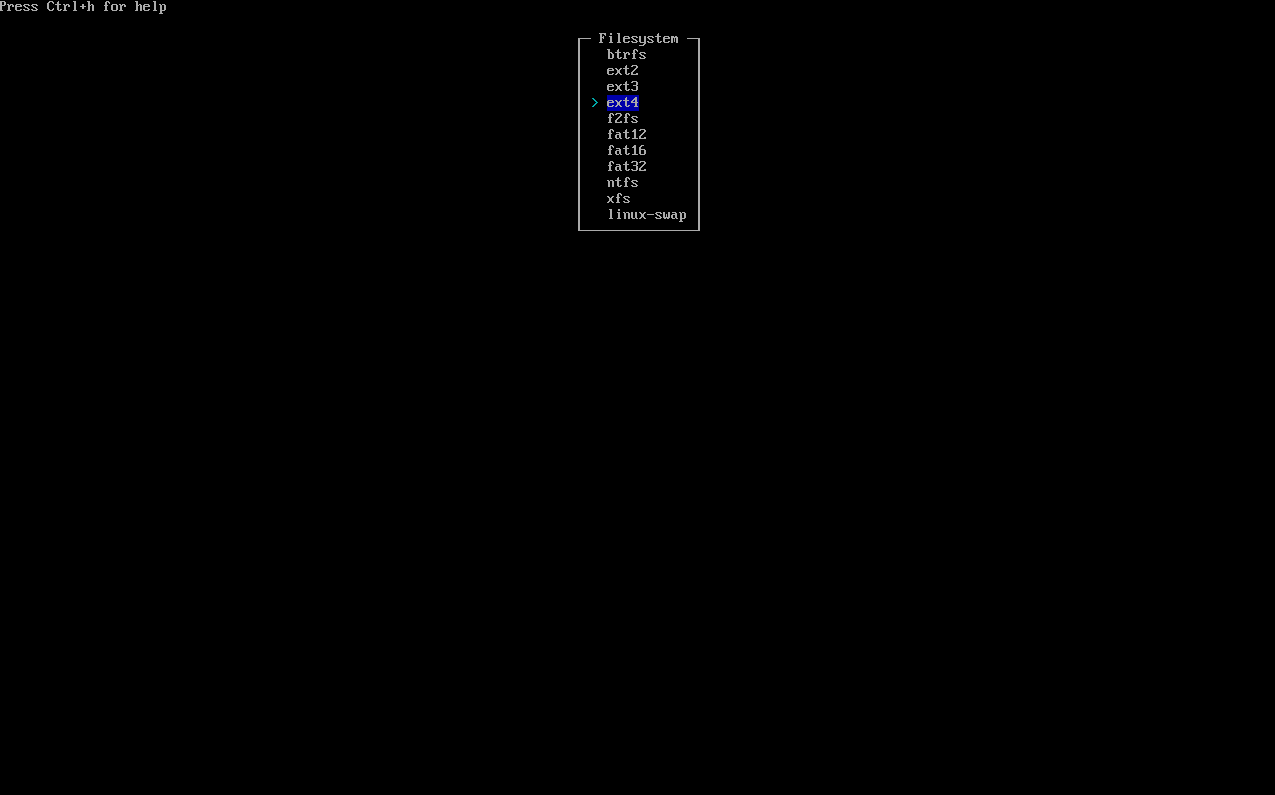 Choose mountpoint `/home`: 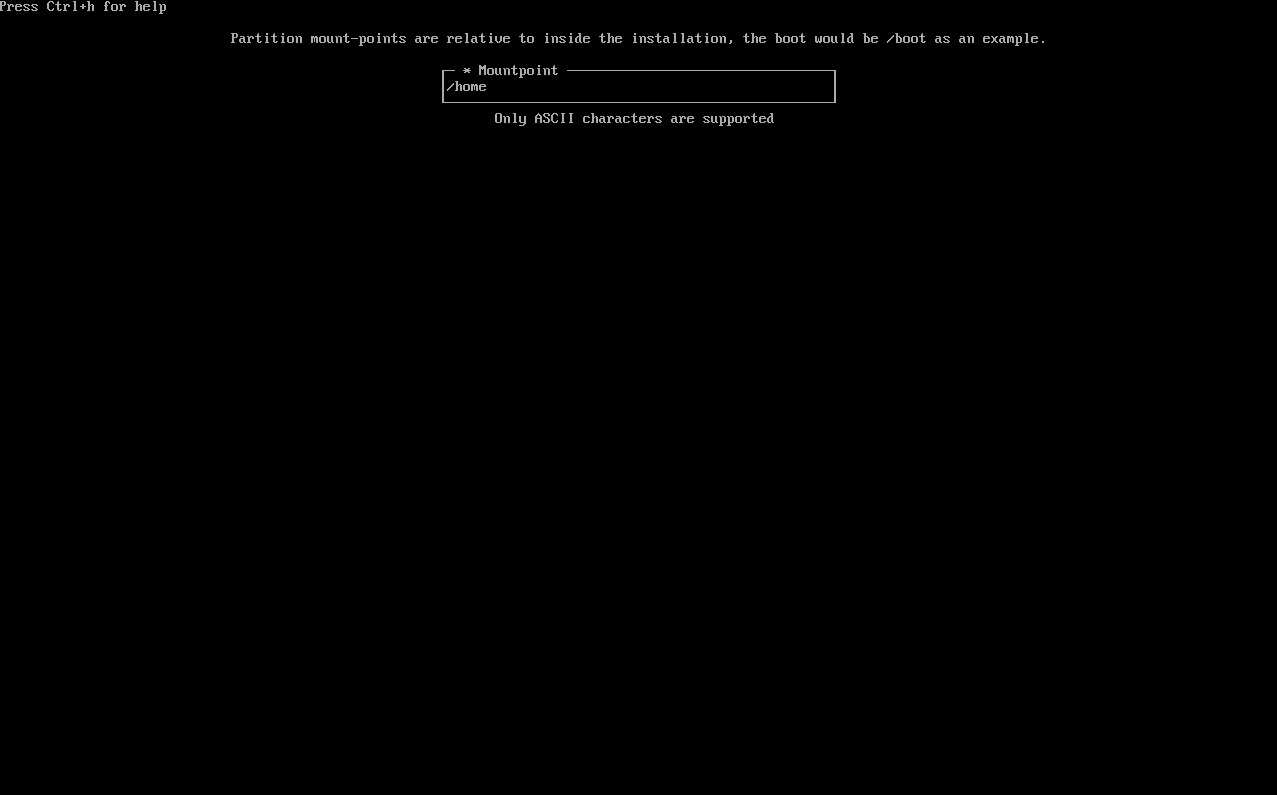 And press **Enter** and you will back to the `Disk configuration`: 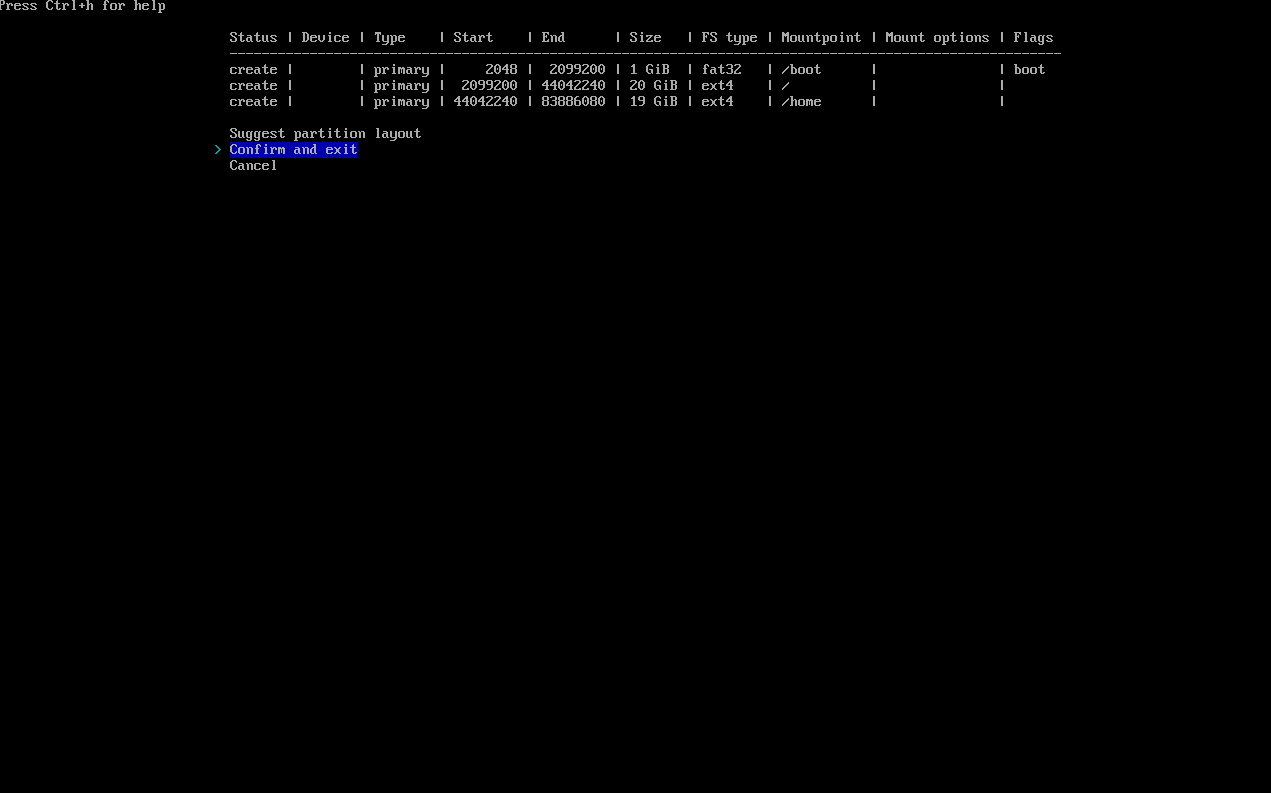 So, after doing this steps, as you see, you have `/boot`, `/` and `/home` partitions! Choose `Confirm and exit` and press **Enter**: 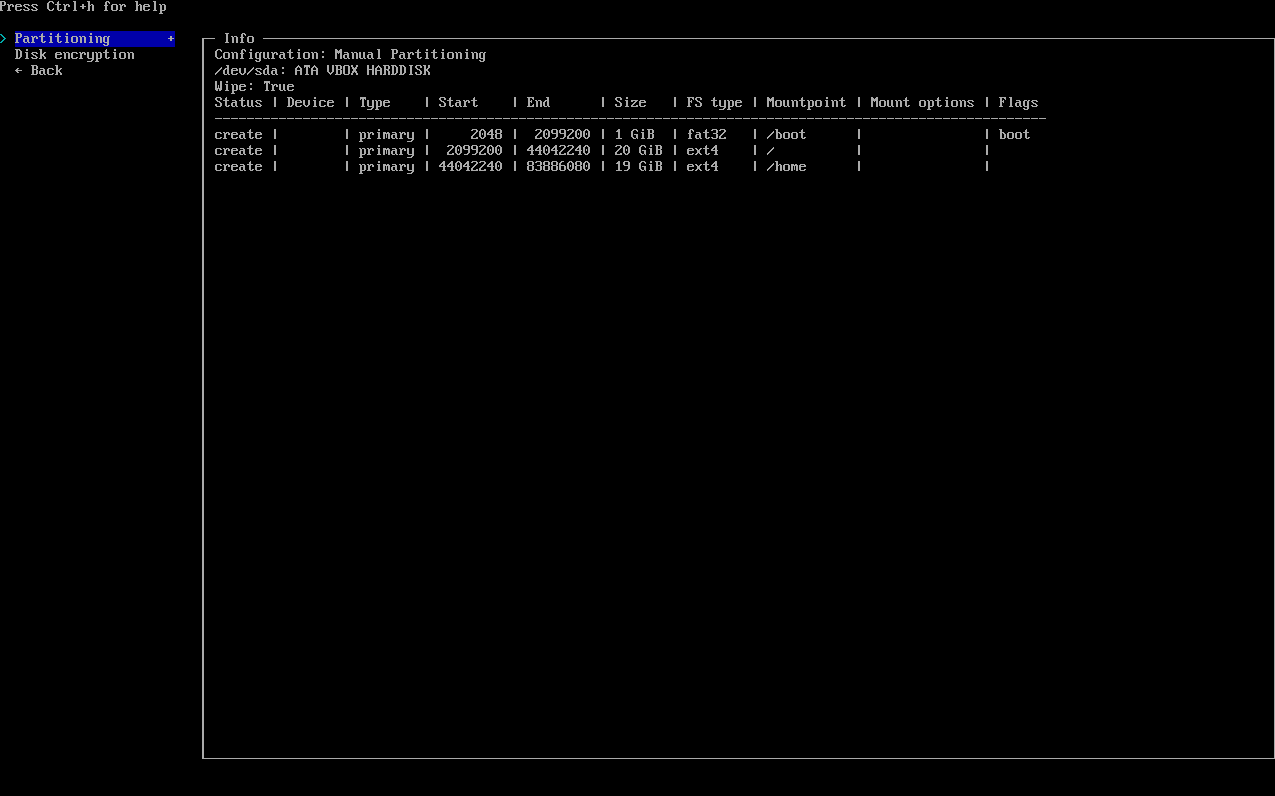 Choose `Back` and you will back to the main menu of installation: 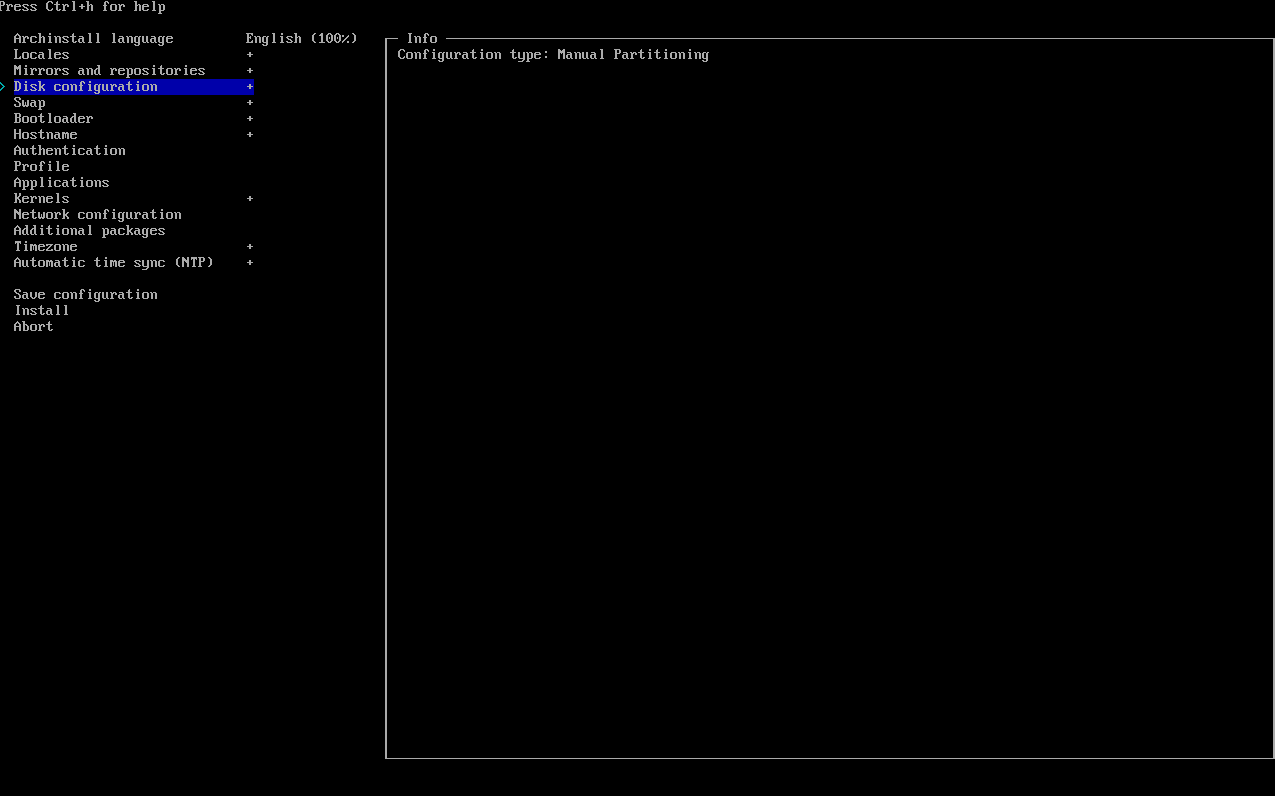 8. Go to the `Bootloader`: 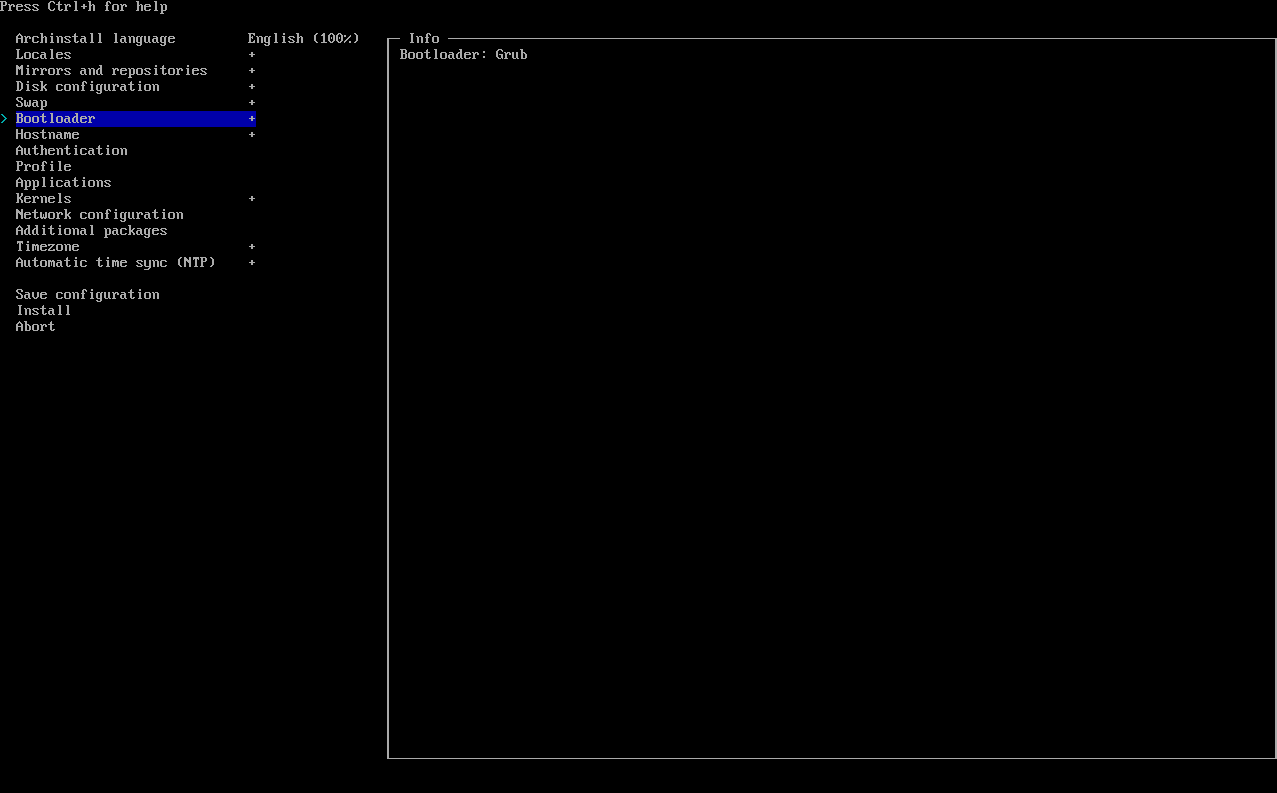 In my case there is a `grub` as default bootloader (because of legacy BIOS in VM) In your case there will be `systemd-boot` as default (for UEFI BIOS) or the same `grub` as default (for legacy BIOS). 9. Go to `hostname`: 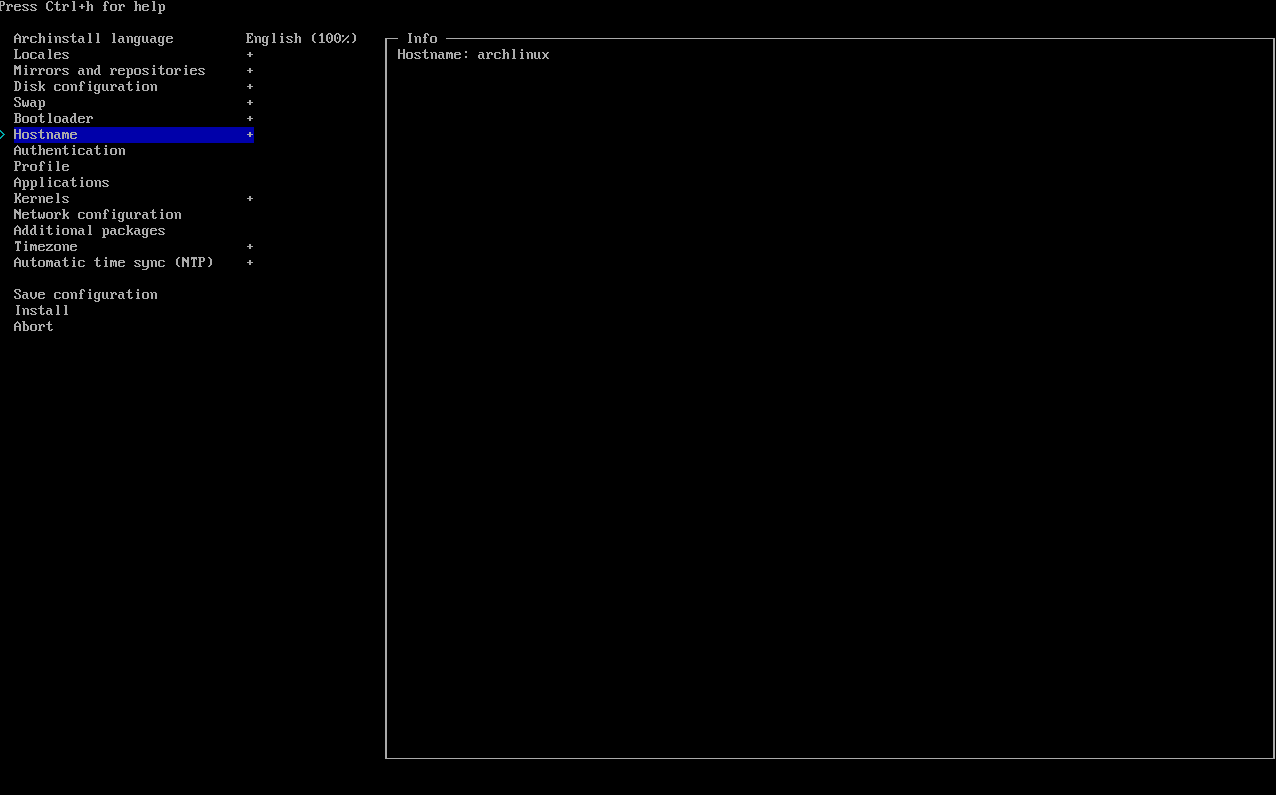 Press Enter and there you can write anything as you want(limitations 1-63 letters): 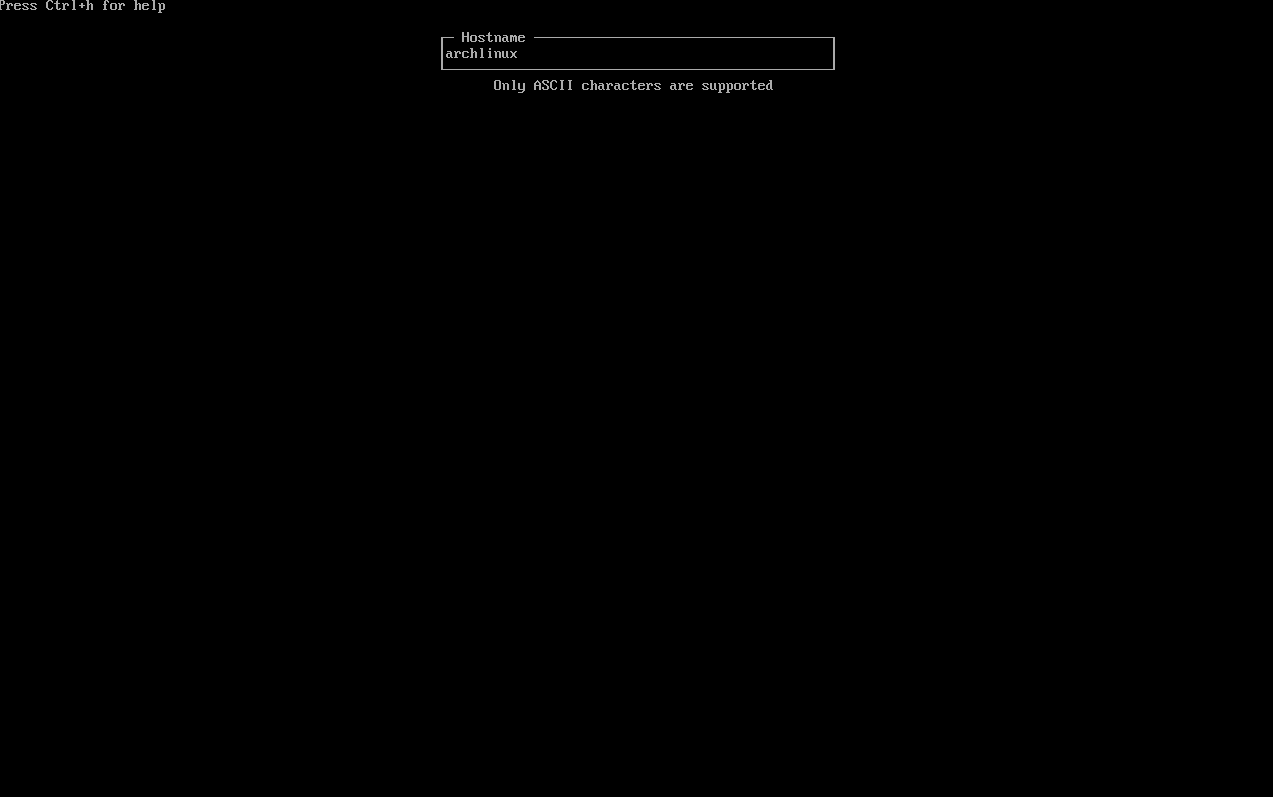 After this, your `hostname` will appear in main menu of the installation like this: 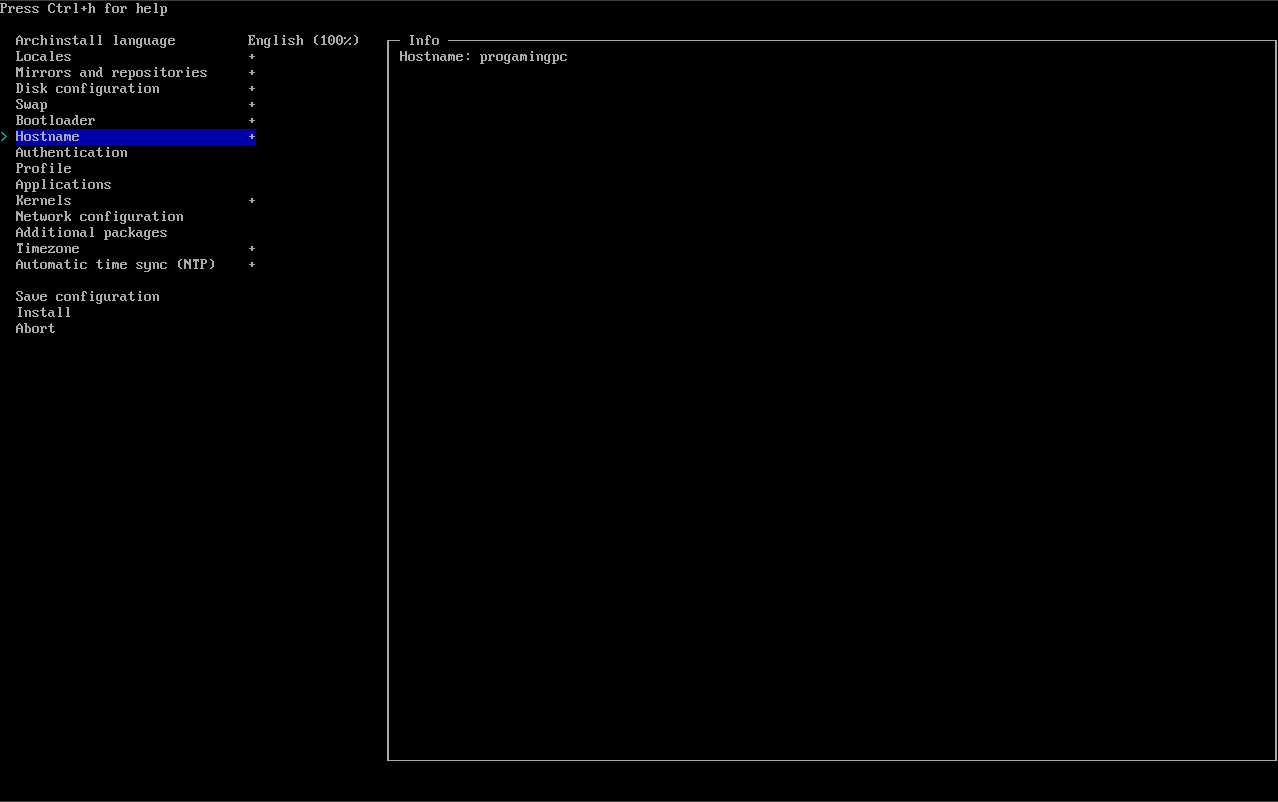 10. Go to `Authentification` and press **Enter**:  Here, choose `Root password` press **Enter** and you will enter the menu, where you can type the root password: 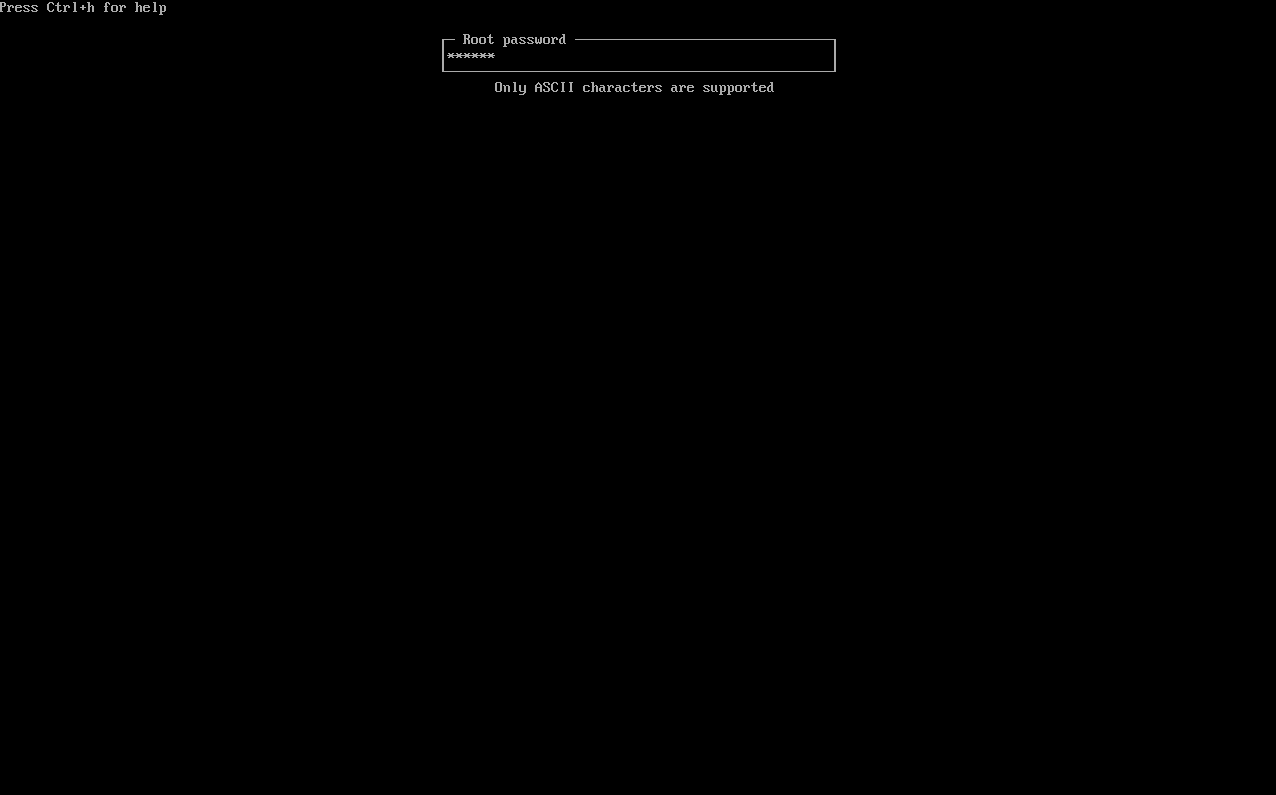 After you entered your password for root, press **Enter** and type your password again for confirmation: 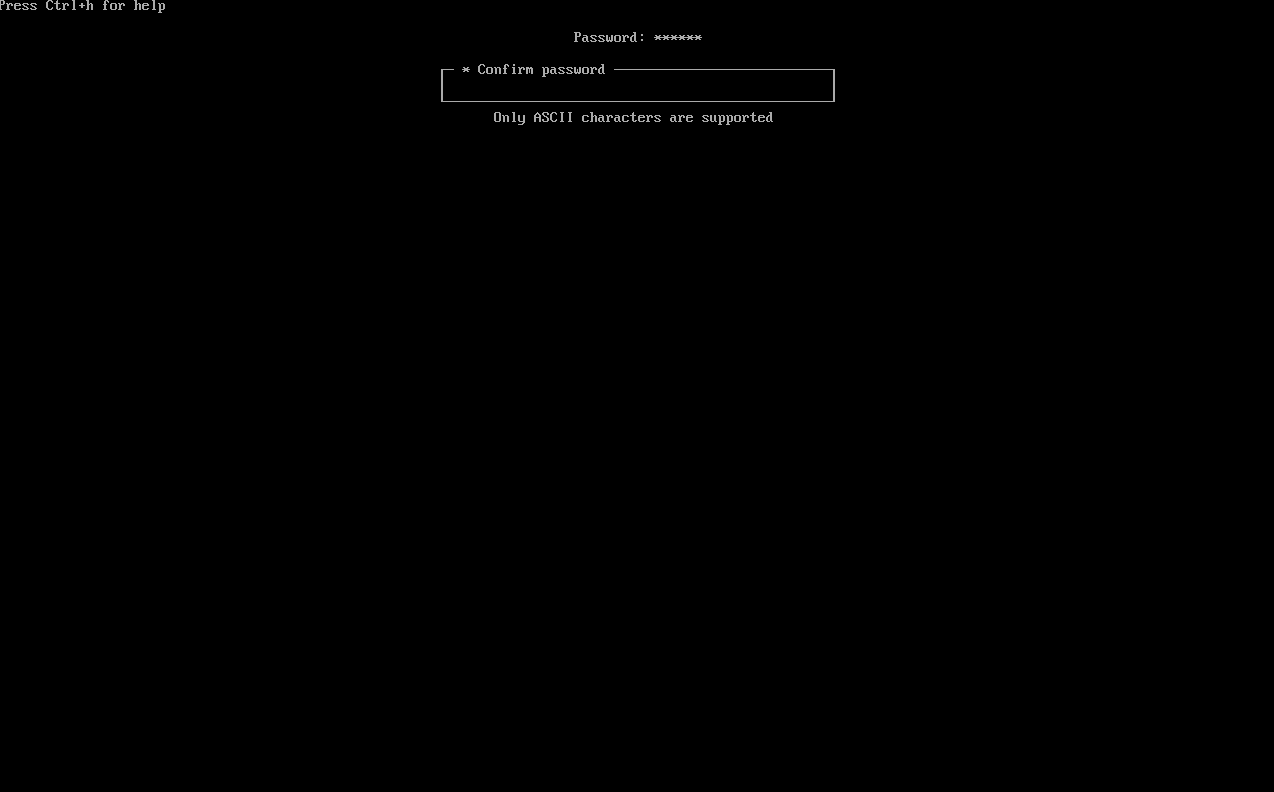 Press Enter, you will back to `Authentification` menu, choose `User account`:  Press **Enter** and you will enter this menu: 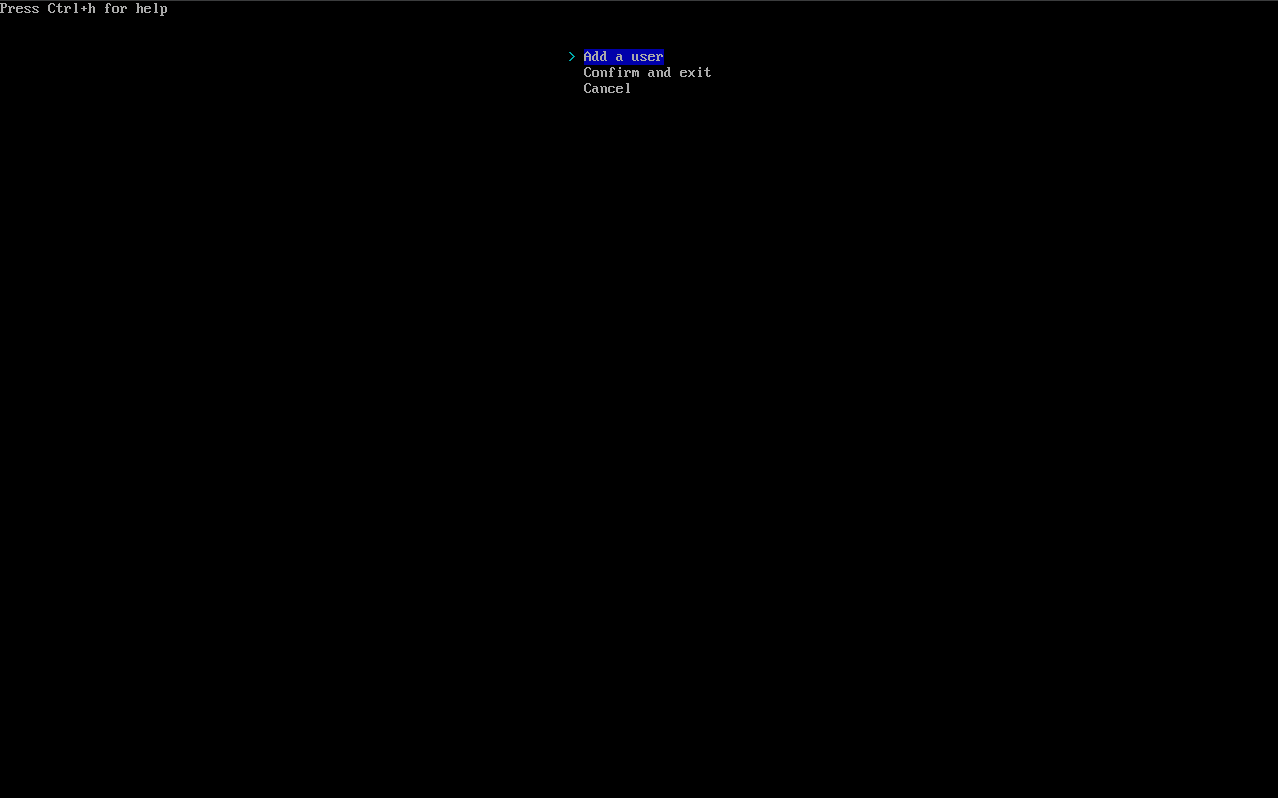 Choose `Add a user` and press **Enter**: 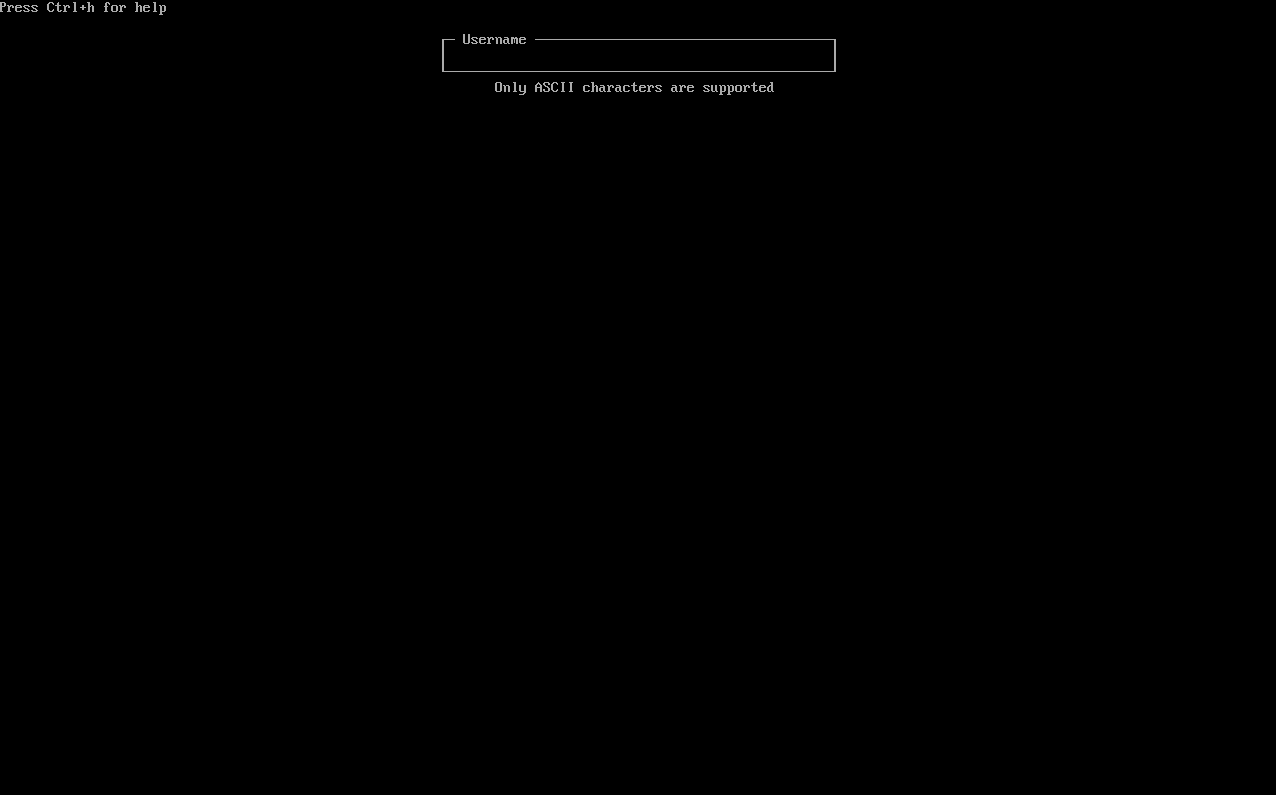 Type your prefered username (you cant just type **admin**, it's forbidden):  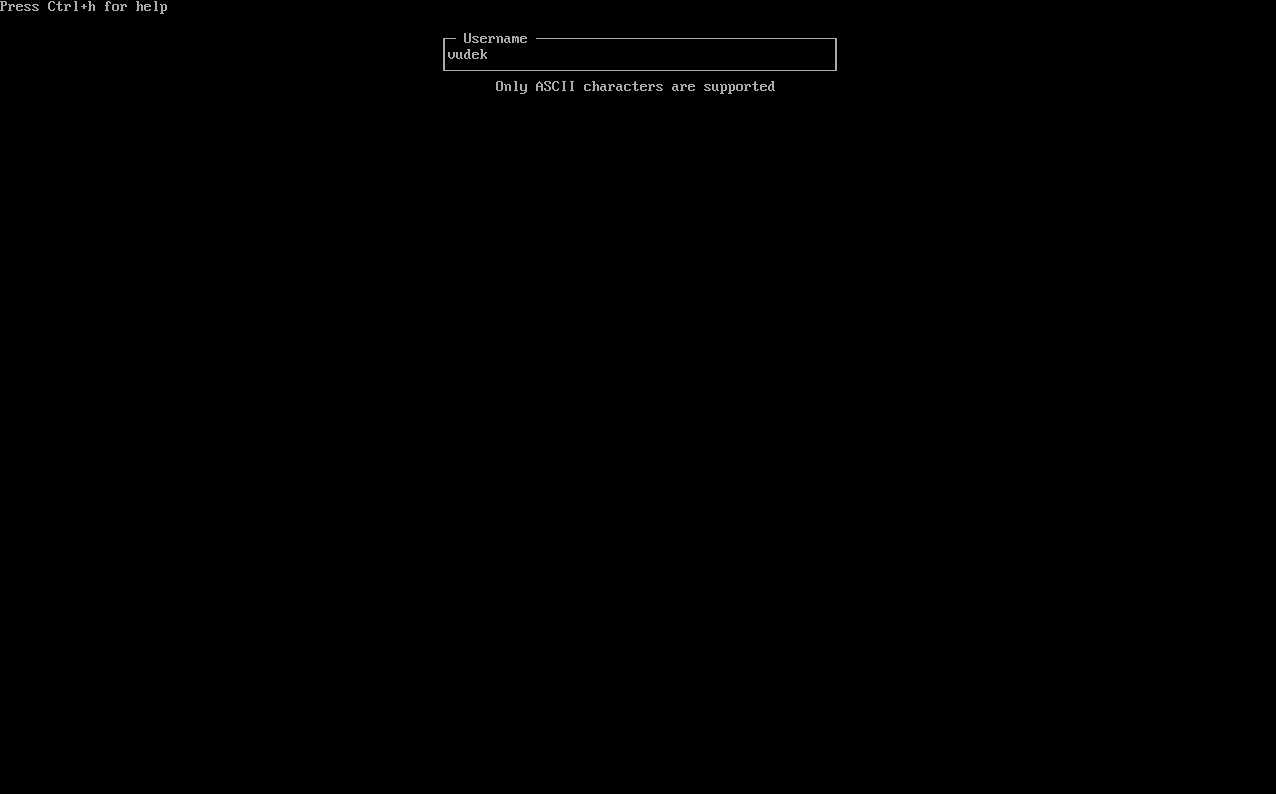 On next step you will see the same menu as in prevoius step, just enter your password for user account twice: 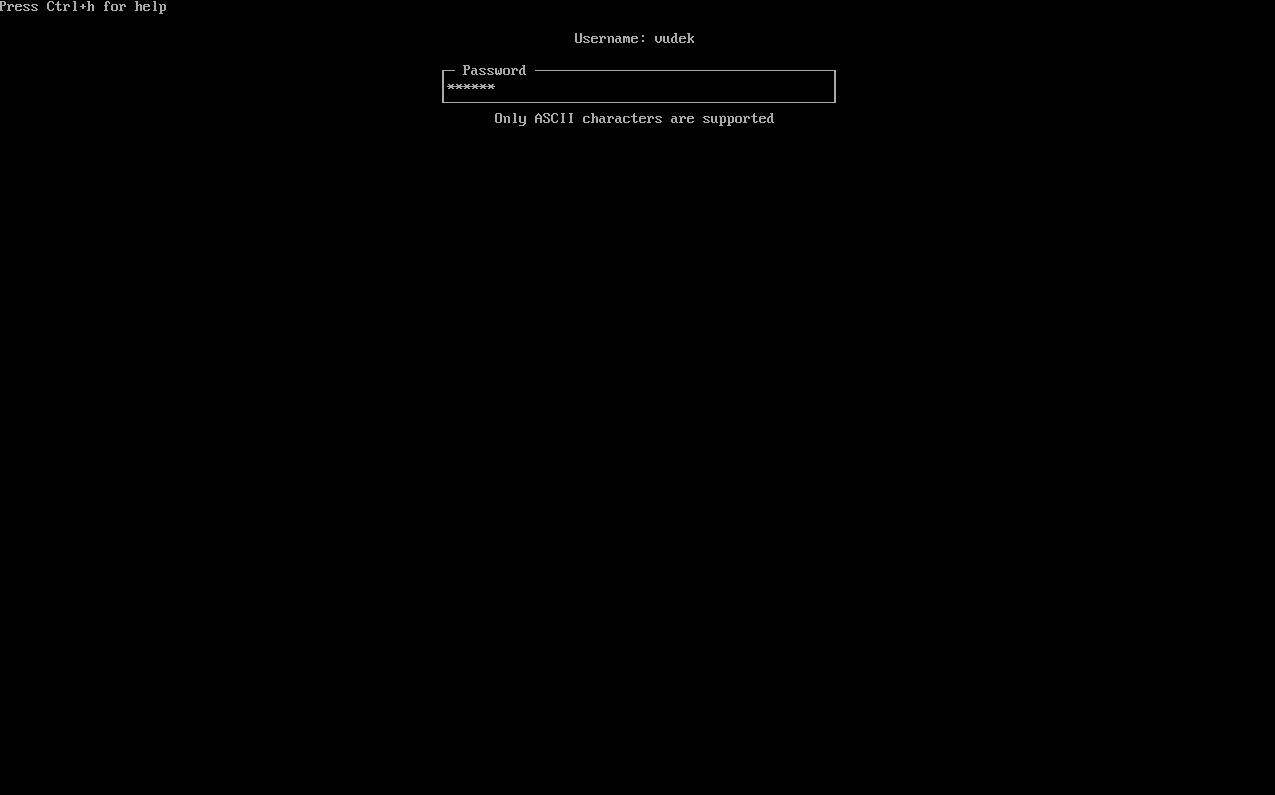 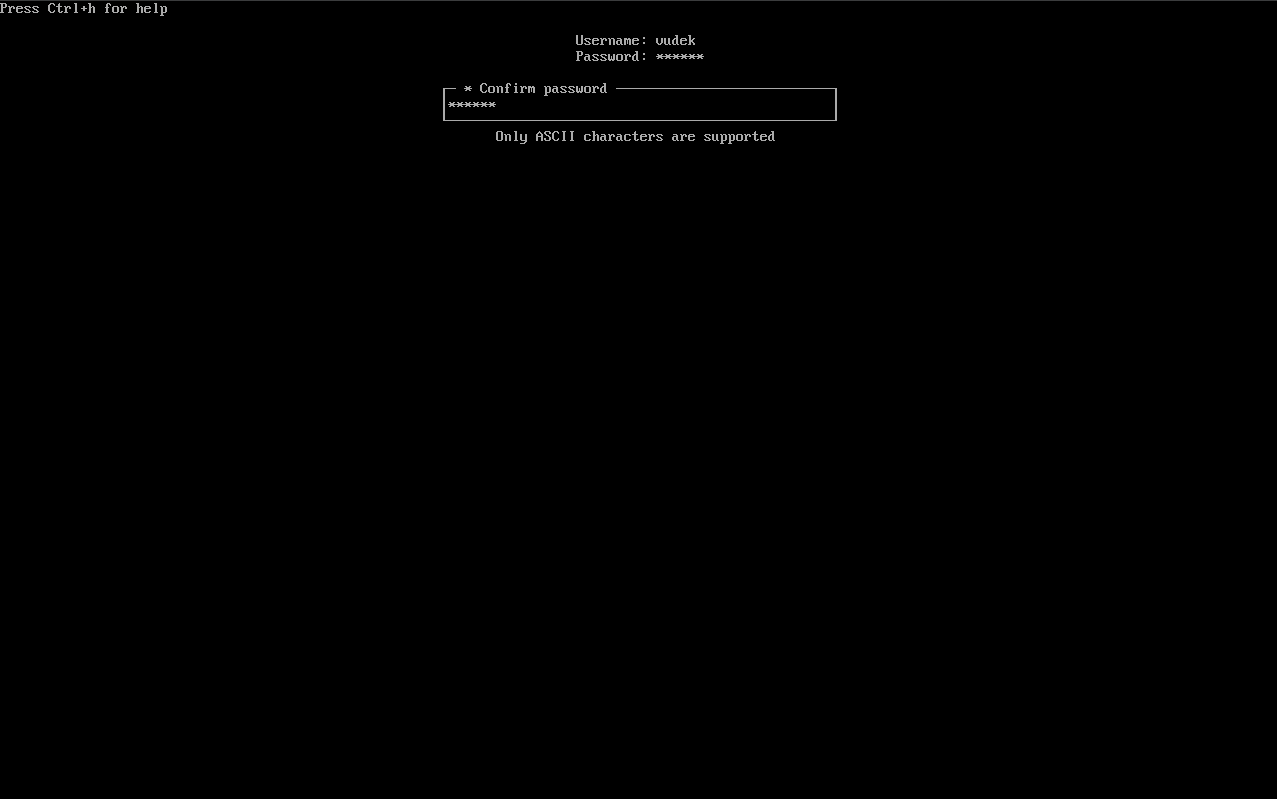 After this, you will be promted with question "Should %user% be a superuser (sudo)". Choose yes and press **Enter**: 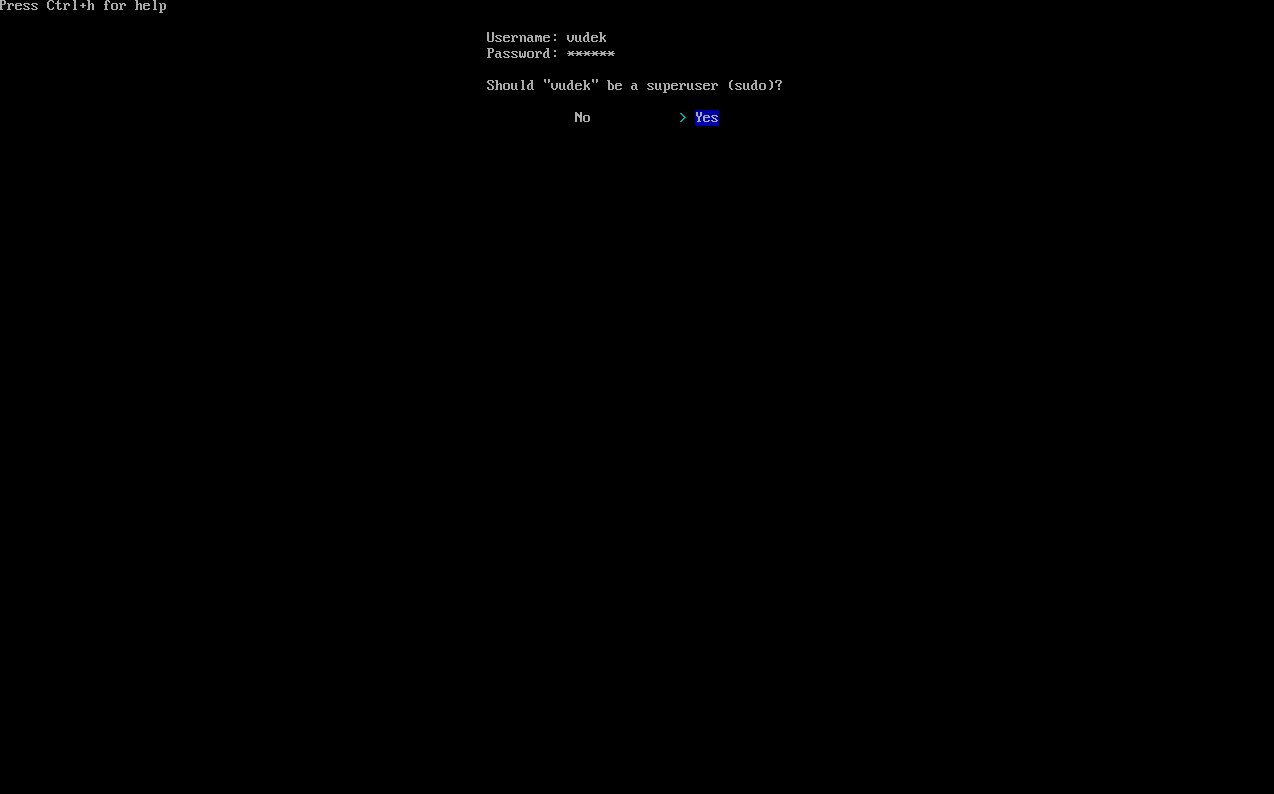 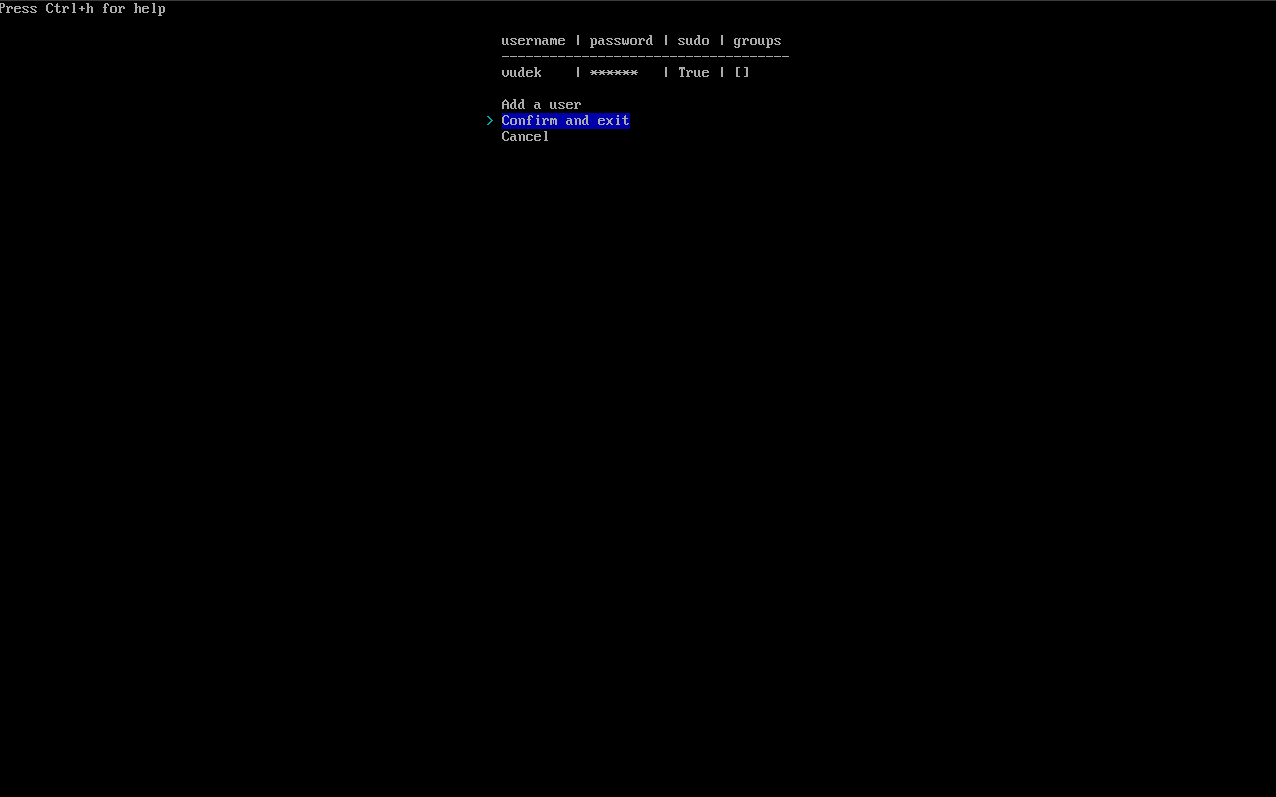 Confirm your changes. Choose `Confirm and exit` and press **Enter**: 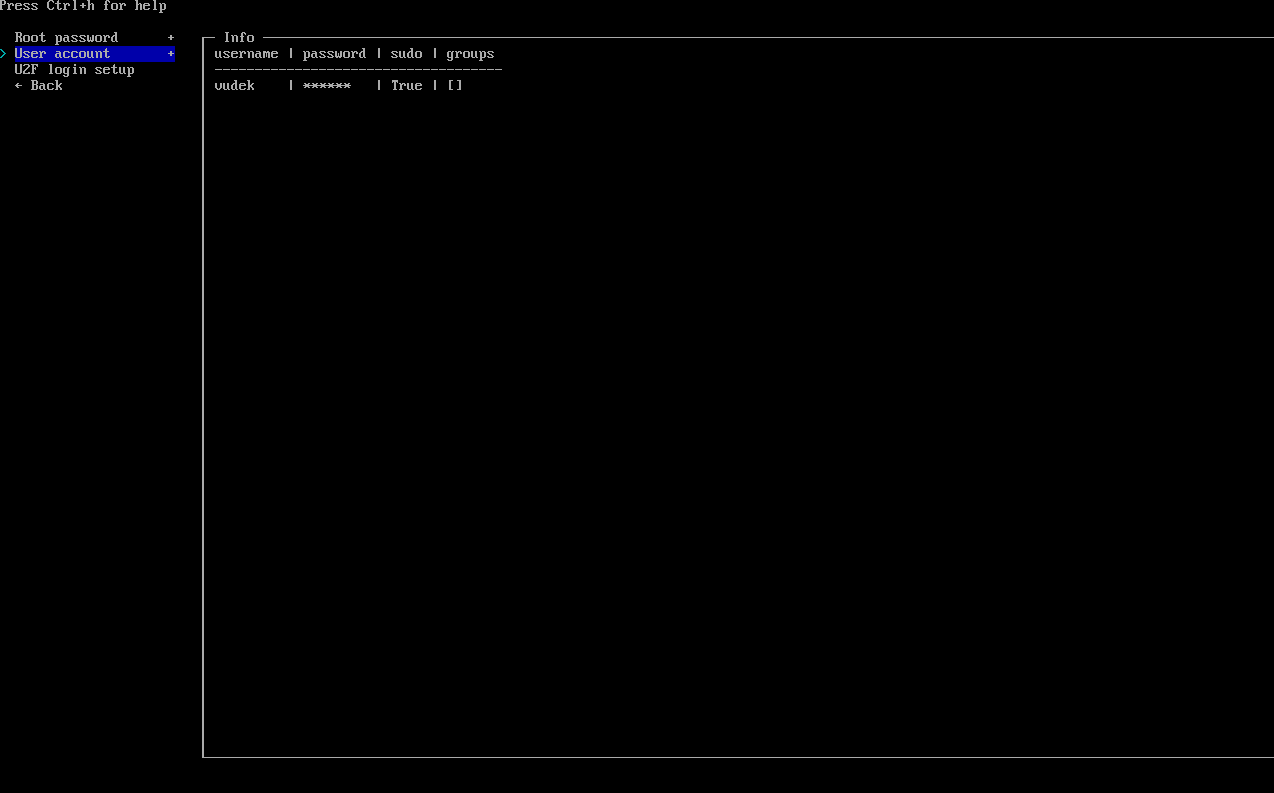 Choose `Back` and you will back to the main menu of installation: 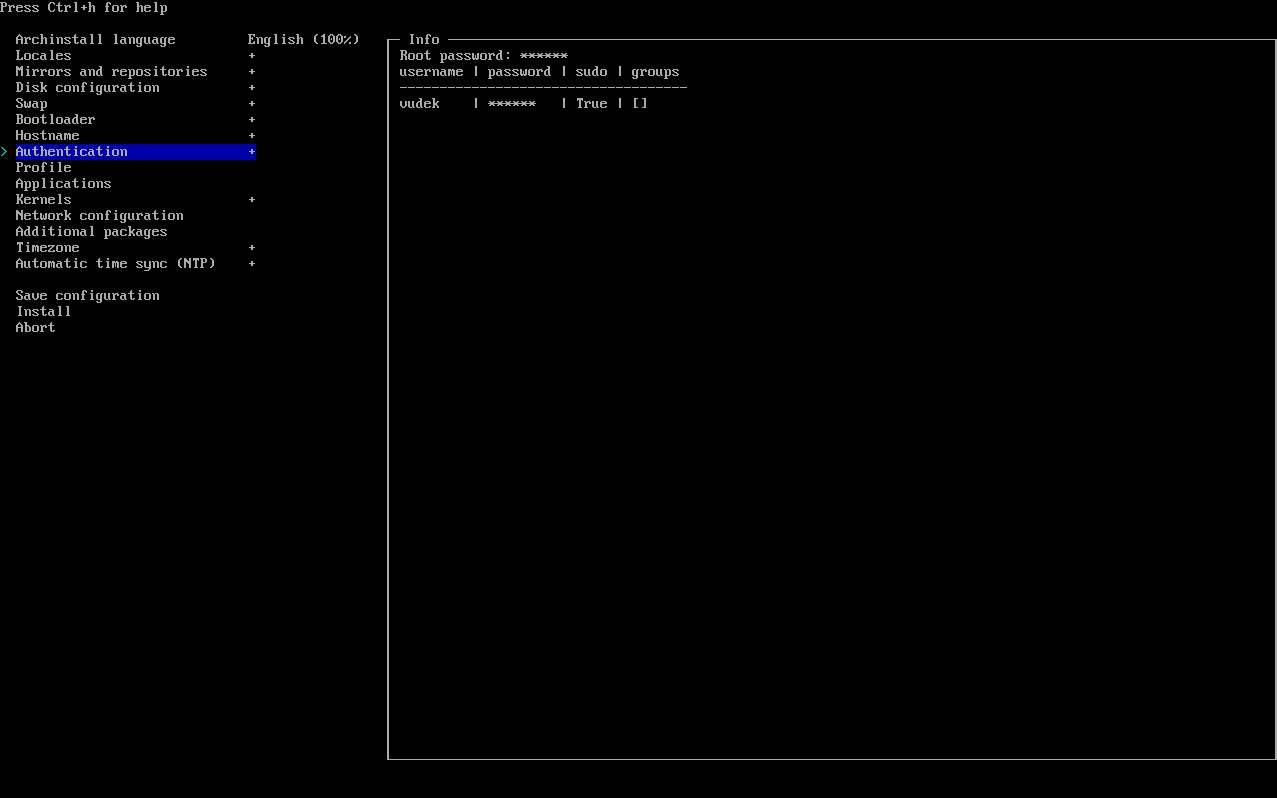 If everything is right, and your root have password and you have an user account with password and sudo, go to the next step. 11. Go to `Profile` section and press **Enter**:  Choose `Type` and press **Enter**: 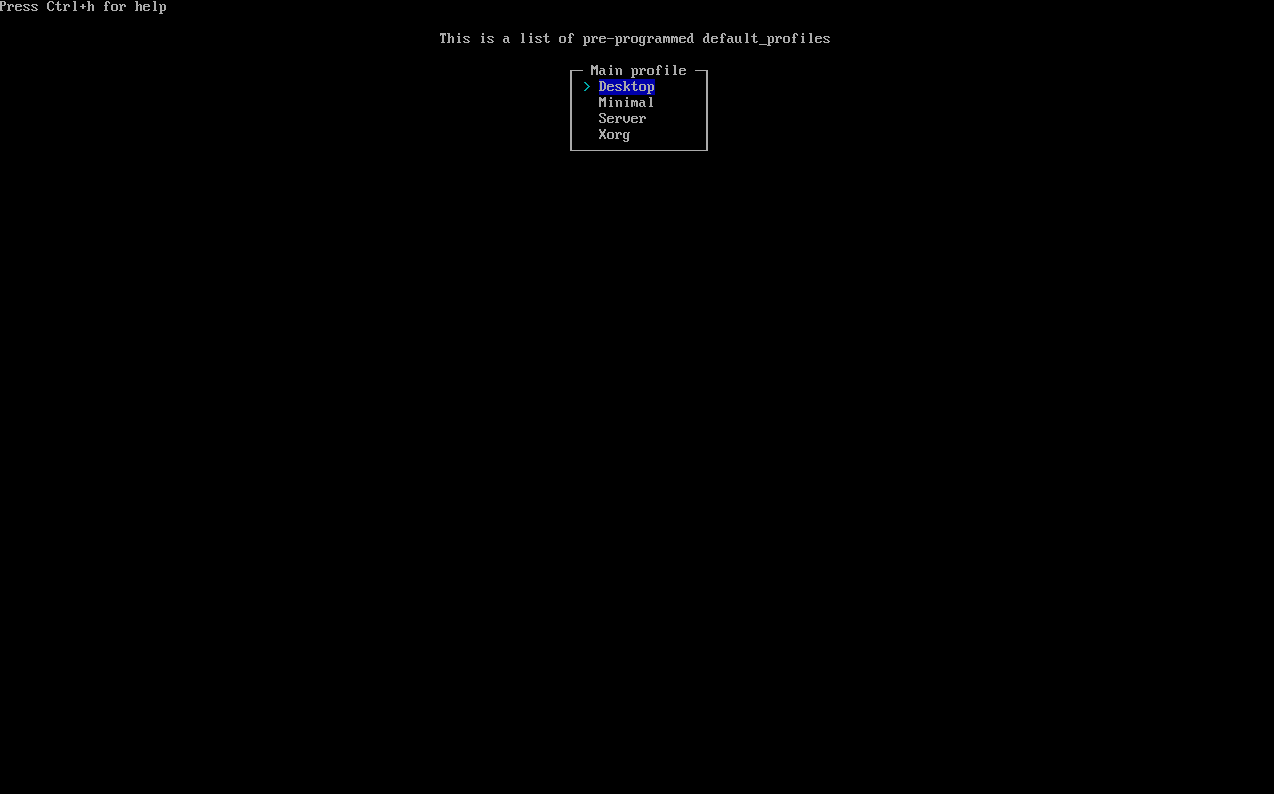 Choose `Desktop` and press **Enter**: 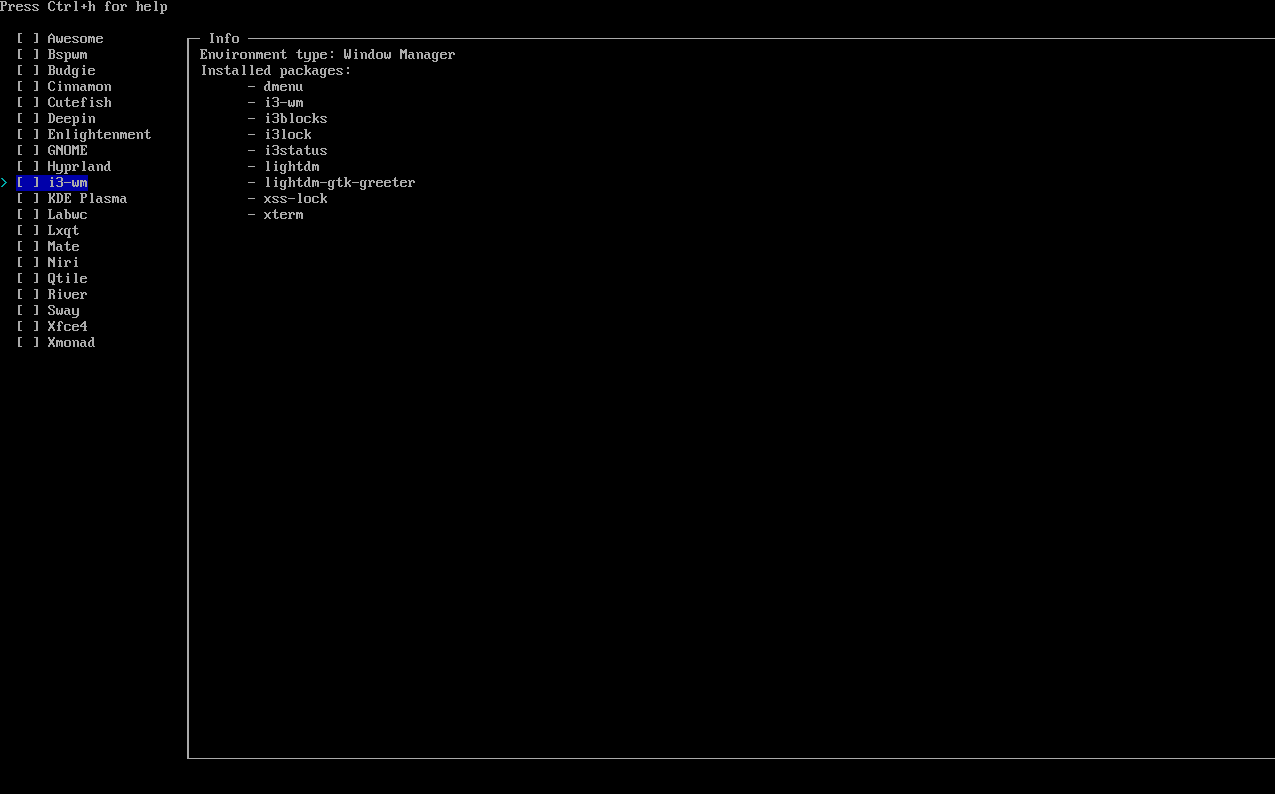 You will enter menu, where you can choose your desktop enviroment. For better latency, choose i3-wm and press **Enter**: 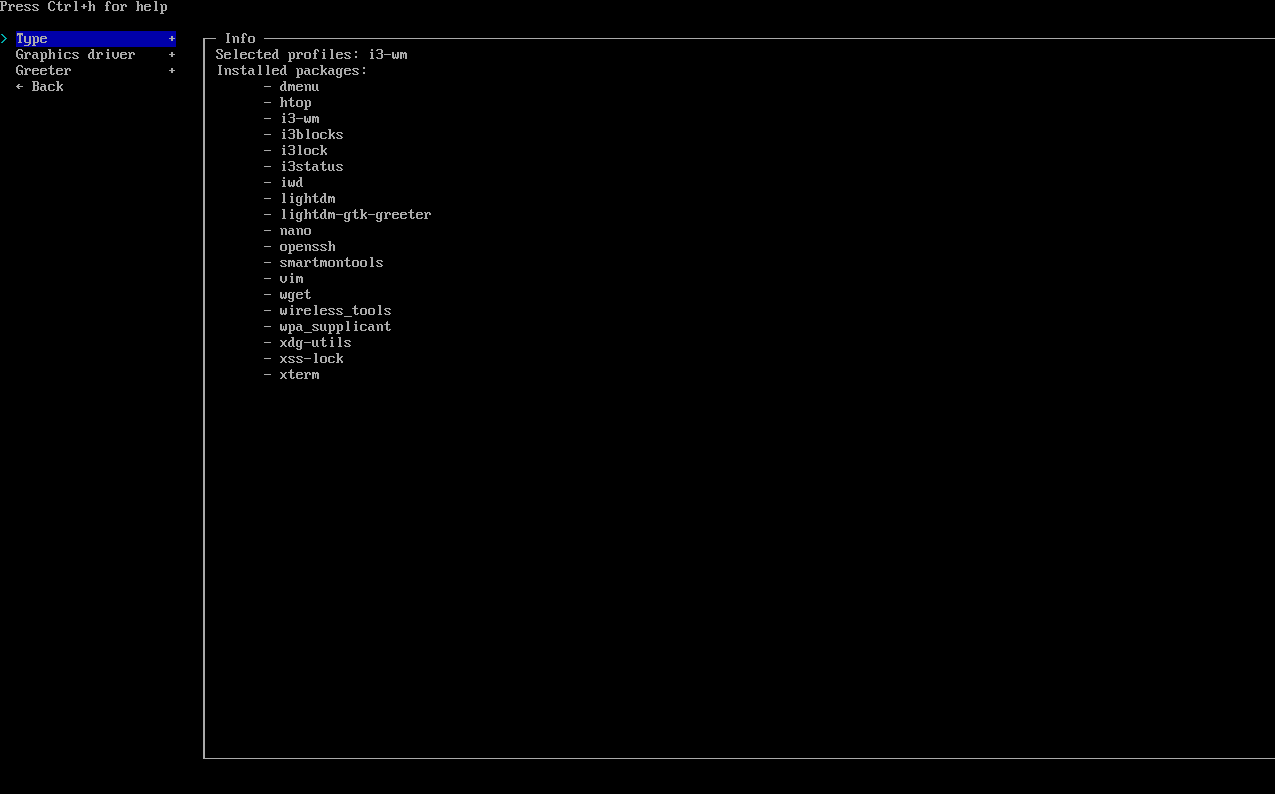 You will be back to the `Profile` menu, choose `Graphics driver` and press **Enter**: 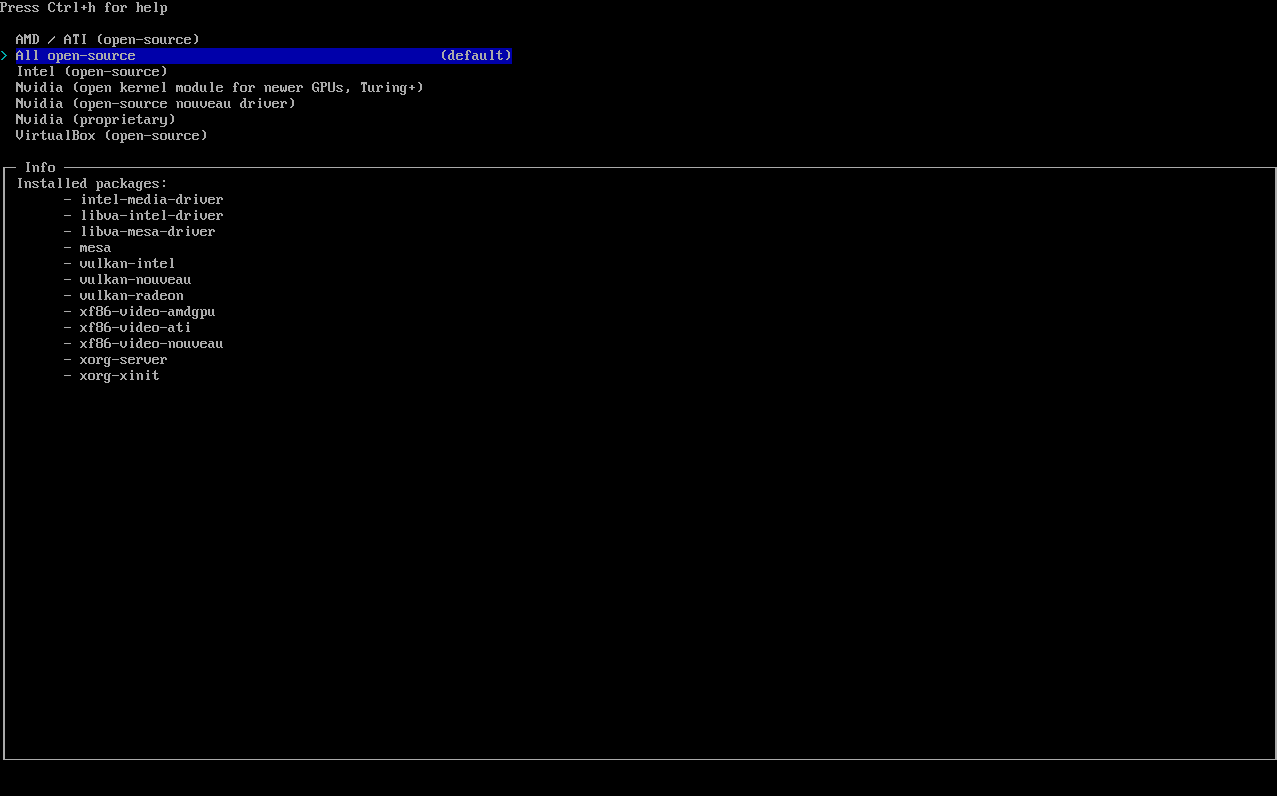 Here you can choose prefered graphics driver, according to your GPU. CheatSheet: - **AMD / ATI (open-source)** — For any AMD GPU - **All open-source** — This choose will install all open-source from this list. - **Intel (open-source)** — For any Intel GPU (Integrated or Arc). - **Nvidia (open kernel module for newer GPU's, Turing+)** — Choose if you have modern Nvidia GPU, starting from 20xx series. - **Nvidia (open-source nouveau driver)** — NEVER CHOOSE THIS LMAO. - **Nvidia (proprietary)** — Choose if you have non-modern Nvidia GPU (Before RTX series). - **VirtualBox (open-source)** — Choose for VirtualBox installation. After choosing your preffered GPU driver, press **Enter** and go back to the main menu: 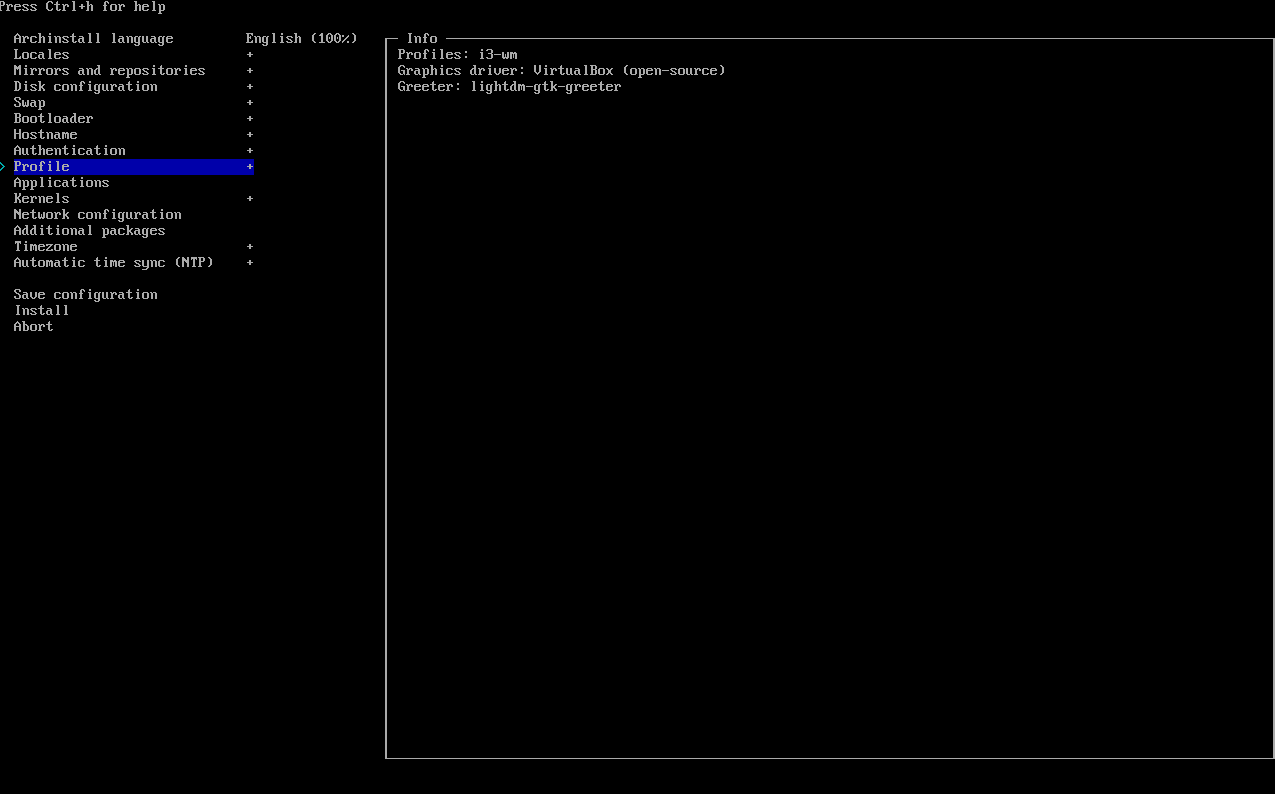 12. Go to `Applications` and press **Enter**:  Choose `Audio` and press **Enter**: 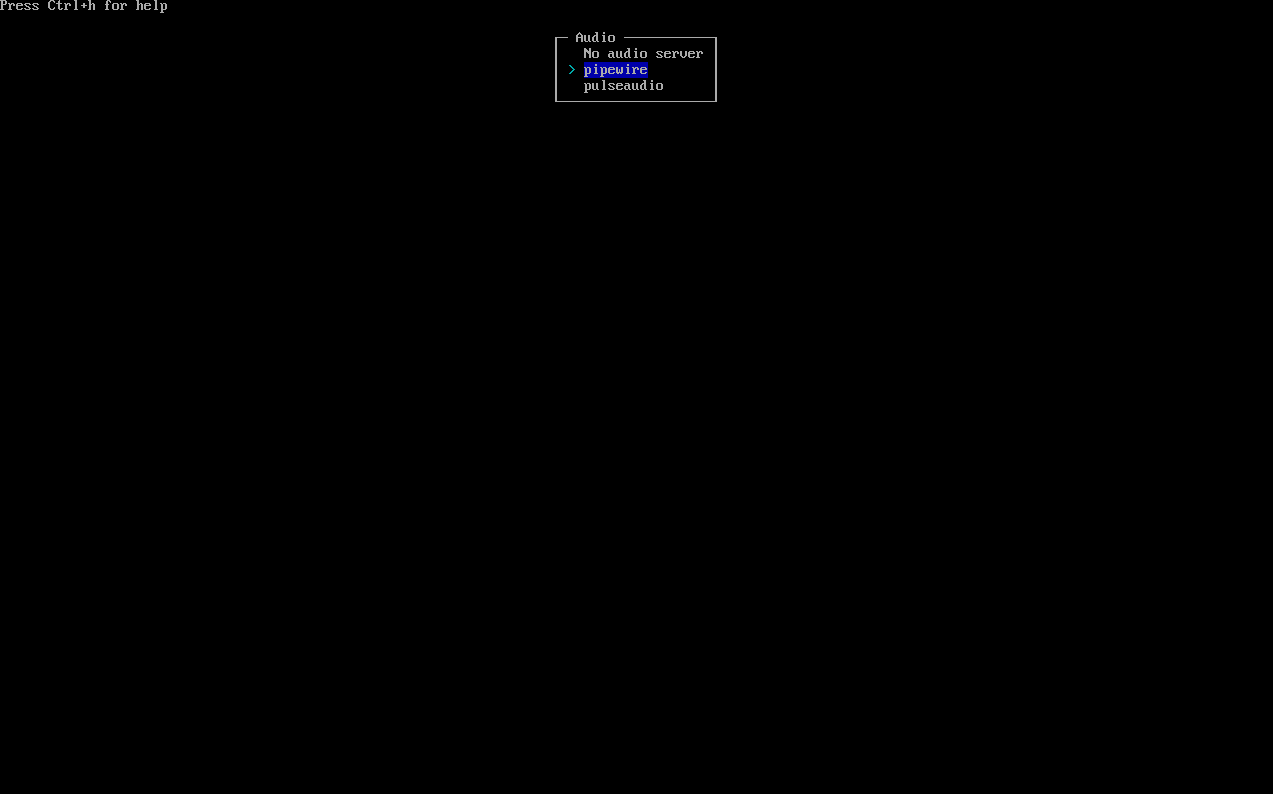 In this menu, choose `pipewire` and press **Enter**: 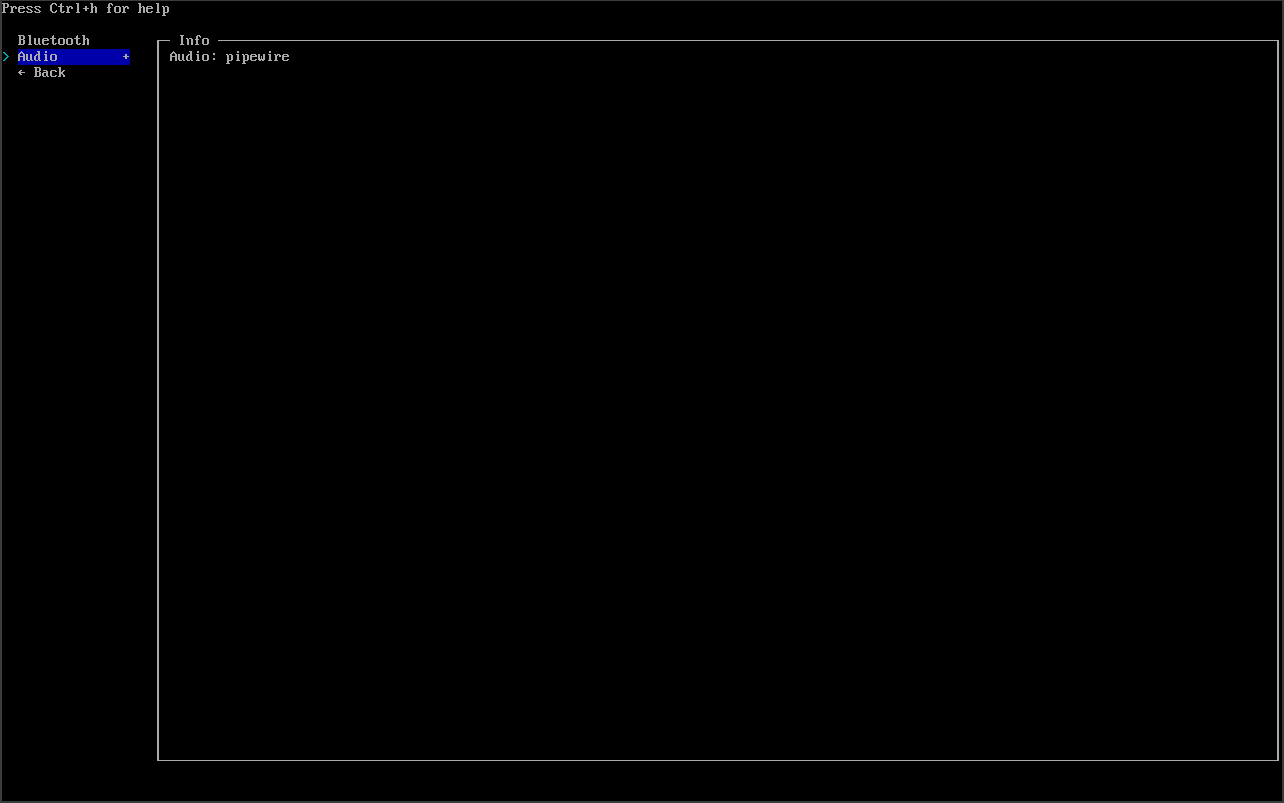 Choose `Back` and go back to the main menu, pressing **Enter**: 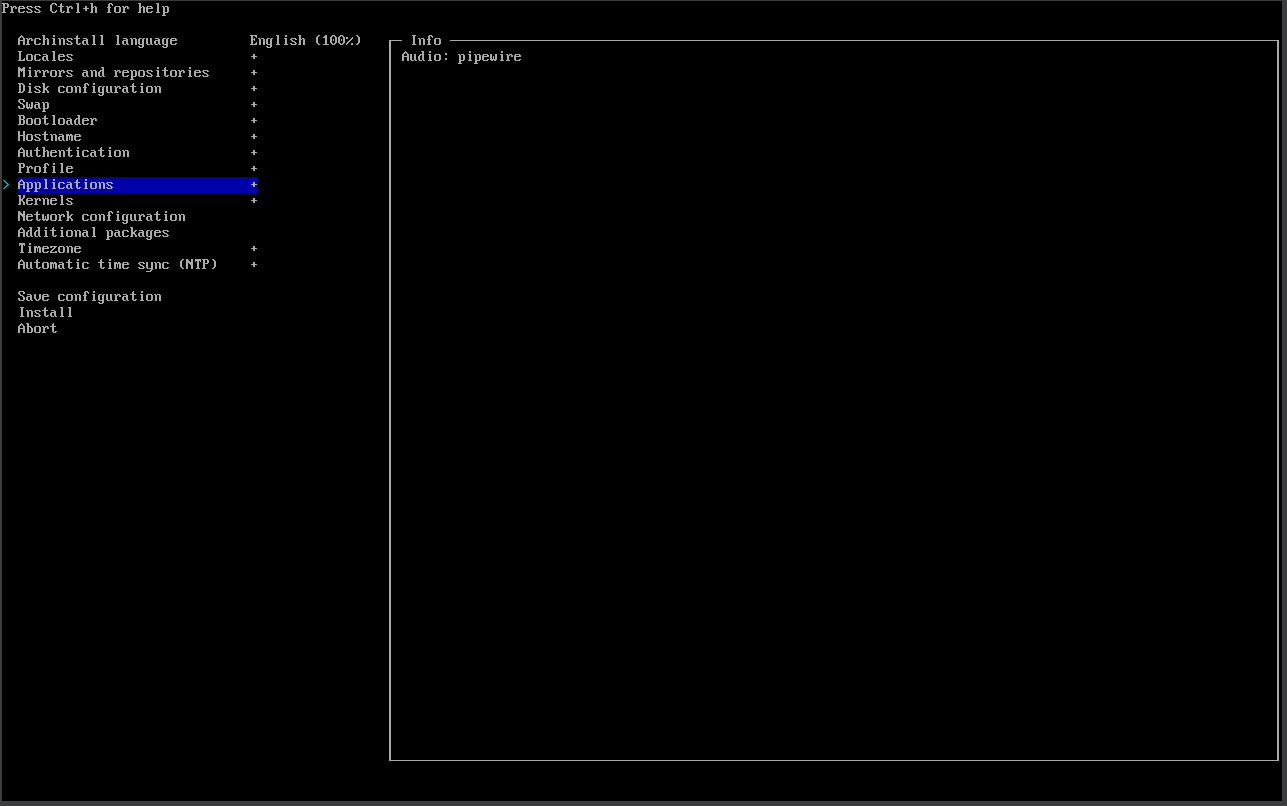 13. Go to `Kernels` and press **Enter**: 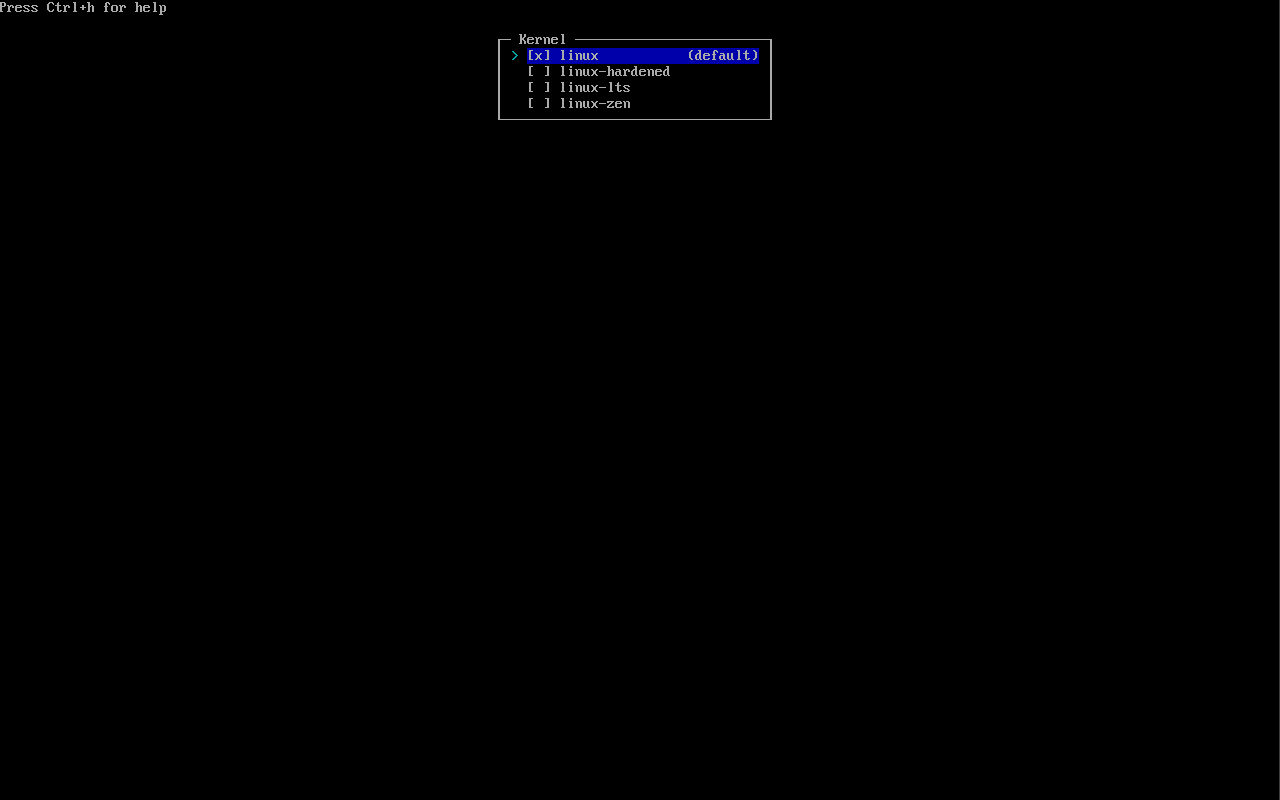 By pressing spacebar, remove `x` from `linux`, choose `linux-zen` press spacebar again and press **Enter**: 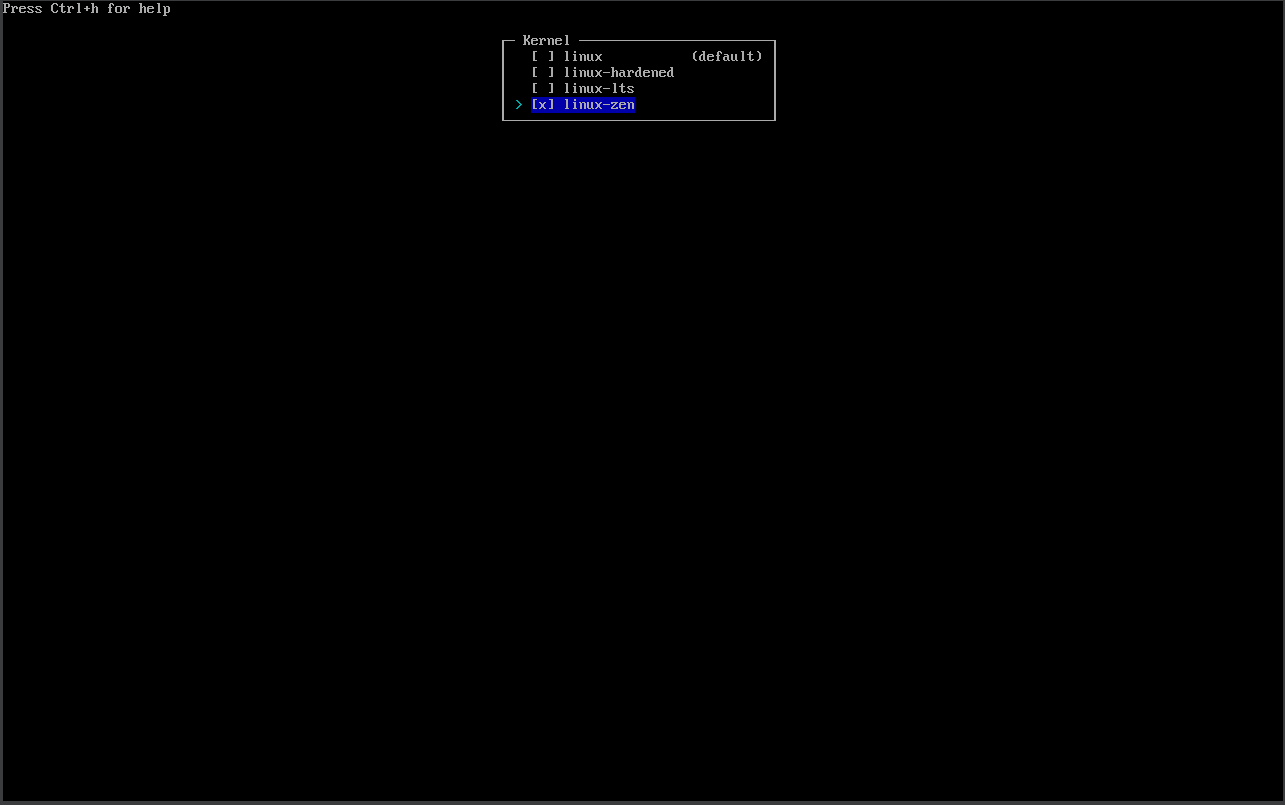 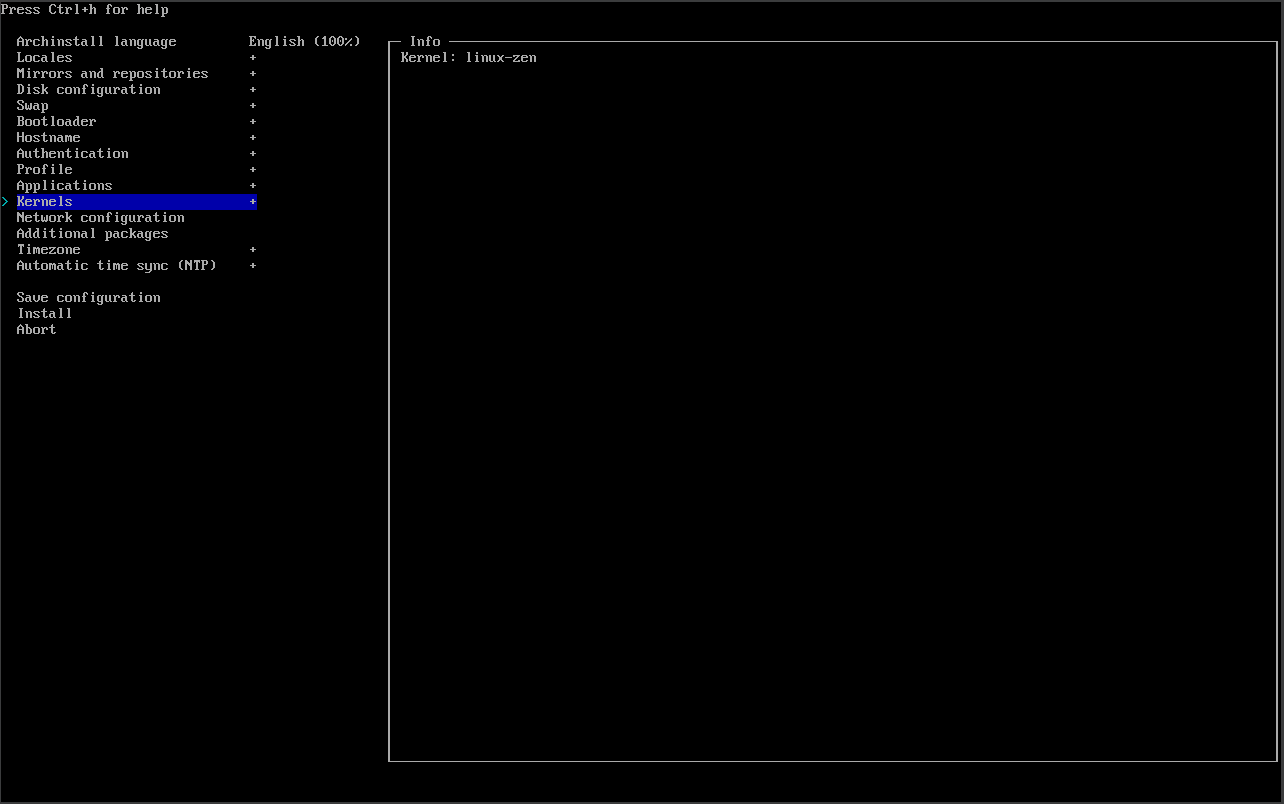 14. Go to `Network configuration` and press **Enter**: 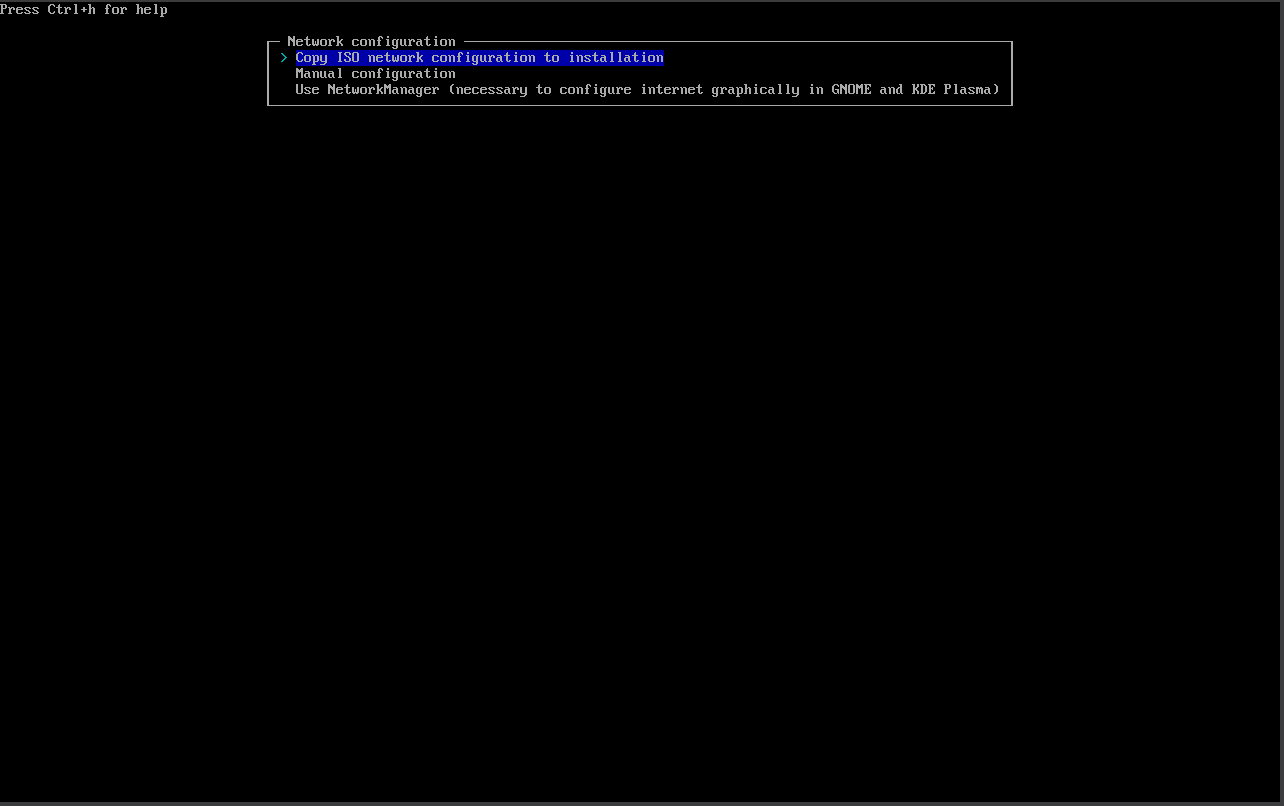 Choose `Copy ISO network configuration to installation` and press **Enter**: 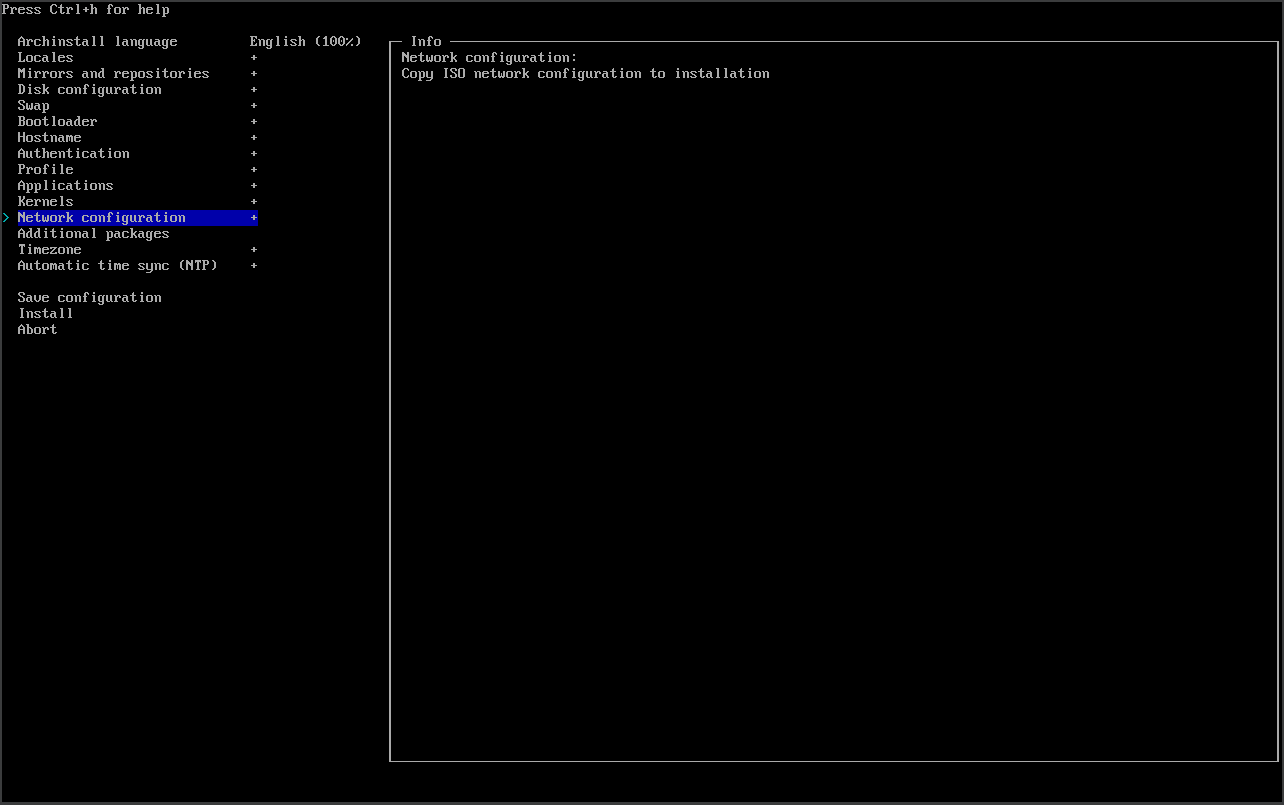 15. Go to `Additional packages` and press **Enter**: 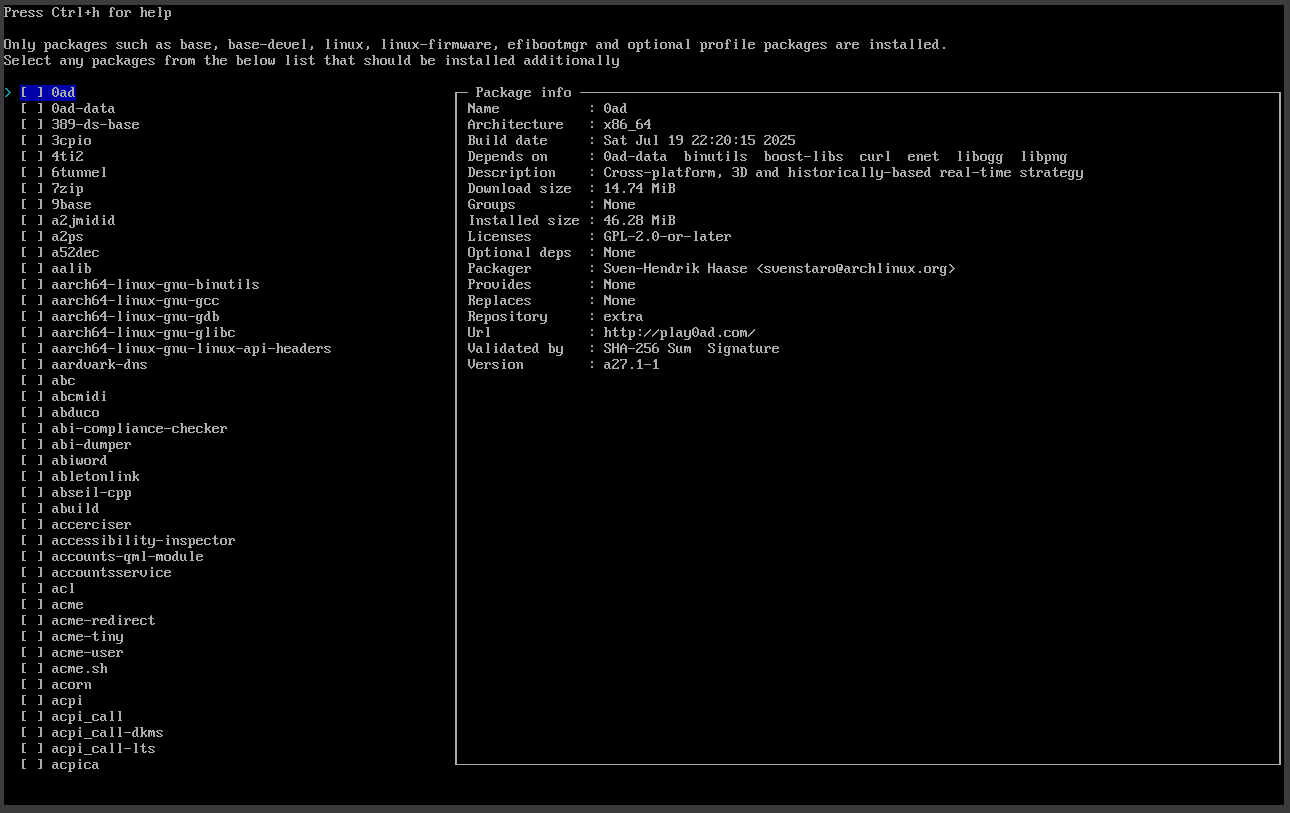 For easy-choose packages do thoose steps: - press `/`; - enter package name; - by pressing arrows on your keyboard, choose package; - press **Esc**; - press **Spacebar**. Demonstration of this algorithm: 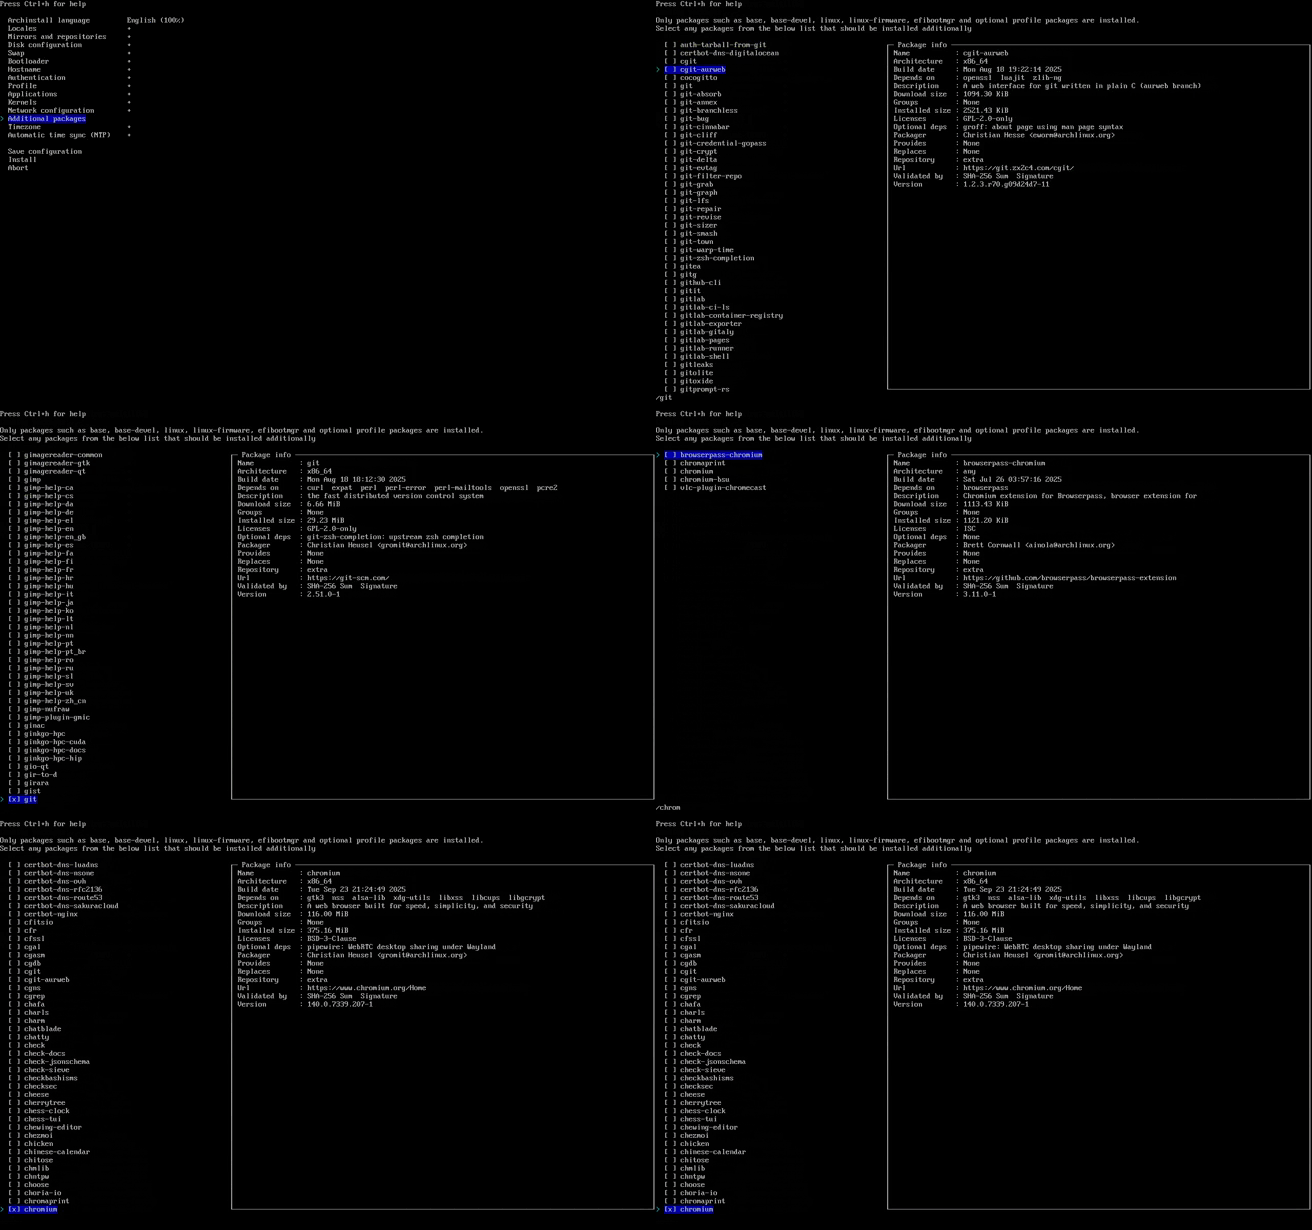 So, you should choose thoose packages: `git chromium winetricks lib32-gnutls lib32-libxcomposite kitty rofi nemo flameshot` If you have Nvidia GPU, additionaly choose this package: `lib32-nvidia-utils`. 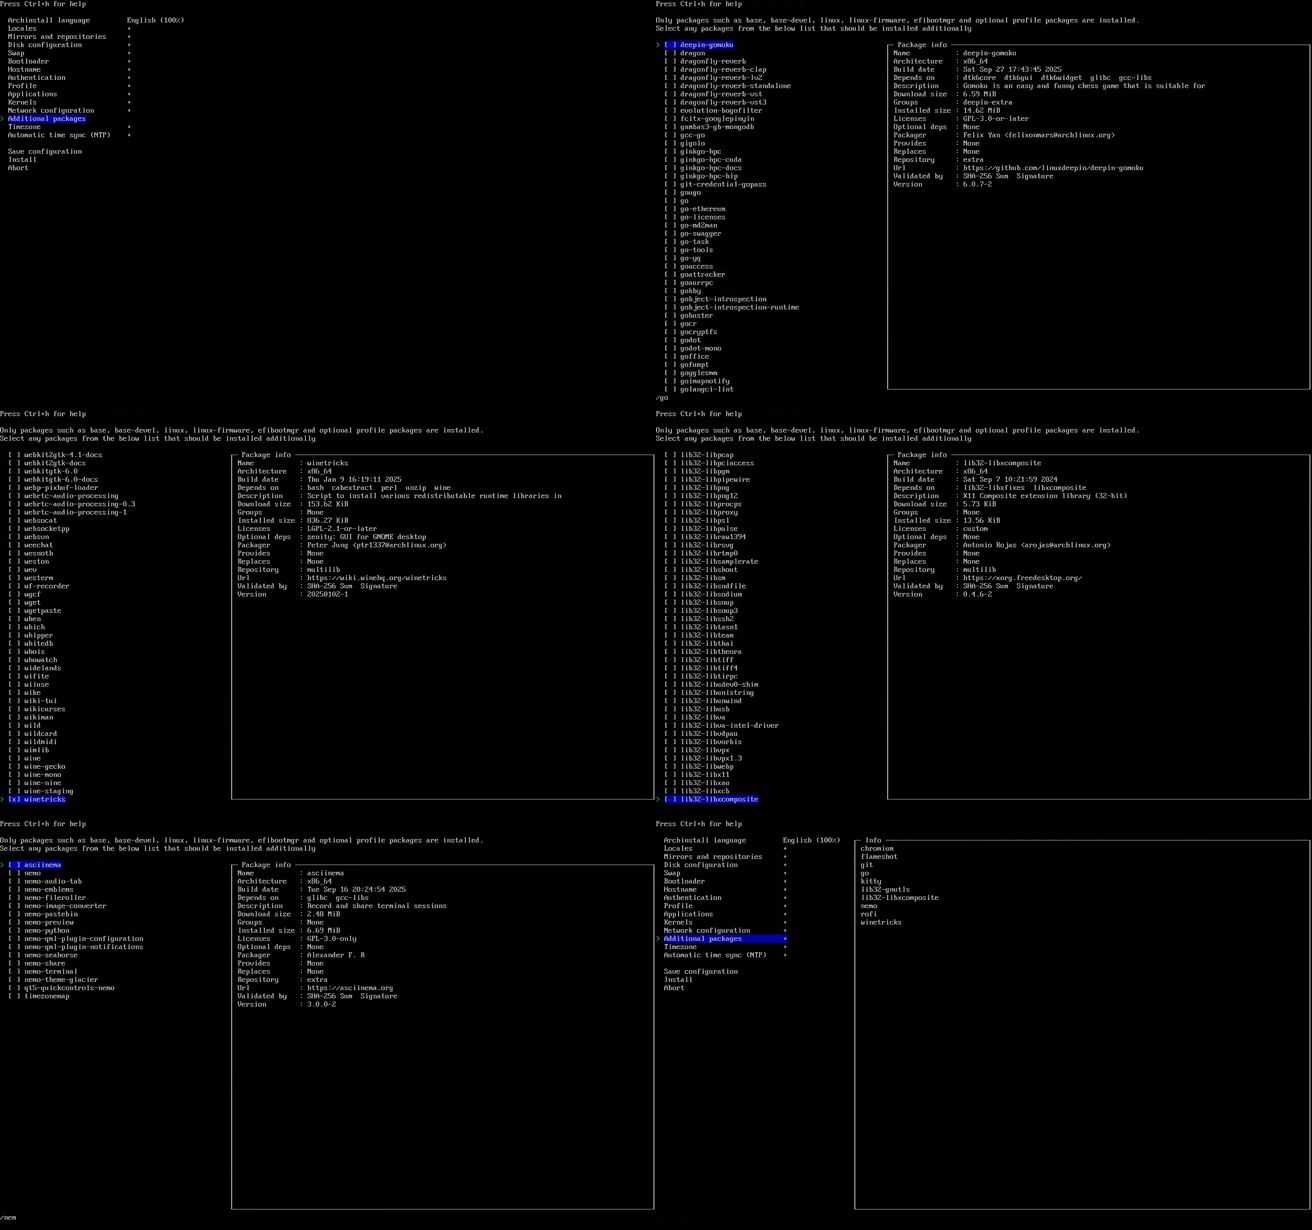 After choosing all needed packages, press **Enter**, everything should be like this: 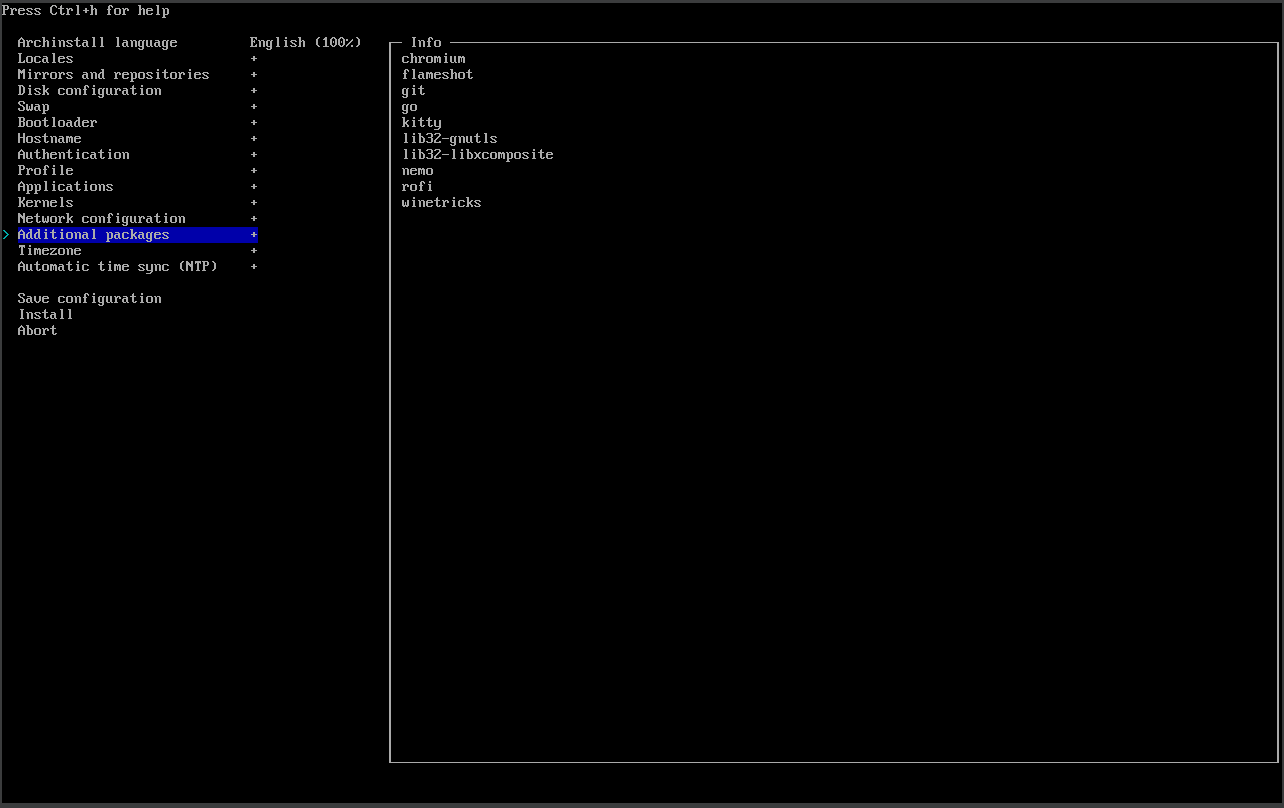 16. Go to `Timezone` and press **Enter**: 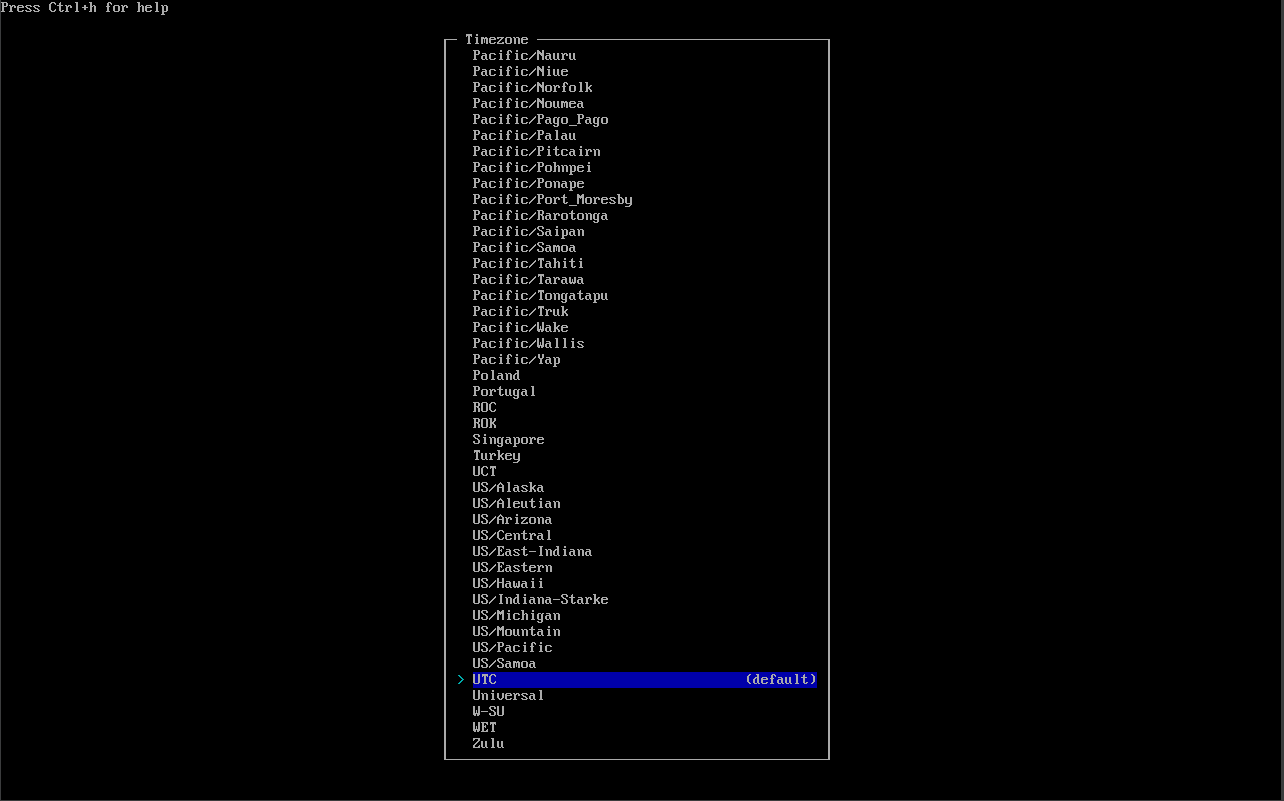 Here, choose your timezone by searching via pressing `/` (in my case it's `/Minsk`: 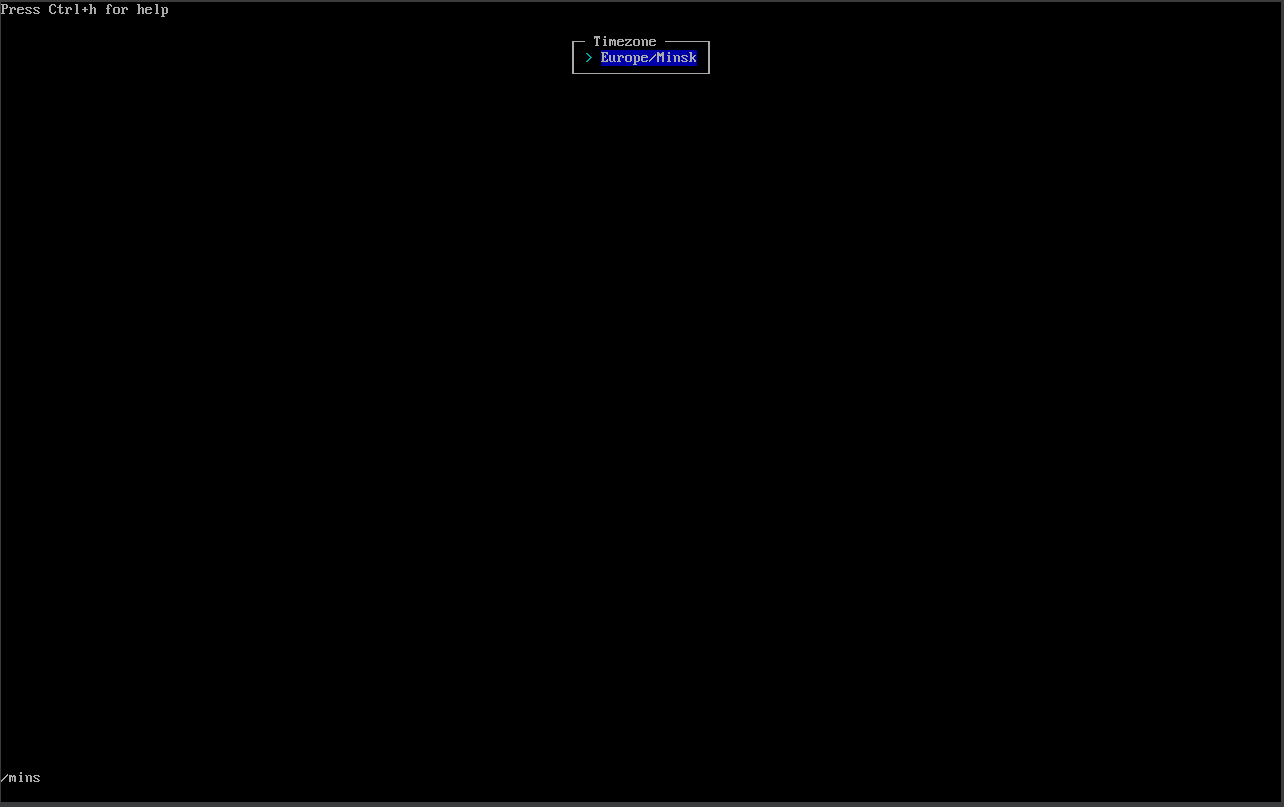 Press **Enter** and go back to the main menu: 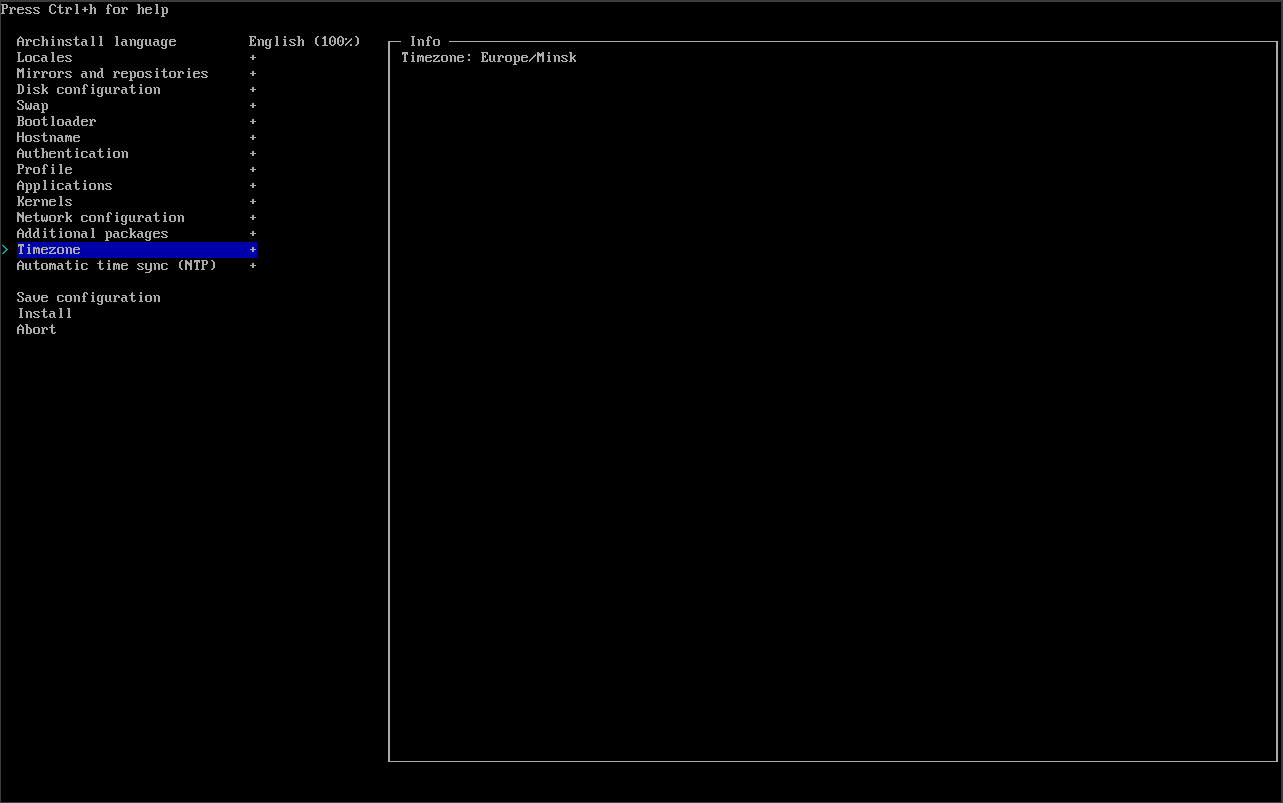 17. Go to `Install` and press **Enter**: 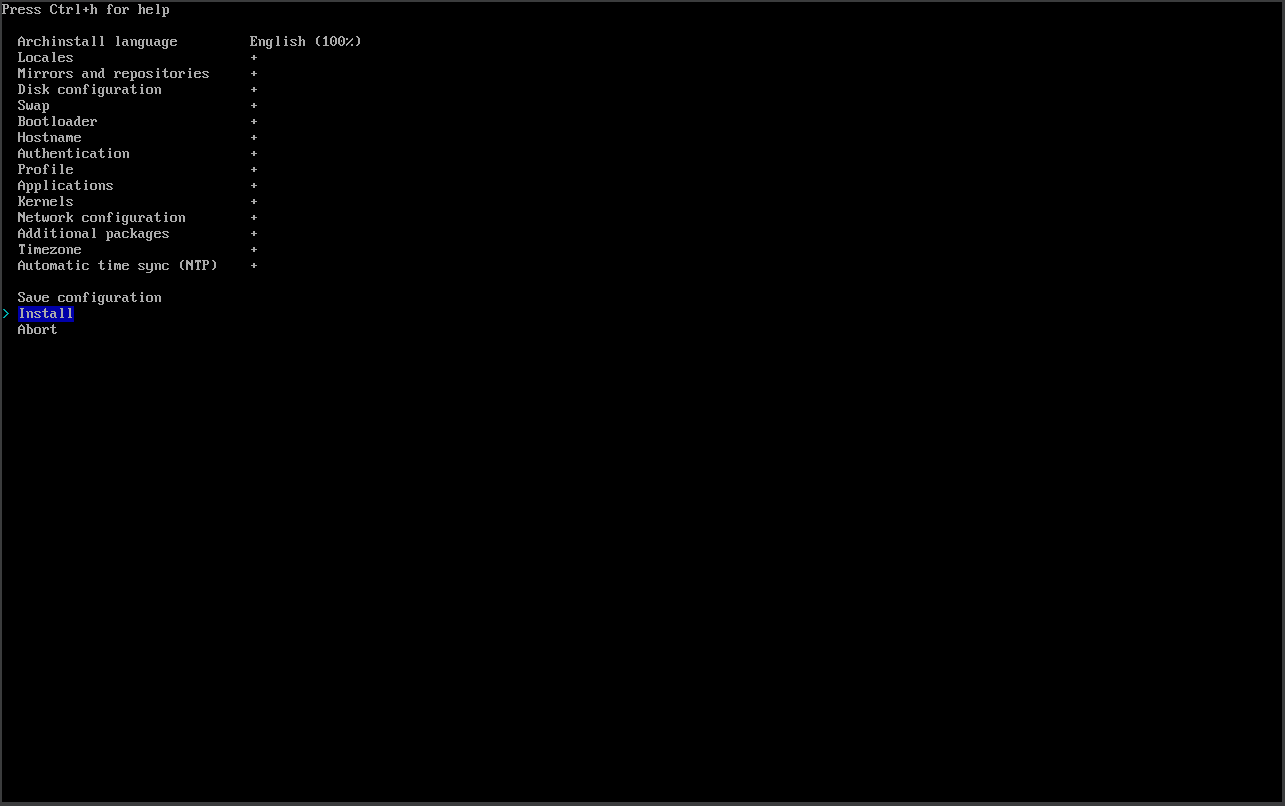 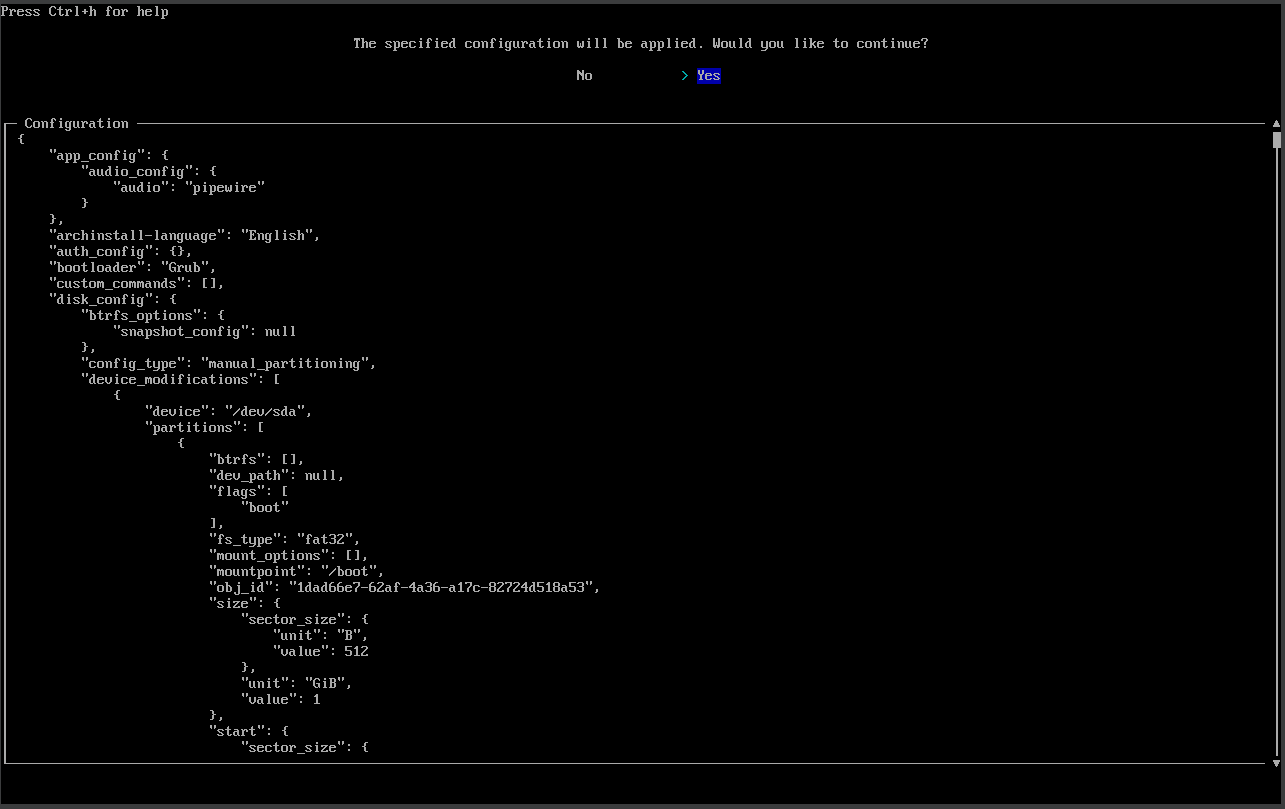 You will be promted with question "The specified configuration will be applied. Would you like to continue?". Choose `Yes` and press **Enter**: 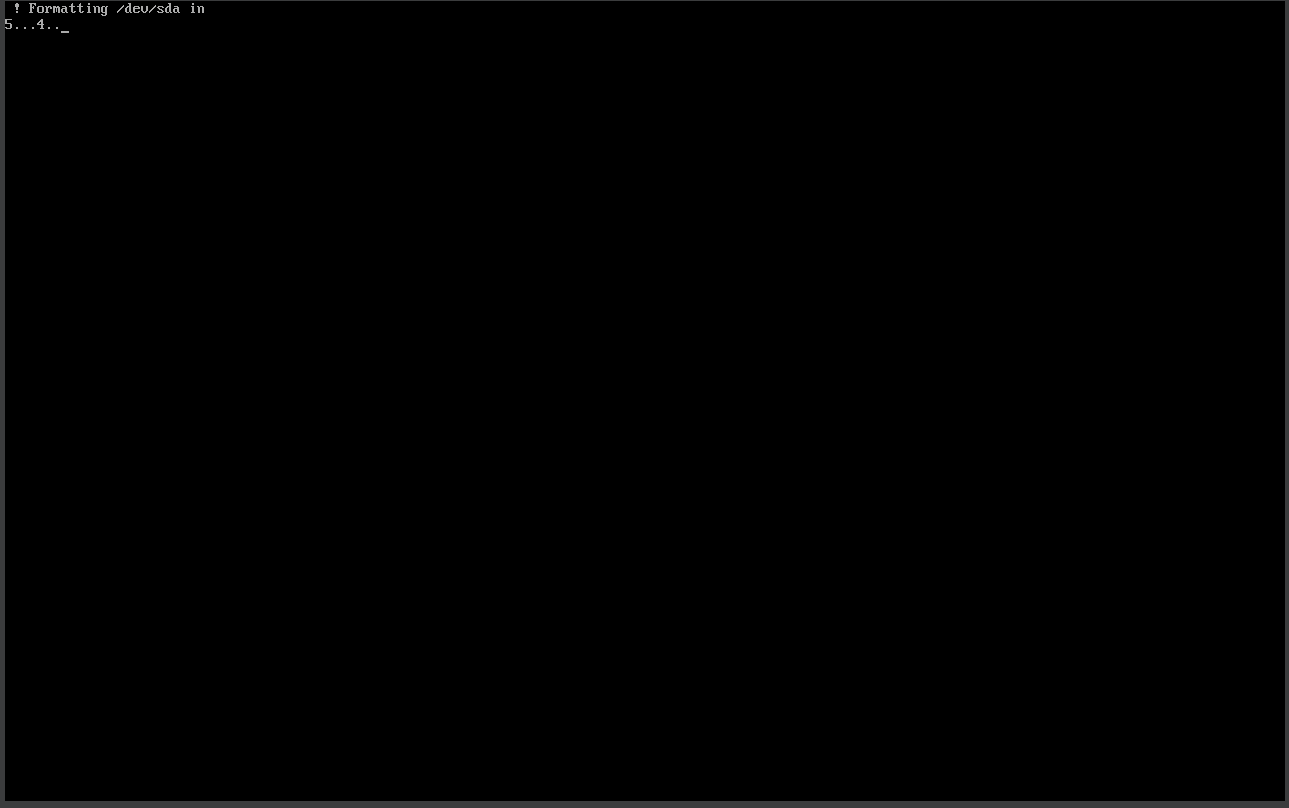 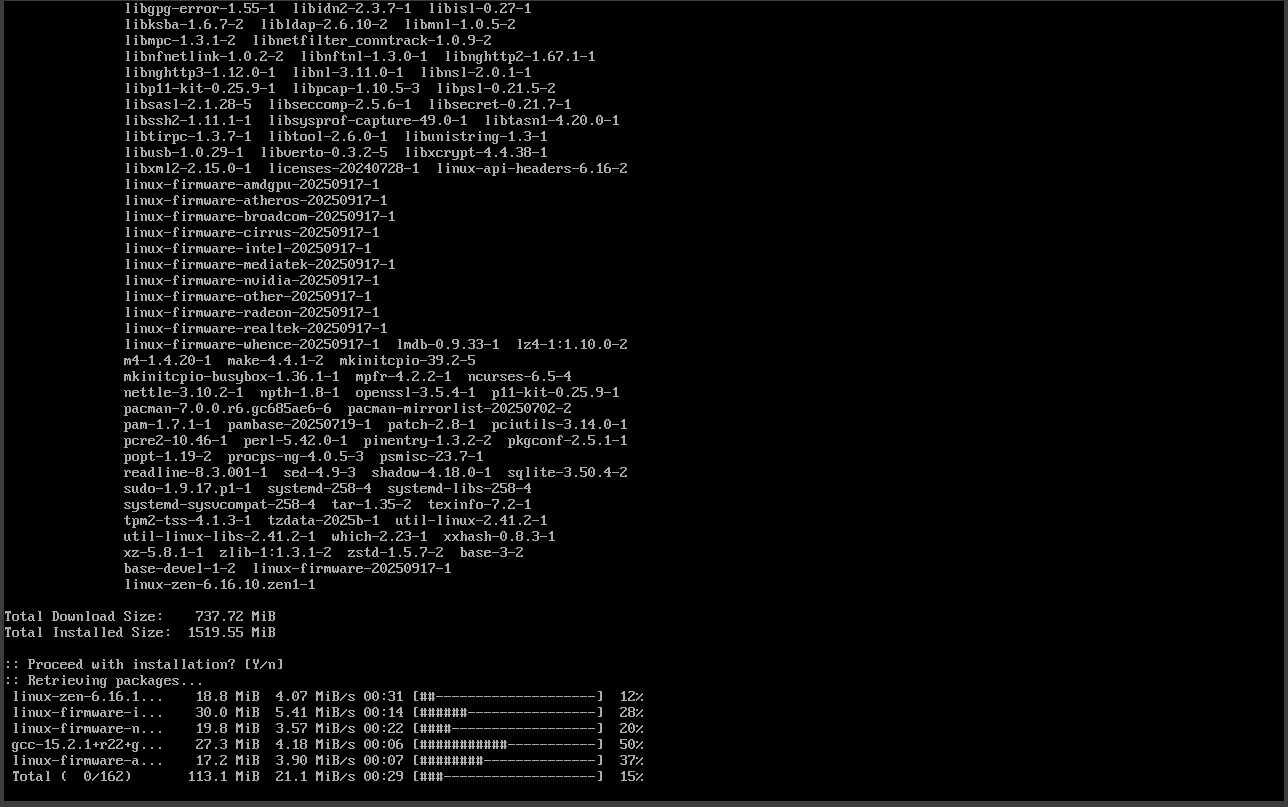 Finally, your installation will begin. At this stage, you can sit back or go make tea, as the process depends on the speed of your Internet connection. In the meantime, you're waiting, sub to my socials🥺: - [Telegram](https://t.me/vudekosu) - [X (Twitter)](https://twitter.com/vudek_) - [YouTube](https://youtube.com/c/vudek) - [Twitch](https://twitch.tv/vudek_) After your installation ends, you will see this menu: 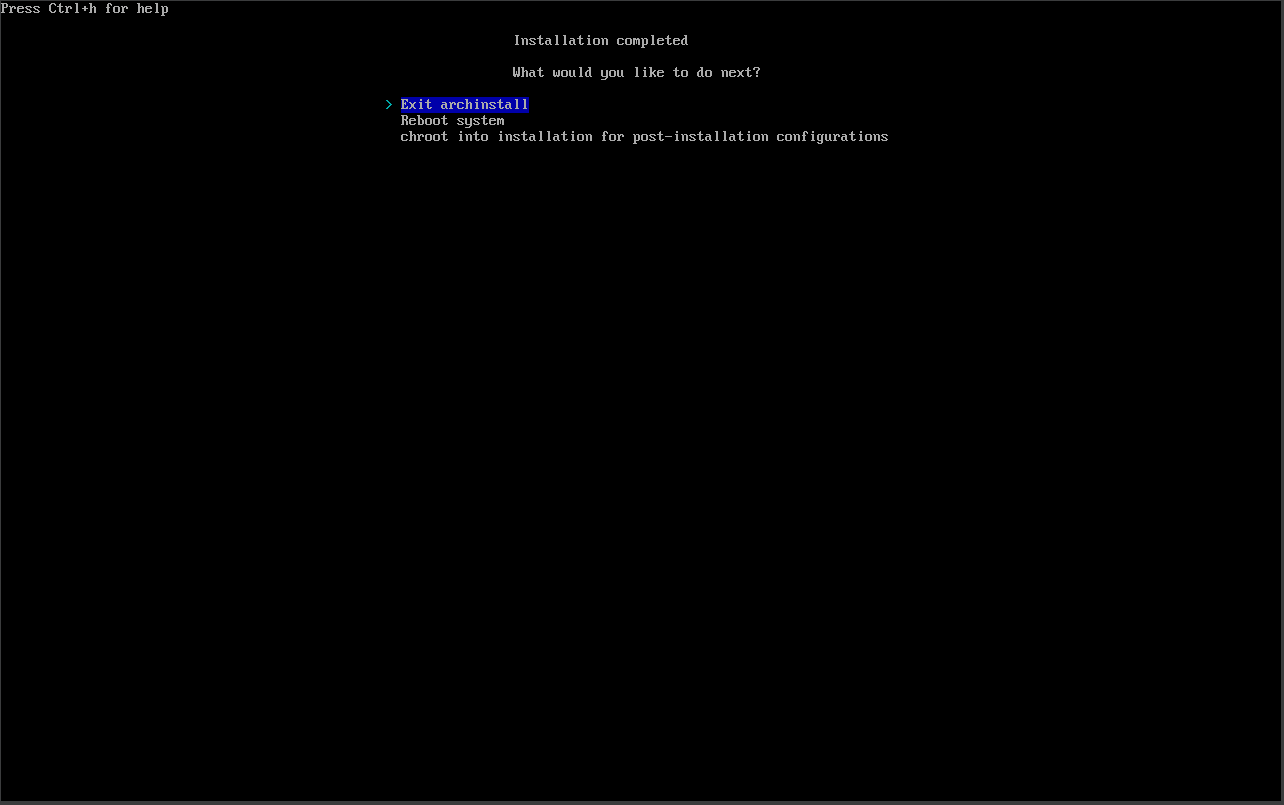 Choose `Reboot system` and press **Enter**. While rebooting, remove your USB flash drive and go to BIOS for choosing boot to Arch Linux. # FINALLY - ARCH LINUX LOADED After your Arch loaded, you will see this login screen: 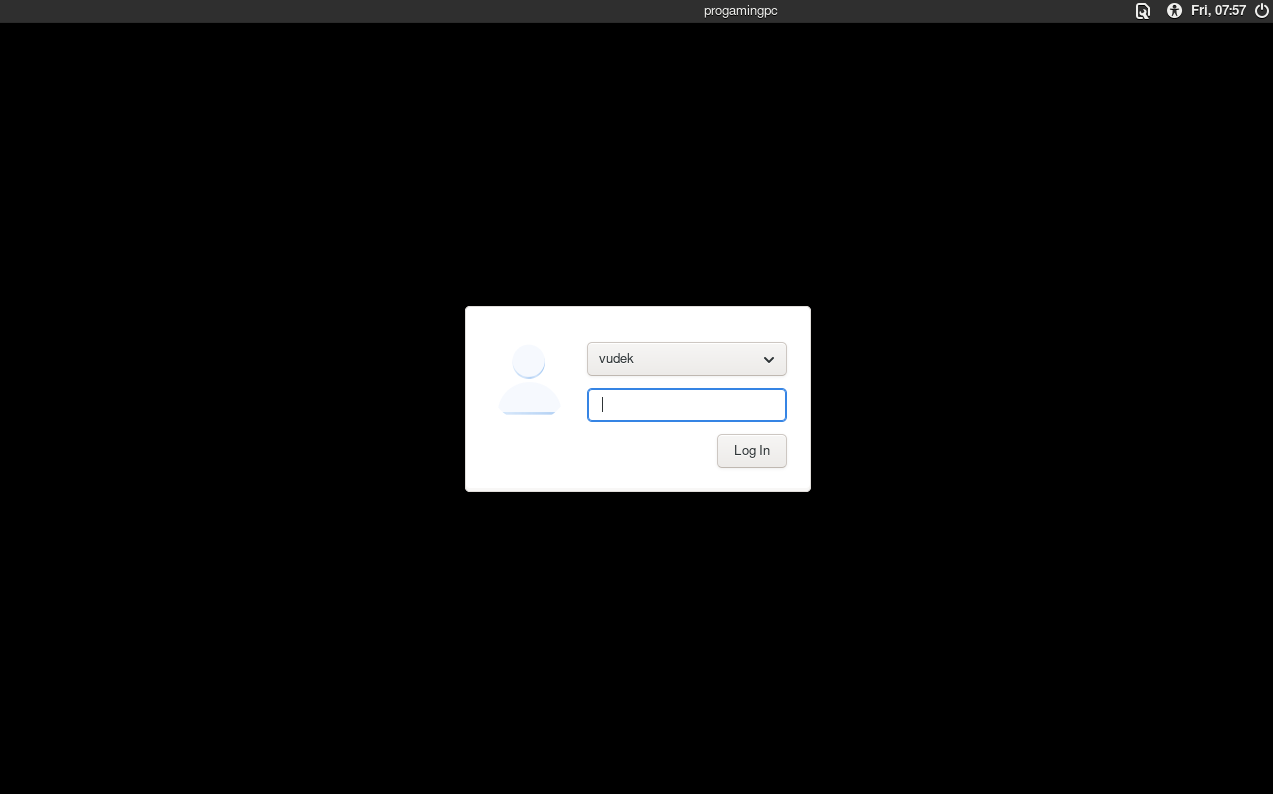 Enter your password and press enter, you will enter the i3-wm desktop enviroment. On first login i3-wm will ask you about basic config generation, press Enter twice. 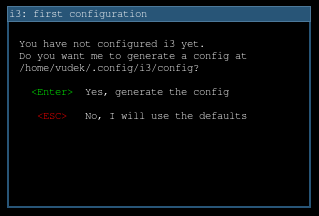 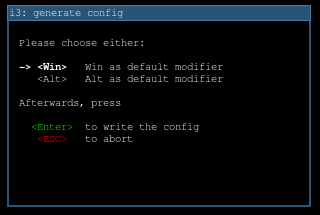 After this, basic i3-wm config will be writed to `~/.config/i3/config`. Now you can use binds. Press **Win+D**, type `kitty` and press **Enter**. Press **Win+2** to change desktop 2. Press **Win+D** again, type `chromium` and press **Enter**: 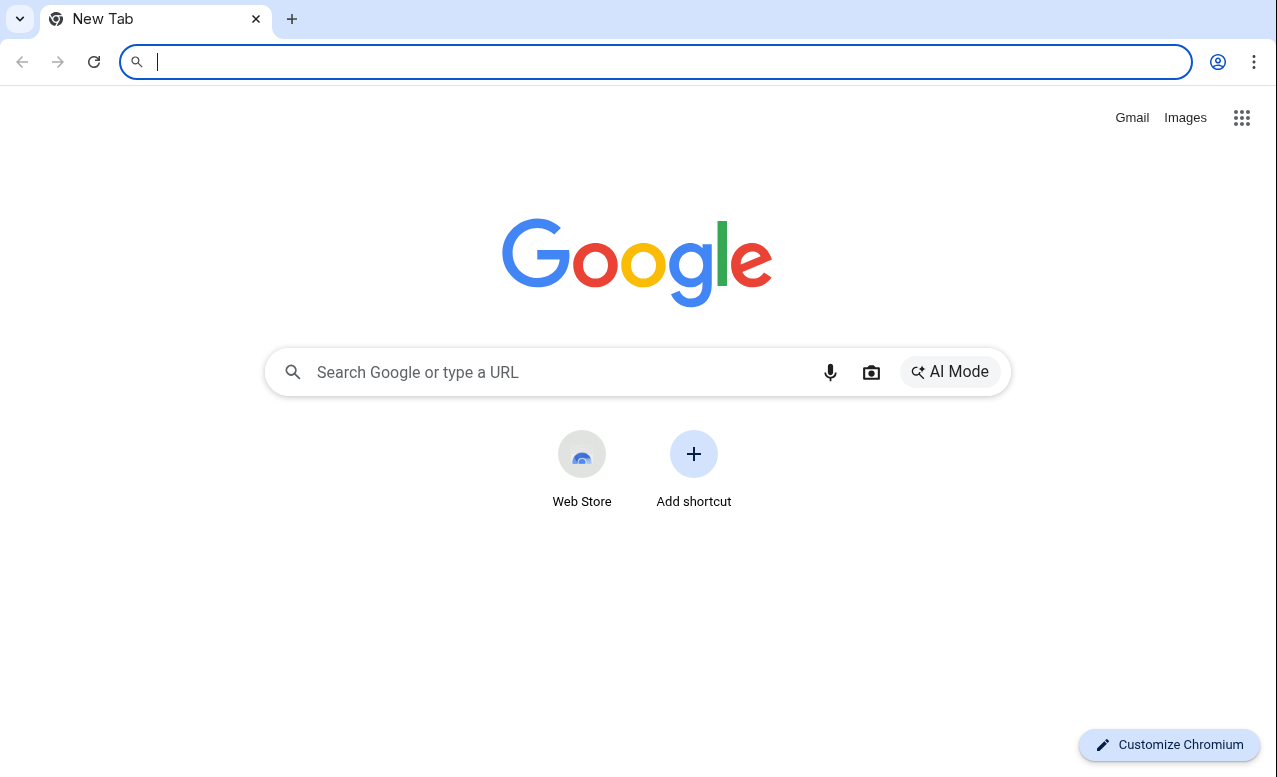 Open [this webpage](https://github.com/Vudek/osu-on-linux) in browser and copy this: ``` wget http://puu.sh/KClvp/49aa8dee55 -O ~/.config/i3/config ``` Go back to 1st desktop by pressing Win+1 and paste copied line to the kitty terminal by pressing **Shift+Insert** or by clicking middle mouse button and press **Enter**. Type: ``` i3 reload ``` and press **Enter**, now you have my advanced i3-wm cfg with thoose binds: - Open run menu by **Win+R** - Open legacy run menu by **Win+Enter** - Change desktops by pressing **Win+1**, **Win+2**, ... **Win+0** - Change active desktops by pressing **Ctrl+Win+⬅** or **Ctrl+Win+⮕** - Move active window to another desktop by pressing **Win+Shift+1**, **Win+Shift+2**, ... **Win+Shift+0** - Close active window by pressing **Win+Shift+Q** - 🩼 Change desktops altab-like by pressing **Win+Tab** - Open terminal by pressing **Win+Enter** Now, go to the terminal and type: ``` sudo pacman -S pipewire-media-session ``` After this, press **Enter** and you will promted with password. WARNING, PASSWORD ISN'T DISPLAYING IN THE TERMINAL! Type Y and press Enter for `removing wireplumber`. Type Y and press Enter again, to install `pipewire-media-session`. 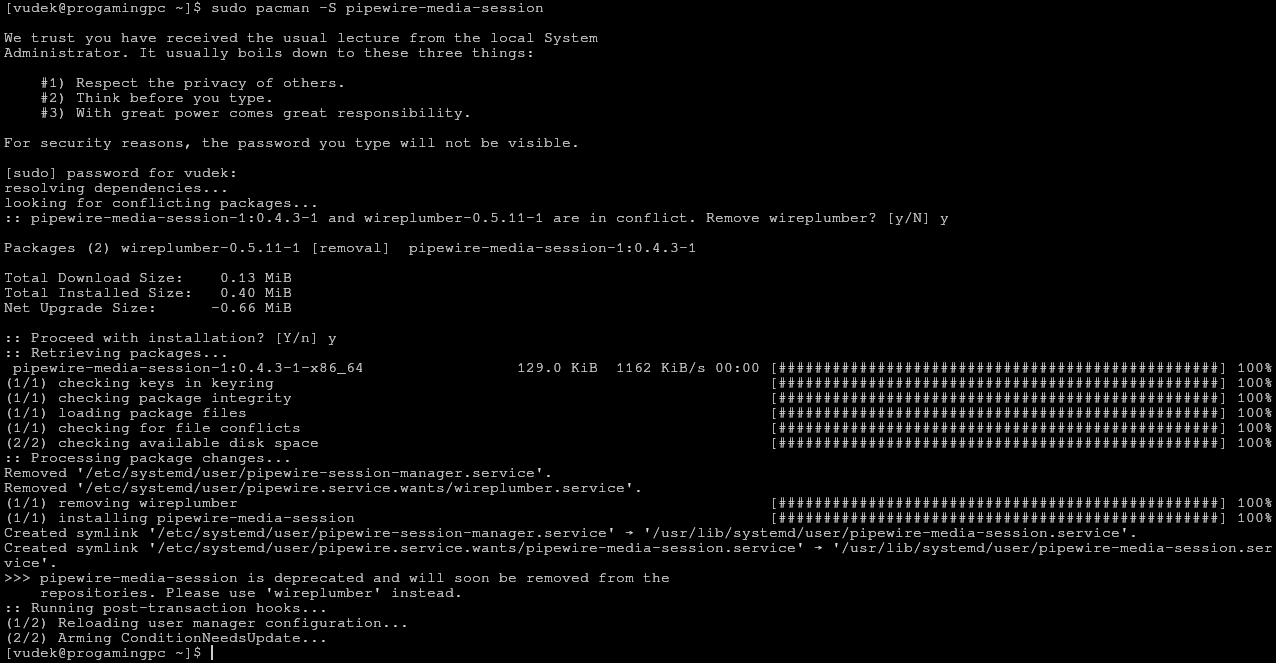 After this step, we need to downgrade wine-1x to wine-9.22-1, so copy this to terminal: ``` mkdir -p ~/Downloads && cd ~/Downloads && wget https://github.com/Vudek/wine-9.22-1-x86_64/releases/download/wine-9.22-1-x86_64.pkg.tar.zst/wine-9.22-1-x86_64.pkg.tar.zst && sudo pacman -U wine-9.22-1-x86_64.pkg.tar.zst && cd ``` And press **Enter**. You will promted with package downgrade. Type Y and press Enter. 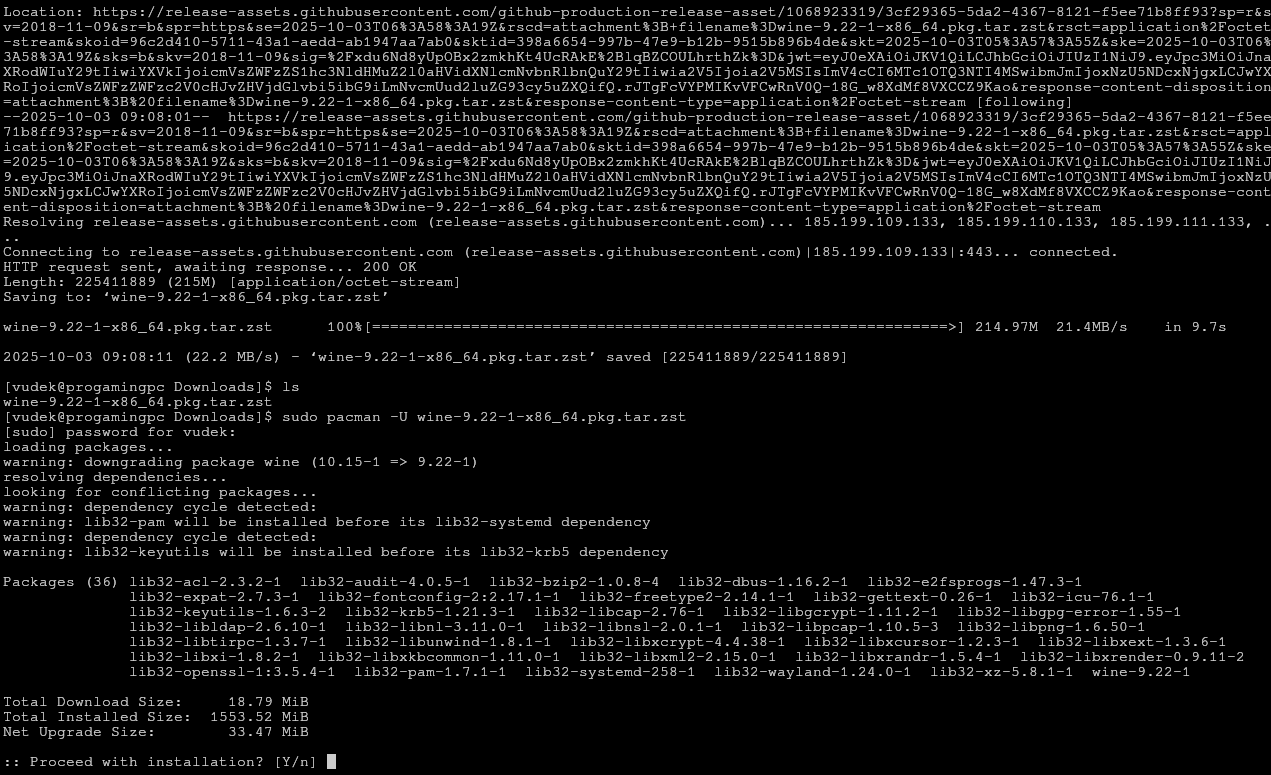 Wine is completely was downgraded to 9.22-1. Now we can make wineprefix and install osu! # osu! installation Before we start, copy this to terminal and press **Enter**, to ensure, that all packages was installed: ``` sudo pacman -S giflib lib32-giflib libpng lib32-libpng libldap lib32-libldap gnutls lib32-gnutls \ mpg123 lib32-mpg123 openal lib32-openal v4l-utils lib32-v4l-utils libpulse lib32-libpulse libgpg-error \ lib32-libgpg-error alsa-plugins lib32-alsa-plugins alsa-lib lib32-alsa-lib libjpeg-turbo lib32-libjpeg-turbo \ sqlite lib32-sqlite libxcomposite lib32-libxcomposite libxinerama lib32-libgcrypt libgcrypt lib32-libxinerama \ ncurses lib32-ncurses opencl-icd-loader lib32-opencl-icd-loader libxslt lib32-libxslt libva lib32-libva gtk3 \ lib32-gtk3 gst-plugins-base-libs lib32-gst-plugins-base-libs vulkan-icd-loader lib32-vulkan-icd-loader ``` After this step, let's create wineprefix for osu!. Copy this to terminal: ``` WINEARCH=win32 WINEPREFIX=~/.wineosu winetricks dotnet45 cjkfonts gdiplus ``` Press Enter. When window with **Mono** install appears, press **Cancel**. Next installation will be windows-like for this step. Agree with install by checkmark, press next, wait and after dotnet installs, press **Restart Later**. So, after everything completes, let's make an osu! folder, copy this to the terminal and press **Enter**: ``` mkdir ~/osu/ ``` Download osu!: ``` wget --output-document ~/osu/osu\!.exe https://m1.ppy.sh/r/osu\!install.exe ``` Create a bin folder: ``` mkdir -p ~/.local/bin ``` Create a startscript: ``` nano ~/.local/bin/osu ``` Copy-Paste this to your startscript: ``` #!/usr/bin/env bash #export PATH="/opt/wine-osu/bin:$PATH" #custom WINE ArchLinux export PATH="$HOME/wine-osu/bin:$PATH" #custom WINE new export WINEARCH=win32 export WINEPREFIX="$HOME/.wineosu" export WINEFSYNC=1 export WINE_DISABLE_VK_CHILD_WINDOW_RENDERING_HACK=1 export STAGING_AUDIO_DURATION=13333 export STAGING_AUDIO_PERIOD=13333 export vblank_mode=0 #For AMD, Intel and others #export __GL_SYNC_TO_VBLANK=0 #For NVIDIA export __GL_MaxFramesAllowed=0 export __GL_THREADED_OPTIMIZATIONS=1 cd ~/osu #wine --version wine "osu!.exe" ``` Save with pressing Ctrl+O, Close with Ctrl+X. Create a killscript: ``` nano ~/.local/bin/osukill ``` Copy-Paste this to your killscript: ``` #!/usr/bin/env bash #export PATH="/opt/wine-osu/bin:$PATH" #custom WINE ArchLinux export PATH="$HOME/wine-osu/bin:$PATH" #custom WINE new export WINEARCH=win32 export WINEPREFIX="$HOME/.wineosu" wineserver -k ``` Save with pressing Ctrl+O, Close with Ctrl+X. Copy-Paste to the terminal: ``` chmod +x ~/.local/bin/osu && chmod +x ~/.local/bin/osukill ``` Now your script and killscript are executable! > For Nvidia users - uncomment\ > ```export __GL_SYNC_TO_VBLANK=0 #For NVIDIA``` \ > and comment \ > ```export vblank_mode=0 #For AMD, Intel and others``` \ > with # at the start of the line. Let's create .desktop file, so osu! will appear in applications section: ``` nano ~/.local/share/applications/osu.desktop ``` Copy-Paste this: ``` [Desktop Entry] Type=Application Comment=osu! Exec=.local/bin/osu GenericName=osu! Name=osu! StartupNotify=true ``` Save file with **Ctrl+O**, and close nano with **Ctrl+X**. To make this file executable, copy this to terminal and press **Enter**: ```chmod +x ~/.local/share/applications/osu.desktop``` Now your osu.desktop application is executable! After this, copy-paste this to the terminal ``` cd ~/Downloads && wget http://puu.sh/KAnxf/6e2425cc8f.xz -O wine-osu-7.15.2-x86_64.tar.xz && tar -xvf wine-osu-7.15.2-x86_64.tar.xz && cp -r wine-osu ~/wine-osu && rm -rf wine-osu && cd ``` Let's configurate pipewire. Copy-Paste this to the terminal and press **Enter**: ``` cd && mkdir -p ~/.config/pipewire && cp -r /usr/share/pipewire/* ~/.config/pipewire/ && wget http://puu.sh/KBIwU/04254728f0.conf -O ~/.config/pipewire/pipewire.conf && wget http://puu.sh/KBIx1/120c9f7b39.conf -O ~/.config/pipewire/pipewire-pulse.conf && wget http://puu.sh/KBIx9/f8b9cdc5ce.conf -O ~/.config/pipewire/media-session.d/alsa-monitor.conf ``` and after this, let's restart our audioserver to apply changes, copy this to terminal and press **Enter**: ``` systemctl --user restart pipewire.service pipewire.socket pipewire-media-session.service pipewire-pulse.service pipewire-pulse.socket ``` Pipewire audio server was succesfully configurated! Now you can close your terminal by pressing **Win+Shift+Q**. > If your PC is powerfull, go to [my Telegram channel to read advanced guide for pipewire lowest possible audio latency](https://t.me/vudekosu/596). # Now you can start osu! By pressing Win+R, you can open application list, type osu! and press **Enter**: 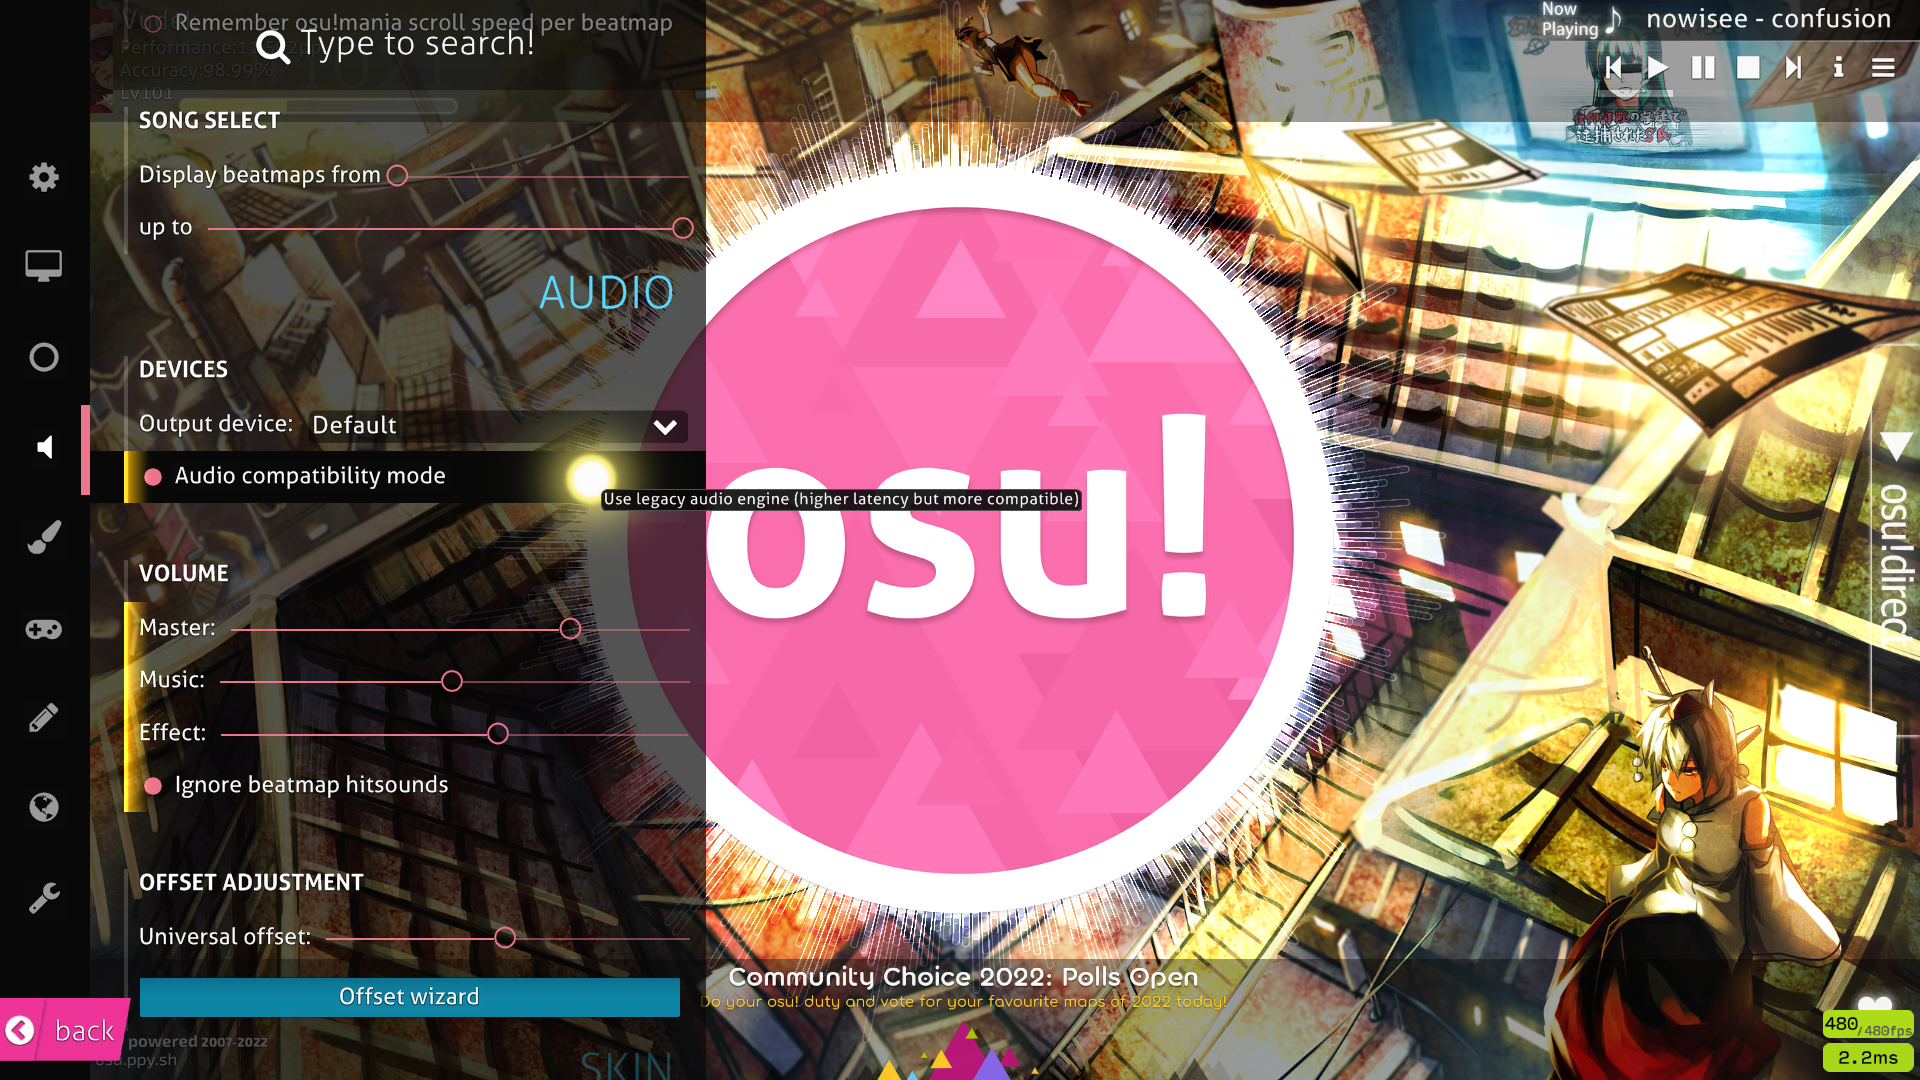 If you want to enjoy low latency audio, ensure that checkmark `Audio compatibility mode` is enabled. # How to change refresh rate?  # How to install OTD? Open terminal by pressing Win+Enter. Copy this to terminal: ``` sudo pacman -S --needed git base-devel && git clone https://aur.archlinux.org/yay-bin.git && cd yay-bin && makepkg -si && yay -S opentabletdriver osu-handler osu-mime ``` > When you will promted with "Packages to CleanBuild" just type `N` to terminal and press **Enter**. > When you will promted with "Diffs to show" just type `N` to terminal and press **Enter**. This command will install `yay`, `opentabletdriver`, `osu-handler` and `osu-mime` After OTD installs, copy-paste thoose commands to your terminal: ``` echo "blacklist wacom" | sudo tee -a /etc/modprobe.d/blacklist.conf ``` ``` sudo rmmod wacom ``` ``` echo "blacklist hid_uclogic" | sudo tee -a /etc/modprobe.d/blacklist.conf ``` ``` sudo rmmod hid_uclogic ``` ``` systemctl --user daemon-reload ``` ``` systemctl --user enable opentabletdriver --now ``` ``` sudo udevadm control --reload-rules && sudo udevadm trigger ``` ``` systemctl --user start opentabletdriver --now ``` If errors, like "MODULE ISN'T LOADED" appears, just ignore them. Let's open OTD: - Change desktop by pressing Win+3 - Open applications list by pressing Win+R - Search for OpenTabletDriver - Press **Enter** and OTD will opens now! Configure your area, filters, save/apply. Close GUI with **Ctrl+Q** or Win+Shift+Q. Change desktop to the 1st by pressing **Win+1**. Now you can play osu!, congratulations! > Ensure that `Raw input` is disabled > Ensure that `Map absolute raw input to the osu! window` is enabled. # How to change keyboard layouts? Depends on which languages do you want. First of all, open terminal and type this: ``` nano ~/.config/i3/config ``` and go to the last line: ``` exec --no-startup-id "setxkbmap -layout us -option grp:alt_shift_toggle" ``` and add prefered language after `us`. For example: ``` exec --no-startup-id "setxkbmap -layout us,pl -option grp:alt_shift_toggle" ``` Save your file by pressing **Ctrl+O** and Enter, **Ctrl+X** to close. > You can also change your keybind for changing layout to `grp:ctrl_shift_toggle` or `grp:caps_toggle` (last is my favourite). and type in terminal and press **Enter**: ``` setxkbmap -layout us,%youraddedlanguage% -option grp:alt_shift_toggle ``` to force changes right now! # Guide was written by [Vudek](https://osu.ppy.sh/users/8816345). Donate: BTC - `bc1q29v9rcdzhs8ds35wmlr8a58u0qk3cvaj2wnpvr` ETH - `0x7BA5a25A669Fb3570EC7C047b978066D309753A2` USDT (TRC20) - `TTgd8EejwyxzTNbzLpGK7L5gzfRAdXaxjH` USDT (ERC20) - `0x7BA5a25A669Fb3570EC7C047b978066D309753A2` meow :3
