KO
|
EN
gitlite — search
Search
#typescript
#ai-agents
#ai
#dsh-plugin
#deepseek-harness
#open-source
#cli
#claude-code
#codex
#developer-tools
#react
#windows
desktop
★ 66
Open GitHub ↗
Desktop sync client for Cloudreve.
Download README (.md)
Explore Similar Repositories
Cloudreve-Heroku
:
Cloureve on Heroku with Redis
Cloudreve-AfdianPay
:
Cloudreve自定义付款渠道-爱发电接口
flutter_reve
:
🔥🔥 私有云盘CloudReve的flutter手机客户端,完美复刻!!
cloudreve-heroku
:
Deploy cloudreve on Heroku
Cloudreve-slave-on-PaaS
:
在 PaaS 服务上部署 Cloudreve 从机离线下载节点
// repository documentation
Was this content helpful?
★ 0
(0 ratings)
Select Rating:
★
★
★
★
★
Submit Feedback
Recent Feedback
×
Download README
Do you want to download the
README.md
file for
desktop
?
Download (.md)
# Cloudreve Desktop 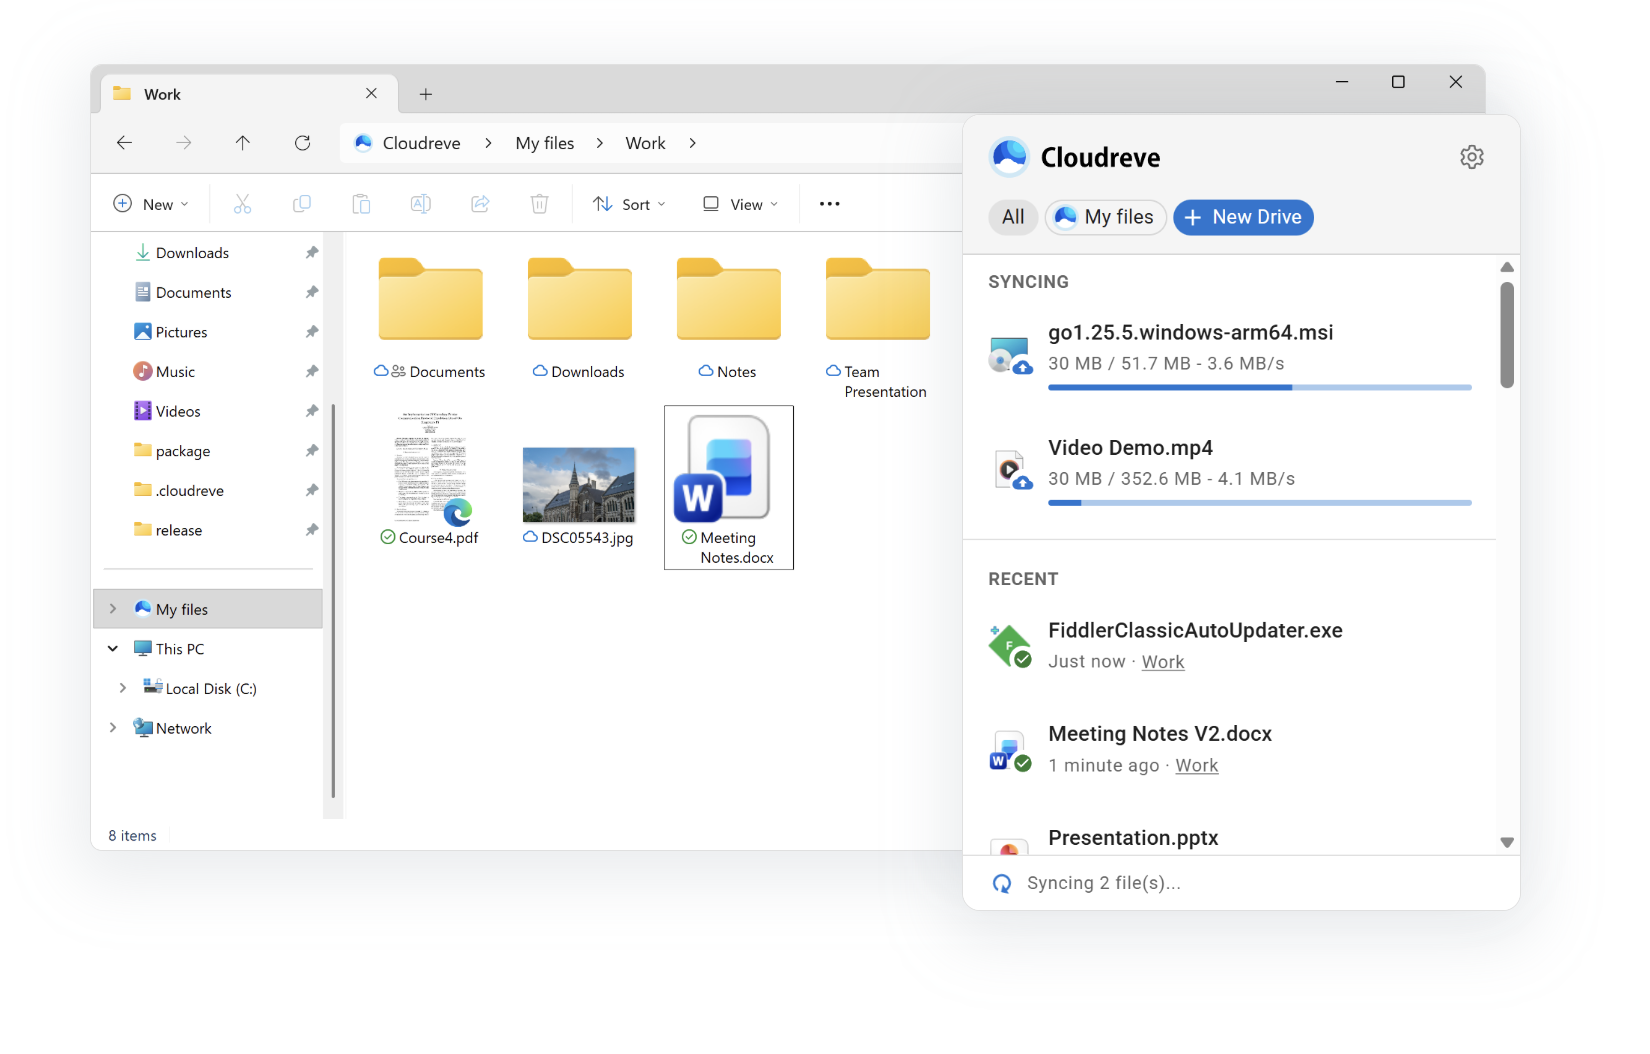 <p> <a href="https://apps.microsoft.com/store/detail/9p3gh5rnnzfd"> <img src="https://get.microsoft.com/images/en-us%20dark.svg" width="200"/> </a> </p> A Windows desktop client for [Cloudreve](https://github.com/cloudreve/Cloudreve) cloud storage, built with Tauri and React. Provides seamless file synchronization using the Windows Cloud Files API. ## Features - Real-time bidirectional file synchronization - On-demand file hydration (files download only when accessed) - Windows Explorer integration (context menus, thumbnails, custom states) - Multiple storage provider support, aligned with Cloudreve server - System tray application ## Prerequisites ### For Users - Windows 10 version 1903 (build 18362) or later - A Cloudreve server instance ### For Developers - **Windows 10/11** with [Developer Mode enabled](https://learn.microsoft.com/en-us/windows/apps/get-started/enable-your-device-for-development) - **Rust** toolchain (install via [rustup](https://rustup.rs/)) - **Node.js** 18+ and **Yarn** - **Windows SDK** (for MSIX packaging) Enable Developer Mode: ``` Settings → Privacy & security → For developers → Developer Mode → On ``` Install Rust targets for cross-compilation: ```powershell rustup target add x86_64-pc-windows-msvc rustup target add aarch64-pc-windows-msvc ``` ## Build & Run ### Quick Start (Development) ```powershell # Install frontend dependencies cd ui yarn install cd .. # Run in development mode with hot reload cargo tauri dev ``` ### Release Build ```powershell cargo tauri build ``` The built binary will be at `target/release/cloudreve-desktop.exe`. ## Development Installation (Full Feature Testing) The basic `cargo tauri dev/build` only produces the binary. For testing **shell integration features** (context menus, thumbnails, cloud file states), you need to register the app as an MSIX package. ### Using dev-install.ps1 ```powershell # Build and register for development .\dev-install.ps1 # Skip build if binary already exists .\dev-install.ps1 -SkipBuild # Use custom version .\dev-install.ps1 -Version "0.2.0" ``` This script will: 1. Build the Tauri application (release mode) 2. Copy the binary to `package/` 3. Update `AppxManifest.xml` with correct architecture and version 4. Register the package with `Add-AppxPackage -Register` ### Unregister Development Package ```powershell Get-AppxPackage *Cloudreve* | Remove-AppxPackage ``` ## Building MSIX Packages For distribution, use `build-msix.ps1` to create signed MSIX packages. ```powershell # Build for both x64 and ARM64, create bundle .\build-msix.ps1 # Build for specific architecture .\build-msix.ps1 -Arch x64 .\build-msix.ps1 -Arch arm64 # Skip build (use existing binaries) .\build-msix.ps1 -SkipBuild # Custom version .\build-msix.ps1 -Version "1.0.0" ``` Output files: ``` dist/ ├── Cloudreve.x64.msix ├── Cloudreve.arm64.msix └── Cloudreve.msixbundle ``` ### Requirements for MSIX Building - Windows SDK with `makeappx.exe` (automatically detected) - For Store submission, packages must be signed with a certificate ## Project Structure ``` ├── src-tauri/ # Tauri application shell ├── crates/ │ ├── cloudreve-sync/ # Core sync service │ ├── cloudreve-api/ # REST client for Cloudreve server │ └── win32_notif/ # Windows notification utilities ├── ui/ # React frontend (Vite + MUI) ├── package/ # MSIX packaging assets ├── dev-install.ps1 # Dev build + register script └── build-msix.ps1 # Production MSIX builder ``` ## License [MIT](LICENSE)
