KO
|
EN
gitlite — search
Search
#javascript
#python
#hacktoberfest
#react
#ai
#typescript
#llm
#go
#golang
#android
#machine-learning
#rust
#deep-learning
#linux
rack-spyup
★ 15
Open GitHub ↗
Spying request and json response
Download README (.md)
Explore Similar Repositories
NeoPixel_Painter
:
Light painting project for Arduino Uno + NeoPixel strips
sanguinews
:
Usenet binary poster with multithreading and SSL support
Estimote-iOS-Xamarin
:
Xamarin binding for Estimote's iOS SDK
safeweb
:
Proposition of a faster and more secure Web (MinimaLT + DNSNMC)
the_great_taco_hunt
:
Where to eat, if you like tacos.
// repository documentation
Was this content helpful?
★ 0
(0 ratings)
Select Rating:
★
★
★
★
★
Submit Feedback
Recent Feedback
×
Download README
Do you want to download the
README.md
file for
rack-spyup
?
Download (.md)
# Rack::SpyUp Spying request and json response [](https://app.wercker.com/project/bykey/badde83f7252323fde185c68212600ba) * [Project page](http://udzura.jp/rack-spyup/) * [Available as a RubyGem](http://rubygems.org/gems/rack-spyup). ## Installation Add this line to your application's Gemfile: gem 'rack-spyup' And then execute: $ bundle Or install it yourself as: $ gem install rack-spyup ## Usage ```ruby use Rack::SpyUp do |config| config.logger = Logger.new(STDOUT) end ``` ### `spyup` command rack-spyup is shipped with `spyup` command. You can use usual config.ru with request and response spyed: ```bash $ spyup config.ru ``` `spyup` has the same options as `rackup` (except `--builder`), because she uses `Rack::Server` internally. ### When you use rails rack-spyup uses railtie system. In rails project, only you must do is just to set your Gemfile: ```ruby gem 'rack-spyup' ``` BTW, if you want to use this middleware only via `spyup` command, just edit Gemfile: ```ruby gem 'rack-spyup', require: false ``` Which does not enable middleware, and you may use the command `bundle exec spyup -p 3000` or like. ## Configurations ```ruby Rack::SpyUp.config do |config| config.logger = Rails.logger # Set your custom logger config.enabled_environments = %w(development staging) # Set the rails envs you want to enable in # By default this is set to %w(development) end ``` ## What you will see 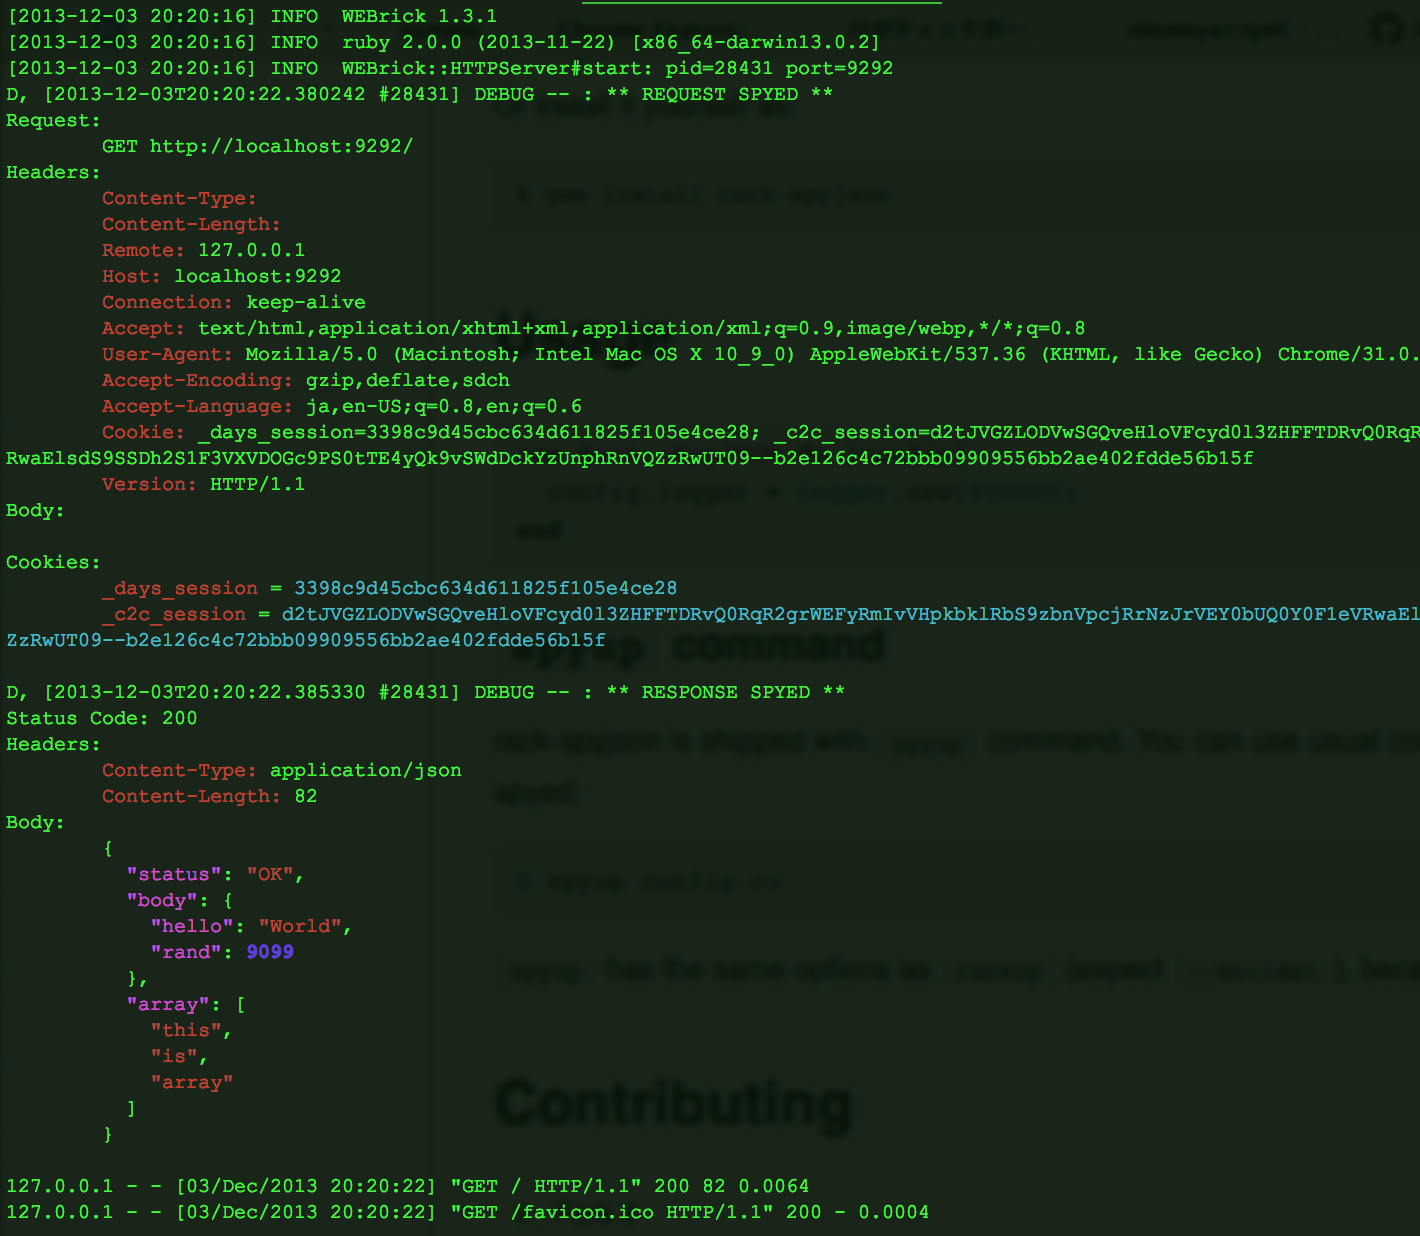 ## Contributing 1. Fork it 2. Create your feature branch (`git checkout -b my-new-feature`) 3. Commit your changes (`git commit -am 'Add some feature'`) 4. Push to the branch (`git push origin my-new-feature`) 5. Create new Pull Request
