KO
|
EN
gitlite — search
Search
#typescript
#ai-agents
#deepseek-harness
#dsh-plugin
#open-source
#ai
#cli
#dsh
#claude-code
#codex
#developer-tools
#react
zjm
★ 43
Open GitHub ↗
No description available.
Download README (.md)
Explore Similar Repositories
energy-line-gauge
:
A customizable line gauge with a legend, optionally showing device power use as a percentage of a main entity.
harvester-cloud
:
A project for deploying Harvester on cloud providers instead of bare-metal infrastructure
open-webui-extensions
:
No description available.
MODEST
:
Monocular Depth Estimation and Segmentation for Transparent Object with Iterative Semantic and Geometric Fusion (ICRA2025)
vue-tree
:
No description available.
// repository documentation
Was this content helpful?
★ 0
(0 ratings)
Select Rating:
★
★
★
★
★
Submit Feedback
Recent Feedback
×
Download README
Do you want to download the
README.md
file for
zjm
?
Download (.md)
# 炸酱面探针安装指南 > **适用对象**:Linux 服务器 / 容器环境运维 > **探针功能**:实时监控 / Ping Tcping分组 / 离线通知 / 流量告警 / 到期提醒 / CPU告警 / 配置导出 / sqlite数据库 等 --- ## 📑 目录 1. [在线 Demo](#在线-demo) 2. [界面预览](#界面预览) 3. [主控安装](#主控安装) - [Docker run](#方法一-docker-run) - [Docker Compose](#方法二-docker-compose) 4. [Agent 安装](#agent-安装) - [面板一键脚本 ✅ 推荐](#方法一-面板一键脚本--推荐) - [官方安装脚本](#方法二-安装脚本) - [Docker Compose](#方法三-docker-compose) 5. [常见注意事项](#常见注意事项) --- ## 在线 Demo 🔗 [https://zjm.net/](https://zjm.net/) --- ## 界面预览 <p align="center"> <img src="https://ooo.0x0.ooo/2025/06/15/OsQVIM.md.jpg" width="48%"> <img src="https://ooo.0x0.ooo/2025/06/15/OsQdNc.md.jpg" width="48%"><br> <img src="https://ooo.0x0.ooo/2025/06/15/OsQfFG.md.jpg" width="48%"> <img src="https://ooo.0x0.ooo/2025/06/15/OsQsEr.md.jpg" width="48%"> </p> --- ## 主控安装 > **安装完成后必须执行:** > ✅ 通过 `docker logs -f zjmapp` 或 `docker-compose logs -f zjmapp` 查看初始 `admin` 密码 > ✅ 浏览器访问 `http://你的IP:9009` 登录后台 > ✅ 推荐绑定域名并配置反向代理(可选) --- ### 方法一 Docker run ```bash docker run -d --name zjmapp \ --network host \ --restart unless-stopped \ -e APP_PORT=9009 \ vpsbuy/zjmapp:latest ``` 说明: - `APP_PORT=9009`:后台监听端口,可按需更改 - 启动后使用以下命令查看密码: ```bash docker logs -f zjmapp ``` --- ### 方法二 Docker Compose ```yaml # docker-compose.yaml services: zjmapp: image: vpsbuy/zjmapp:latest container_name: zjmapp network_mode: host restart: unless-stopped environment: - APP_PORT=9009 ``` ```bash docker-compose up -d docker-compose logs -f zjmapp ``` 日志示例中将包含后台初始密码: 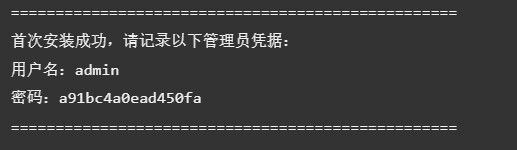 --- ## Agent 安装 > 可部署在任意支持 Docker 的 Linux VPS,用于采集带宽 / 流量 / 延迟等指标 > 支持三种方式部署 Agent,根据你的环境选择适合的方法即可 --- ### 方法一 面板一键脚本 ✅ 推荐 1. 登录主控后台 → 进入 **注册服务器** 页面 2. 点击「生成安装命令」,复制到目标 VPS 执行 3. 自动完成依赖安装、配置、运行、注册 systemd 服务 如需手动管理,可运行脚本: ```bash ./install_zjmagent.sh ``` 安装界面示例: 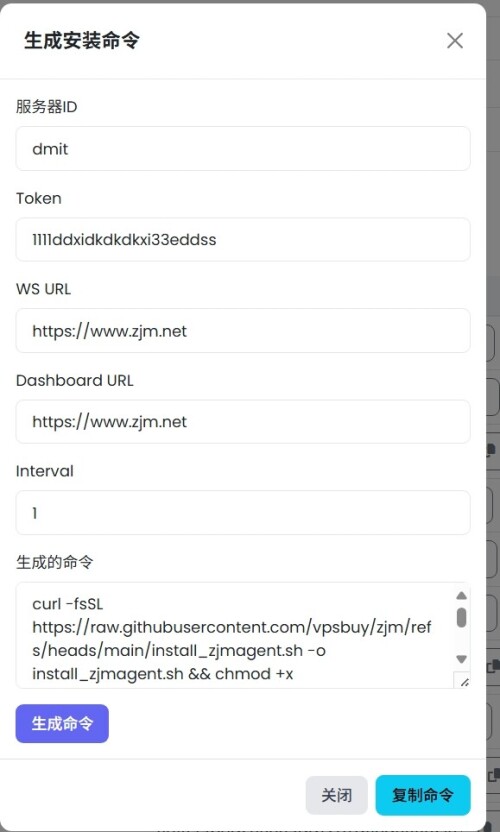 --- ### 方法二 安装脚本(手动交互) ```bash curl -fsSL https://raw.githubusercontent.com/vpsbuy/zjm/refs/heads/main/install_zjmagent.sh -o install_zjmagent.sh chmod +x install_zjmagent.sh ./install_zjmagent.sh ``` 按提示输入 server-id / token / 后台地址等,完成后自动启动 Agent。 --- ### 方法三 Docker Compose ```yaml # docker-compose.yaml services: zjmagent: image: vpsbuy/zjmagent:latest container_name: zjmagent network_mode: host restart: unless-stopped command: - --server-id=agent01 - --token=7675b4c33323625d25f7158120f53354 - --ws-url=http://1.1.1.1:9009 - --dashboard-url=http://1.1.1.1:9009 - --interval=1 ``` ```bash docker-compose up -d docker-compose logs -f zjmagent ``` --- ## 常见注意事项 | 项目 | 说明 | |------|------| | **网卡名称** | Agent 默认监听 `eth0`,可通过 `--interface` 显式指定 | | **网络模式** | 所有容器均使用 `--network host`,确保与宿主机共享 IP 和网卡 | | **端口要求** | 默认使用 TCP 9009;需开放防火墙端口供 Agent 与主控通信 | | **多网卡环境** | 建议只监控主外网出口,避免统计混乱 | | **变动响应** | 若 VPS 更换 IP 或网卡名,需重启 Agent 生效 | | **资源占用** | Agent 极轻量,1 秒间隔上报也能在低配 VPS 正常运行 | --- ## ✅ 完成部署 🎉 至此,你已成功部署炸酱面主控与 Agent 探针! > 本项目未开源,如介意请勿安装使用。
